Posted on 4 Comments

Dash Rapid Egg Cooker Review: Should You Get One?

DASH Rapid Egg Cooker Review

I am obsessed with eggs. Scrambled…omelets..hard-boiled…yum! Since eggs are big in our household, I’m always looking for ways to cook them efficiently. Recently, we received an egg cooker as a gift for our upcoming wedding. This article will focus on an in-depth DASH Rapid Egg Cooker Review: what is it, how to use it, and should you get one? 

There are definitely lots of pros to this appliance. Cook everything in one place with little mess, yes, please! I absolutely hate having to clean stuck-on egg bits from pans after making scrambled eggs. I can never seem to find the right non-stick pan that eggs won’t stick to! 

In this review, you will also find some cons to the appliance and tips and tricks to make the appliance work efficiently. 

This post contains affiliate links. If you use these links to buy something I may earn a commission. Thanks!

DASH Rapid Egg Cooker Review

What is the DASH Rapid Egg Cooker? 

DASH Rapid Egg Cooker

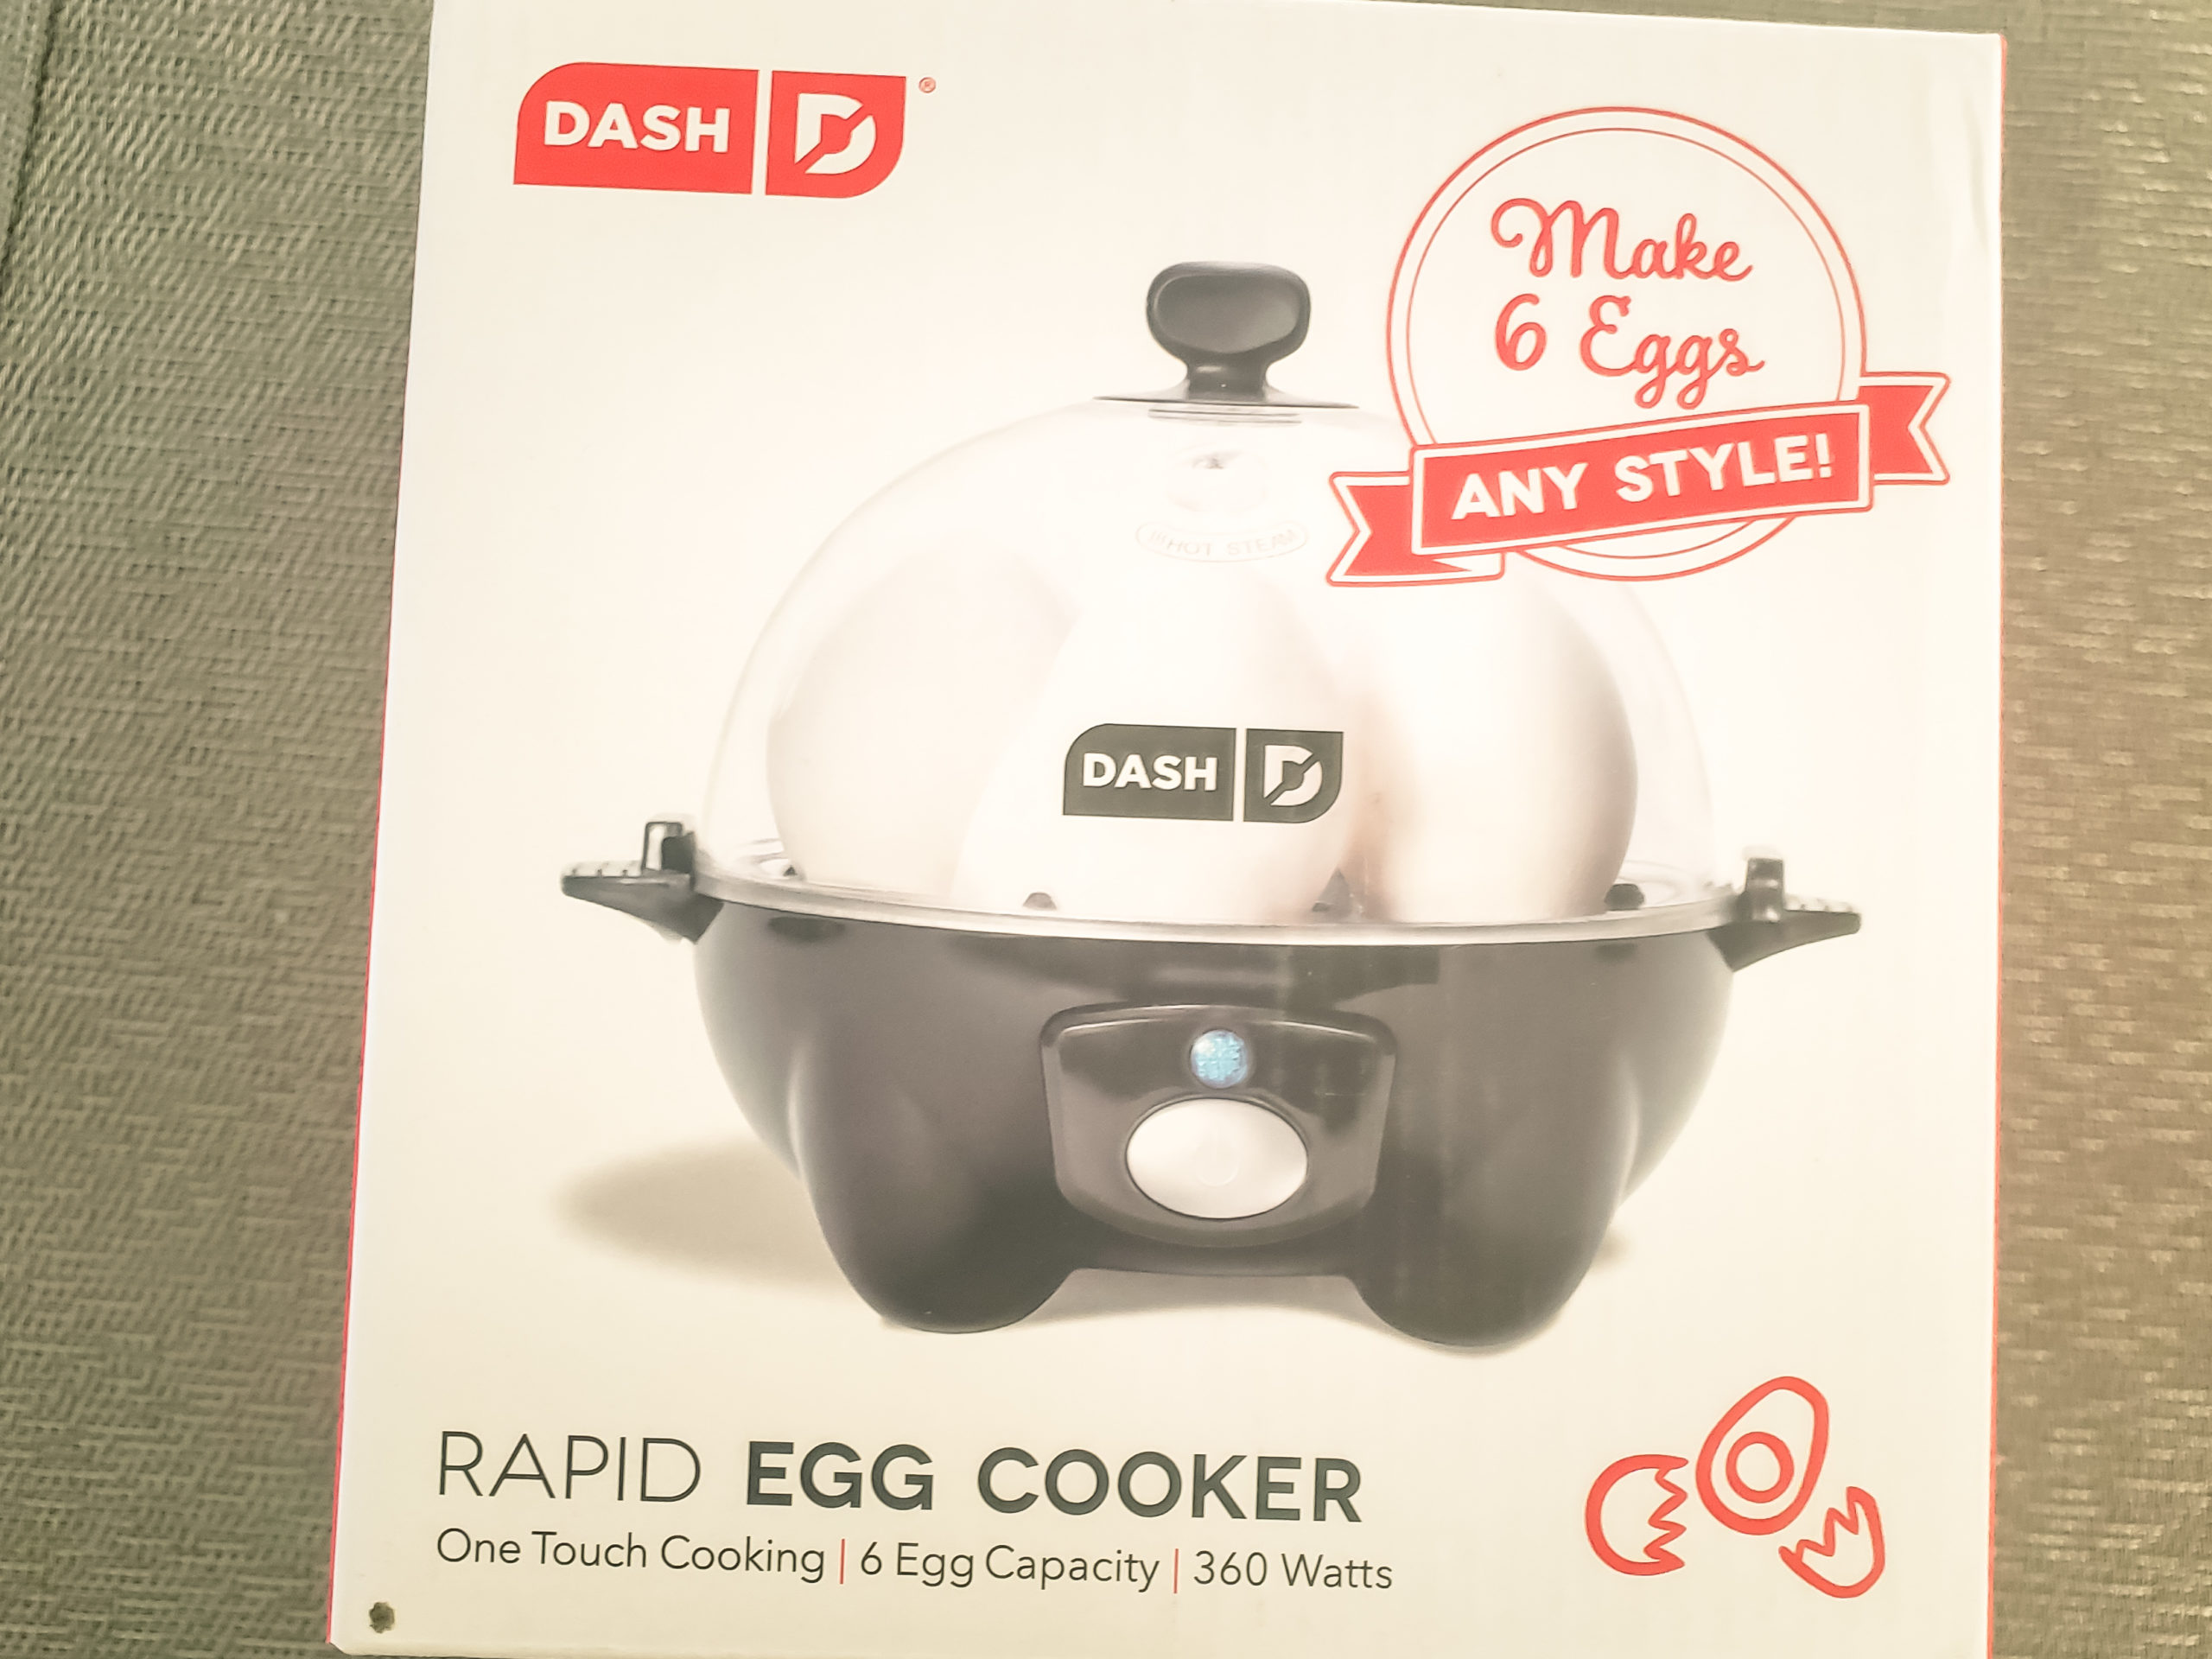
The DASH Rapid Egg Cooker is a 6 egg capacity egg cooker for hard-boiled, poached, scrambled eggs and omelets. It has options for soft/medium/hard-boiled eggs and works fast to save you time and water. Weighing under a pound, the egg cooker is lightweight and compact. An auto-shut-off feature prevents overcooking (no more gray/green yolks in hard-boiled eggs!). 

With over 36k reviews on Amazon, this rapid egg cooker is very popular. It’s also affordable at a price point of $19.99. 

Unboxing the Egg Cooker

Unboxing DASH Rapid Egg Cooker, Boiling Tray, Poaching Tray, User Manual

When we received our DASH Rapid Egg Cooker, we were pleasantly surprised by how compact the appliance was. I am a big cook, and I love my kitchen gadgets. It’s essential to me to have something that doesn’t take up much space as I already have a storage unit filled with appliances. The egg cooker is 6.5 inches tall and 7.5 inches wide, taking up less than a foot of space!

The egg cooker comes with a boiling tray to make hard-boiled eggs (cook up to 6 at a time), a poaching tray (cooks up to 2 eggs at a time), and an omelet tray (cooks up to two eggs at a time), a measuring cup for water, and a handle attachment to help lift the boiling tray.

At first glance, the omelet tray is small. Think petite single-serving versus the giant ones you get at a diner. 

Also included is an instructions manual. The booklet outlines how to cook different types of eggs as well as recipes. You’ll find other foods you can cook at the very end of the booklet, such as broccoli!

How to Use the DASH Rapid Egg Cooker? 

Though the egg cooker is straightforward to use and does work rapidly, it is not foolproof. There is some experimentation with how much water to add as it does not correlate to what the manual says. This isn’t a dealbreaker; it just means there is some trial and error to achieve the perfectly cooked eggs you want. 

Even with this limitation, the egg cooker is much more efficient than having to boil water stovetop. 

How to Make Hard-Boiled Eggs with the DASH Rapid Egg Cooker: 

Making hard-boiled eggs is super easy with this cooker. 

  1. Start with the unit unplugged. 
  2. Use the provided measuring cup to pour the designated amount of cold water onto the heating plate.*
  3. Insert boiling tray handle into the boiling tray and place it on top of the heating plate. 
  4. Add eggs to the boiling tray slots (up to 6 eggs). 
  5. Cover the lid and plug in the cooker. 
  6. Press the power button to start cooking. 
  7. When the eggs are done, and the water has boiled off, the machine will sound (a jingle will play). Press the power button to silence the buzzer. 
  8. Uncover the lid and remove eggs with tongs. Be careful when opening the lid as it will be hot and steamy.
  9. Place eggs in cold water to stop cooking. 

Notes: 

  • The amount of water placed into the boiling tray in step #2 will change depending on how many eggs you use and the size of the eggs. For 6 eggs, I filled the measuring cup up to the hard-boiled line and then added another half of the cup. This was the perfect amount and the eggs cooked perfectly. 

How to Make Poached Eggs with the DASH Rapid Cooker: 

Poached eggs in Dash rapid egg cooker

Poached eggs are significantly easier with the appliance, though similar to the hard-boiled eggs, you have to fiddle with the water measurements. 

  1. Fill the provided measure cup with cold water to the “Omelette/Poached” line. Pour onto the heating plate.*
  2. Place the boiling tray over the heating plate. 
  3. Lightly spray cooking oil onto the poaching tray and place it on top of the heating plate. 
  4. Break an egg into the poaching tray slot (capacity for 2 eggs). 
  5. Cover the lid, plug into the socket, and press the start button. 
  6. When the buzzer sounds, turn the power off. Carefully remove the cover lid, be careful with the hot steam. 

Notes: 

  • The first time I used the poaching tray, I used both slots to make 2 eggs. I followed the directions for the water, and it was not enough. The bottom of the poached egg was still runny. I realized I need to double the water for 2 eggs. The poached eggs turned out wonderfully after I got the water ratio right. It cooked fast, comes out of the tray easily, and had a great texture. 
  • If you cook and find your eggs are runny, simply add some more water to the heating plate and cook again. 
Measuring Cup with water
Not Enough Water for Poached Eggs

How to Make an Omelet with the DASH Rapid Cooker: 

uncooked omelet in DASH rapid egg coooker

Omelets are my favorite thing to make so far with the cooker. They turn out really nice, and I love the ease of making it. 

  1. Fill the measuring cup with cold water to the “Omelette/Poached” line. Pour water onto the heating plate.*
  2. Place boiling tray on top of the heating plate. 
  3. Spray cooking oil to the omelet tray and place it on top of the boiling tray. 
  4. Add your eggs and any fixings to the omelet tray. 
  5. Cover the lid and plug in the appliance. Press the power button to start cooking. 
  6. When the buzzer sounds, turn the power off. Carefully remove the cover lid, be careful with the hot steam. 
  7. Remove eggs with a spatula. 

Notes: 

  • I used more water than the marking on the measuring cup for the omelet. My first omelet was not cooked fully underneath. I used 1.5 times the designated amount, and this cooked perfectly. 
  • If you find the bottom of your omelet is runny, add more water to the heating plate and cook again. 

What Else Can You Make in the Egg Cooker? 

I was pleasantly surprised to see that I could cook other items aside from eggs in the cooker. Since it is a steamer, it works great with veggies. Here are some items you can cook: 

  • Broccoli
  • Asparagus
  • Edamame
  • Frozen Corn

Bowl of green Broccoli

Regarding the DASH Rapid Egg Cooker review, this feature is a huge plus in my book. I love that I can use one appliance to make breakfast and have a side of veggies. It really helps with keeping the dish load down. However, due to the compact size of the cooker, you can’t make huge amounts at a time. It really is for one serving. So if you are cooking for a family, I don’t suggest using this to steam veggies. 

For breakfast, this works for me as I only cook for myself. So far, I have tried steaming broccoli and spinach with great success. 

How to Clean the Egg Cooker: 

One thing I absolutely love about this egg cooker is how easy it is to clean. I HATE doing the dishes. This appliance cleans really easily, and that really cuts my workload to focus on other things. 

After you are done cooking, let the machine cool down. You can wash the boiling tray, poaching tray, omelet tray and cover the lid in the sink with warm soapy water. When the appliance has fully cooled, wipe down the heating plate with a wet cloth. 

And that’s about it!

You can store all the parts within the cooker, so that makes it super easy to store. 

Over time you may need to do a deeper cleaning of the heating plate with a water/vinegar solution to remove mineral deposits. The manual mentions the egg cooker won’t rust. 

DASH Rapid Egg Cooker Review: Should You Get One? 

Overall, I do recommend this product. Ever since I got it, I have used it every morning for my breakfast.

Pros: 

  • Easy and efficiency
  • Compact
  • Affordable
  • Easy to Clean

Cons: 

  • The water measurements needed do require some experimentation to cook the eggs fully. 
  • Some people don’t like the buzzer sounds at the end of cooking. I don’t mind it; it’s nice-sounding music. 
  • When using the appliance to steam veggies, keep in mind the size is small.

If you’re looking for an egg cooker that cooks rapidly and doesn’t require much work, this is it. 

I hope you enjoyed this Dash Rapid Cooker Review. Want to see more reviews like this? Check out the Bertello Pizza Oven Review

Posted on 3 Comments

Journal Prompts for Writers to Beat Writer’s Block

journal prompts for writers

Do you have writer’s block? Do you want to write, but that dreaded white page stares back at you? Journal prompts for writers can help beat writer’s block. 

Writers block, white page, pages crumbled in a ball

When I was a kid, I loved to journal. I had an expansive imagination and loved to write stories. As an adult, I often draw on the things I wrote as a child for inspiration in my writing. Whether you are writing fiction short stories or fact-based articles, having a human element to your writing will engage your readers. 

These journal prompts for writers are specifically tailored to nurture your imagination and keep all your ideas in one place. Whenever you have writer’s block, you’ll have your arsenal ready to work for you. 

What is Writer’s Block? 

The dreaded writer’s block hits seasoned, and newbie writer’s alike. Simply put, it’s a condition where a writer cannot think of what to write. This leads to staring at an empty page, followed by lots of procrastination (usually Netflix binges!) followed by some more procrastination. 

Vintage inscription made by old typewriter, HELP!

It’s not a fun place to be when you want to write and can’t come up with a single idea. It’s even worse when this happens with a deadline looming.

Mentally, writer’s block is draining. You question why you even chose to write in the first place. You start to second guess your choices overall, which can lead to a harmful path for writers. If writer’s block goes unchecked, it could lead to abandoning projects and writing altogether. 

The Benefits of Journaling for Writers

You write for a living, or you write because you’re passionate about it. Why do you need to add journaling to the mix? 

Journaling is a great tool to cultivate your writing skills. This is for your eyes only. There are many benefits of journaling for writers: 

  1. Journaling engages you to write without constraints. 
  2. It helps you plan and track your progress. 
  3. Brain Dump” journaling can help you focus as you get your ideas together. 

Now that you have the why let’s look at some prompts to help you slay writer’s block. 

Journal Prompts for Writers

Journal Writing Prompts for Plot Development

journal writing prompts for plot development

  1. Describe a dramatic event that happened recently with your friends/family.
  2. Take the plot of your favorite movie and change it, so it takes place underwater. 
  3. Write a story where a disabled man attempts to rob an older woman.
  4. Take your favorite book and movie and create a plot mashup between the two. 
  5. Write what happens when a kid’s first day of school is interrupted by an earthquake.
  6. Create a story based on a trending topic on Twitter. 
  7. Take two news headlines and write a story.
  8. A character from your favorite childhood movie is drafted to war with another planet. 
  9. Describe the craziest event of your life and replace yourself with a scientist. 
  10. What happens when an unscrupulous teen falls for her wealthy boss?

Journal Writing Prompts for Character Development

journal prompts for character development, different types of characters

  1. Describe someone who you met this week. 
  2. What is your impression of your neighbor?
  3. What mannerisms do you hate about a friend?
  4. What hobbies that someone in your life is doing are you jealous of?
  5. What is the strangest profession you can think of?
  6. What are some tics your family has?
  7. Who is the funniest person you know?
  8. What is the most traumatic thing to happen to someone?
  9. Who is your best friend envious of?
  10. Describe a friend or family member who is held back by their personality. 

Journal Writing Prompts for Setting

beautiful beach setting, colorful sunset

  1. Describe a small town that aliens are buying. 
  2. Where would an undercover botanist go to let loose?
  3. What does a war-torn galaxy look like?
  4. Write about an overpopulated prison. 
  5. Describe an apartment complex that is out of place in a wealthy suburb. 
  6. Where do the homeless live on Mars? 
  7. The first place a wife goes after seeing her husband kiss a goat. 
  8. Where does one hold a wedding between two rival intergalactic nations? 
  9. What’s the backdrop for an epic love story? 
  10. Describe a coastal community after the ocean dries up. 

Journal Writing Prompts for Dialogue

two people talking with a dialogue bubble

Write dialogue based on the following scenes: 

  1. A husband and wife discover one has been lying about their family. 
  2. A concerned parent reprimands a teacher for being an internet-famous social media influencer.
  3. A lonely man talks to his fish as if it was his dead daughter. 
  4. Two siblings get stranded after their car battery dies. 
  5. An estranged daughter gives the eulogy at her mother’s funeral. 
  6. An elderly couple fights: the wife is hysterical, and the husband is overcome with laughter. 
  7. A bridesmaid tells the groom the bride is missing. 
  8. An astrologer shares a bench with a 
  9. A group of co-workers on a train ride to their CEO’s baby shower. 
  10. A parent calls their child after committing a crime. 

How to Use Journal Prompts 

The best way to maximize writing efficiency is to use these prompts daily.  There are two reasons for this. 

  1. When you practice an activity daily, you automatically get better at it. 
  2. You create discipline through consistent habits. 

Try using these journal prompts for writers first in the morning or at night before you go to sleep. You can write freely without limitations or give yourself a time limit for an added challenge. For example, try giving yourself 10 minutes one day and 5 minutes the next. You can play around with what works with your needs. 

You also want to stop yourself from editing your work. Journaling is freeform writing. Don’t get bogged down if sentences are run on or there are grammatical errors. This is not the time to judge your work. 

Text written with a vintage typewriter - That's my story

There are no rules to journaling. It’s a very individual practice. If you’re new to journaling, with time, you will figure out your comfort level. Tailor these prompts to help you with your writing journey. Let your mind take you wherever it wants to go. Don’t stifle any creativity that pours out during this process. 

And lastly, enjoy the process!

Did you like these journal prompts for writers and want to use more prompts? Check out Journal Prompts for Success. 

Posted on Leave a comment

New Blog Analytics: 3 Month Review (Mar-April 2021)

new blog traffic analytics, computer with statistics

We are now into month 3 of this blog! I’m proud of my consistency and growing this site. As someone who usually starts a project hot and then gives up, sticking with this blog is all the more rewarding.  With 90 days behind me, I wanted to take the time to write up some new blog analytics

Before I delve into my month 3 stats, I just wanted to give a little background this past month. I spent 2.5 weeks on the east coast to prep for my upcoming wedding. With the traveling and preparations, I didn’t have as much time to write this month.

It is something I am disappointed in. But that is life. I have to give myself some slack. Wedding planning is tough work, and I am happy with how that’s coming together. 

There will be consistency sometimes, and sometimes you’ll fail. How you keep going will separate you from those who quit. I have every intention of catching back up in month 4 with this blog!

New Blog Analytics: Month 3

 If you are new here, I started this blog in January 2021 with my first blog post on Jan 9 (How to Make Reusable Crochet Face Scrubbies in 10 minutes).


Crochet Face Scrubbies

I created this blog to comprise everything mind, body, and soul. This is a place for creative tutorials, positive guidance for self-improvement, and healthy DIY recipes. I found myself creating separate Instagram accounts and Etsy stores for things I enjoyed, and I wanted to funnel it all into one place. Hence By Bindi was born!

After the first-month learning curve, I have done things to help build this blog and key learnings I came across to improve my goals. You can take a peek at my 1 month blog review here

Let’s take a look at my new blog analytics for month 3. 

Things I Have Learned in 3 Months of Blogging

Blog Research

As I navigate this new blogging world, I am continuing to research how to blog successfully. This means something different for everyone.

For me, making this blog, success looks like seeing good and engaged traffic and being able to share what I love to a community of like-minded people. 

How to implement SEO to blog posts has been a huge focus area for me. I want to learn all I can about SEO as everything I read says that investing time up front will pay off down the road. It is definitely a slow burn, but I’m hopeful all the effort will pay off by 6 months. 

Another big area I focused on was Keyword Research. Previously, I was writing about things I enjoyed and had only done the minimal keyword research. I realized that longtail keywords really are the jackpot. 

blog research with laptop and coffee

Here are some great articles and websites that I found useful this month. 

Keyword Reserach Guide

I found this beginner’s guide to keyword research by ahrefs.com pretty helpful this month. I do use their research tool, though I have not paid for the premium. It does help to see what users are searching for and what keywords are difficult to rank for. While I believe you should write things you want to write, if you are trying to rank, you have to be strategic about it.  

How to Create a Round-Up Blog Post

I love round-up posts and wanted to write one for a while. Creating a round-up post is on my to-do list for month 4. Round-up posts can increase traffic when done well and also are a great way to promote yourself without being spammy. I’m going to try my hand at it and see how it goes!

Website Updates: 

One major change I made this month is implementing the Easy Table of Contents plugin. This plugin is super easy to use and has helped me tailor my posts in a more digestible way. I’m always looking to improve my writing, and have a table of contents was a great addition. 

Month 3 Review

Let’s break down the new blog analytics. Last month I made a goal to aim for 11 blog posts a month. I was on track the first half of the month. However, I got too busy with wedding planning in the last two weeks of the month. I traveled to the east coast, and while I accomplished a lot for the upcoming wedding (got all my outfits, yay!), I didn’t have as much time to write. 

I wrote 7 blog posts my first month and 11 in my second month. 

In my third month, I wrote. 6 blog posts. I am disappointed with my number. But, next month, I’m aiming for 11 again. 

While I did not meet my goal, I did try to continue to hit higher word count posts and have been doing well. I still need to write a post that is 3k words. This is more of a long-term goal at the moment. Hoping to hit this in the next couple of months. 

These 6 blog posts break down as follows: 

March 11, 2021: New Blog Traffic Analysis: 2 Month Review

March 15, 2021: Striped Crochet Wash Cloth Pattern

March 19, 2021: Powerful Daily Affirmations for Self Love

March 24, 2021: DIY Lavender Vanilla Lip Balm Sticks (Non-Toxic Recipe)

March 31, 2021: Bertello Pizza Oven Review (With Recipes and Photos)

April 11, 2021: Easy Textured Crochet Dish Scrubbies Pattern (Reusable)

Despite my uneven publishing schedule, I did get a post out at least once a week. This is the bare minimum I want for my blog. I am definitely hitting that point where I tend to quit due to other priorities. But, I want to keep pushing through, so I need to keep myself on track. 

Month 3 New Blog Traffic Analysis

My blog traffic is growing consistently, and that does motivate me to keep going. As long as my traffic grows, I know I’m doing something right!

increasing blog traffic

This was the first month I decided to share an article on my personal Facebook page. I usually only use Instagram and Pinterest to promote the blog under a specific business account. I feel weird spamming my friends on my personal pages. However, the post I did share (The Pizza Oven Review) was a huge hit! It was really well received and shared. This brought a lot of traffic to my blog. 

I even got a writing gig out of it. Win!

So what did my 3-month blog traffic look like? 

Here is the overview of blog traffic from Jan 9 – Feb 9 (Month 1)

  • 28 first time visitors
  • 270 monthly page views
  • 130 user engagement events

Here are my Month 2 Stats (Feb 9 – March 9)

  • 83 first time visitors – 196% increase 
  • 1.2k monthly page views – 344% increase 
  • 617 user engagement events – 374% increase

Here are my Month 2 Stats (Mar 9 – April 9)

  • 231 first time visitors – 56% increase 
  • 3.4k monthly page views – 54% increase 
  • 1.9k user engagement events – 48% increase

Month 3 didn’t have the dramatic increase between months 1-2, but that’s okay! I am still on an upward trajectory, and I’m happy with that. Last month I mentioned my goal was to hit 3,000 page views a month or 100 page views a day. I thought it would take me 5-6 months to hit that number, but I accomplished it in 3 months. 

I am happy with how that turned out. 

Page Views and Blog Post Word Counts

I’m always interested in seeing how word counts correlate to page views. Last month I mentioned that longer blog posts rank higher on Google as you are covering more information. I love data, so I’ve been tracking my word counts monthly, and it’s a good one to track for new blog analytics. 

This month I managed to write one article over 2k, which I’m really proud of. This article was a super fun one to write. 

blog page views

Here are the word counts for my 6 blog posts for March 2021: 

New Blog Traffic Analysis: 2 Month Review(1,765 words)

Striped Crochet Washcloth Pattern (461 words)

Powerful Daily Affirmations for Self Love (1,058 words)

DIY Lavender Vanilla Sticks (non-toxic recipe) (1,298 words)

Bertello Pizza Oven Review (with recipes and photos) (2,116 words)

Easy Textured Crochet Dish Scrubbies Pattern (Reusable) (769 words)

Blog Posts under 1Kwords: 2/6 (33%) | Blog Posts Over 1k words: 4/6 (66%) | Blog Posts Over 2k words: 1/6 (16%)

My most viewed article in month 2 was Daily Affirmations for Self Love with 288 monthly views. Previously my most viewed post was Want Long, Thick and Luxurious Hair? Try these Natural Indian Hair Masks! with 91 monthly views. 

It will still some time to see how on-page SEO and long-word posts help drive traffic. I should have more data on this after six months of consistent blogging. 

Blog Revenue and Monthly Cost Breakdown

blog cost and revenue breakdown

Cost and revenue are a big part of new blog analytics. In month 1-2 of my blog, I made $0 in revenue. In month 3, I am starting to make money, but it is pennies.  Since this blog is still new, I don’t expect to monetize until 3-6 months. Probably closer to 6 months. 

In month 3, I joined two ad networks: 

Skimlinks:

Skimlinks is an affiliate marketing network that adds code to your site to turn links you write into affiliate links. It’s a good way for beginners to start making money as you don’t have to apply to individual affiliate networks. However, you do need to have some traffic as you make money with clicks. 

I did not make any money using Skimlinks this month. 

Infolinks:

Infolinks is an ad platform that is easy to access for beginner bloggers. I was able to get accepted within a day of applying on their site. 

With Infolinks, I made a whopping $0.86. It’s not much, but it’s a start! I’m curious how the next month will look. 

Here are my monthly costs to run the blog: 

Total cost for Month 3: $37.98

Overall Total cost for 3 months: $119.96 

Revenue Month 3: $0.86

Profit/Loss: $119.10

I want to keep track of how much I spend each month, so once I can monetize, I have a better picture of where I stand. 

Blog Marketing Breakdown

My goal for this blog is to use synergistic platforms to promote my posts. Right now, my two big marketing platforms are Pinterest and Youtube. 

This month I made one Youtube video to go with my post: 

What’s next for this blog?

Based on my new blog analytics, I have learned some things that I want to implement for month 4. 

Month 4 Goals: 

  • Post 3-4 times a week (Try adding Sunday to the mix)
  • Have a minimum of 11 posts for the month
  • Stay consistent with marketing on Pinterest, Twitter, and Youtube. 
  • Write a 3k word blog post (this may be a reach, but I want to continue to push myself)

I’m excited to see what month 4 has in store for me! Have any tips or guidance for a new blogger? Comment below!

Posted on 5 Comments

Easy Textured Crochet Dish Scrubbies Pattern (Reusable)

Easy textured crochet dish scrubbies pattern

I love switching home products to reusable ones.  This easy textured crochet dish scrubbies pattern is a perfect way to create something functional and pretty. It’s also very beginner-friendly!

I created this pattern after falling in love with Red Heart’s scrubby yarn.  I’d seen it in Michael’s before but never used it. This week I decided to buy some and boy was it a pleasant surprise! I love the yarn texture.  It’s perfect for making crochet dish scrubbies. 

Red heart scrubby yarn Marble

The yarn is soft yet textured.  It does a great job with cleaning dishes and it lathers up so well! After making 1 reusable sponge for my mom,  she and my aunt requested 5 more. After that my sister-in-law wanted 12! Needless to say, these are a big hit in my family!

This textured crochet dish scrubbies pattern works in the round and uses one stitch: half double crochet (hdc). It’s very beginner-friendly and works up fast.  I can make one within 10-15 minutes.

You’re welcome to sell any products you create using this pattern. I always appreciate design credit.  You are not allowed to sell this pattern as your own. 

Let’s make some crochet dish scrubbies!

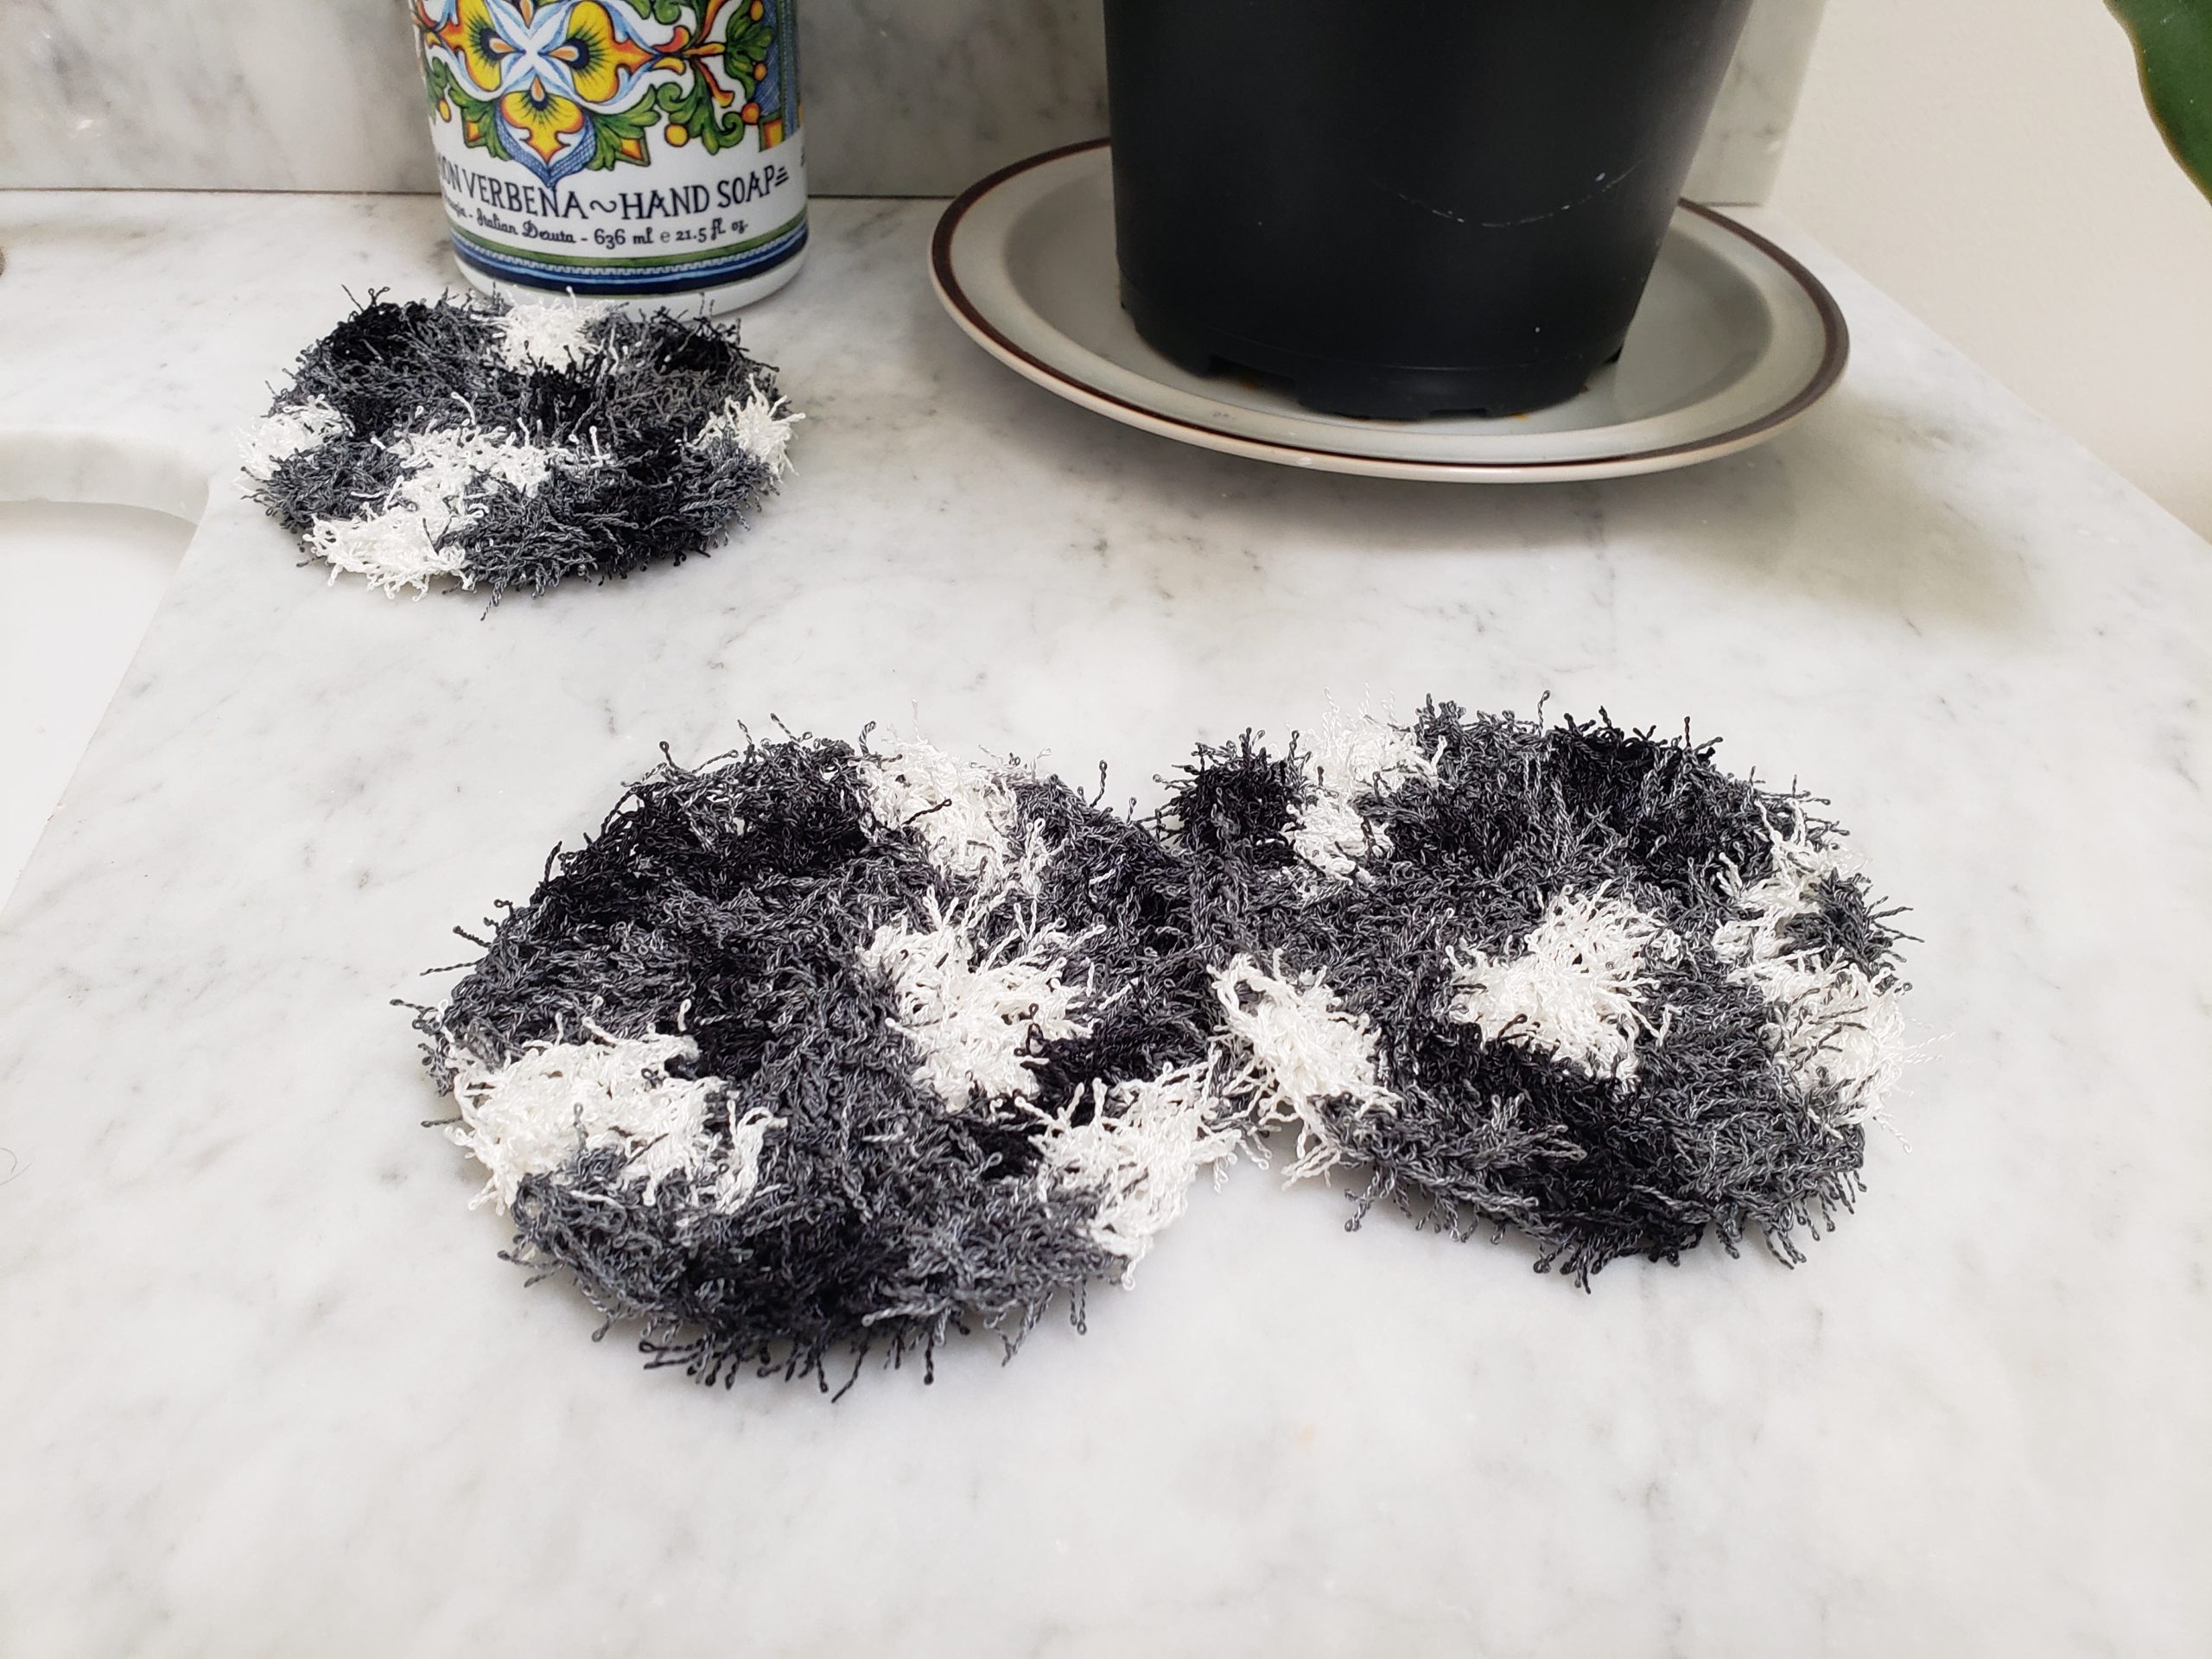
Black and white textured crochet dish scrubbies

Why Should You Use Reusable Dish Scrubbies Instead of Disposable Sponges?

1.) It’s Environmentally Friendly 

As humans,  we create an unimaginable amount of waste every day.  Much of this waste is not biodegradable, meaning it won’t break down. Rather it piles up in our landfills, polluting our beautiful planet. 

Disposable sponges add to this waste problem as we constantly need to buy more to handle our weekly dish load.  Reusable sponges and scrubbies last longer, eliminating the amount of waste created. 

Reusable Crochet Dish Scrubbies

2.) It’s More Hygienic than Sponges 

Since these scrubbies are reusable and easy to make enough for a week’s worth of use, you’ll be able to stop spreading bacteria onto your dishes. Simply throw your dish scrubbies in with your kitchen laundry items and reuse them as needed.  I like to use one per day and wash them all at the end of the week. 

This is way easier than cleaning sponges that tend to go unwashed on sink counters and become bacteria breeding grounds. 

3.) It’s Cost-Effective

DIY reusable sponges are cheap to make! One skein of dish scrubby yarn costs about $4.50-5.00 and makes between 5 and 6 scrubbies. With proper care these scrubbies will last much longer than your disposable sponges, saving you money in the long run. 

We all love to save money!

Why Crochet Dish Scrubbies Yourself?

Because it’s fun and easy! Crocheting is such a great hobby that can be done anywhere. 

If you’re a novice or advanced crocheter, you’ll enjoy this pattern. Plus it’s so satisfying to use something you’ve made yourself.  You’re more likely to incorporate it into your routine. And, you get to decide exactly what colors you want so you can customize the scrubbies to your home decor.

Easy textured crochet dish scrubbies pattern

Easy Textured Crochet Dish Scrubbies Pattern 

Supplies

1 skein dish scrubby yarn (I used the color Marble)

H 5.0 MM crochet hook

Stitch markers

Weaving needles

Stitches

Half Double Crochet (hdc)

Yarn over,  insert hook into stitch, yarn over, and pull through 1 loop. You will have 3 loops remaining on hook.  Yarn over and pull through all loops. 

Pattern Notes

  • This yarn is textured and it might be hard to see your stitches depending on the color you choose. I kept my stitches loose which helped. 
  • Chain 1 at the beginning of round 1-4 does not count as a stitch. When using a stitch marker,  add to your first stitch, not chain 1. 

Textured Dish Scrubbies Pattern 

Foundation: ch 3, sl to first ch,  ch1

How to make crochet dish scrubbies

Row 1: 9 hdc into circle, sl to first hdc, ch 1 (9 stitches)

Crochet dish scrubbies pattern


Row 2: *2 hdc* into first stitch, repeat from * to * 8 more times. Sl to first stitch and ch 1 (18 stitches)

Half Double crochet dish scrubbies

Row 3: *2 hdc in first stitch and 1 hdc in the next*. Repeat from * to * 9 times. Sl to first stitch and ch 1 (27 stitches)

Black and white textured crochet dish scrubbies

Row 4: *2 hdc into first stitch*. Repeat from * to * 26 times.  Sl to first stitch (54 stitches)

Diy reusable Crochet Dish Scrubbies

Fasten off and weave in ends. 

And that’s it! Hope enjoy this textured crochet dish scrubbies pattern. I love to see any creations you make.  Tag me on Instagram @by.bindi.

Want to try more crochet patterns? Check out this striped crochet washcloth pattern and beginner-friendly single crochet washcloth pattern


Are you a beginner crocheter? Check out these tutorials:

How to Single Crochet

How to make a Slip Knot