Posted on Leave a comment

5 Must Things to Do on Mackinac Island

Hey there, fellow travel enthusiasts! So, picture this: a charming island tucked away in the midst of Michigan’s stunning Great Lakes. That’s right, we’re talking about none other than Mackinac Island! My husband and I recently had the chance to explore this hidden gem, and let me tell you, it was an absolute blast. This car-free paradise is like stepping back in time, with its cobblestone streets, horse-drawn carriages, and Victorian architecture. Oh, and did I mention the breathtaking views of Lake Huron and Lake Michigan? Trust me, folks, this place is a dream come true for history buffs, nature lovers, and anyone craving a little slice of tranquility. So, grab your backpack, hop on a ferry, and let me share the top 5 must things to do on Mackinac Island that will give you the adventure of a lifetime!

How to Get to Mackinac Island

Before delving into things to do on Mackinac Island, let’s talk about how to actually get yourself to this slice of paradise. Getting to Mackinac Island is a breeze, thanks to the convenient ferry services operating from both Mackinac City and St. Ignace.

During our visit, we opted for the ferry from Mackinac City, using the reliable company Shepler’s. Trust me when I say it’s a smooth and hassle-free ride. Since cars are a no-go on the island, you’ll park your four-wheeled companion at the ferry dock, and guess what? Your luggage hops aboard with you! The ferry ride itself is a delightful experience, taking roughly 30 minutes. But here’s the kicker—the views are absolutely breathtaking! I highly recommend grabbing a seat on the top deck to soak in the magnificent sights of the iconic double suspension bridge and the island as you approach it. Believe me, it’s an Instagram-worthy moment you won’t want to miss!

mackinac island ferry

One thing to note is the time you travel to the island. We went in mid-May and we did not know that there is a phenomenon called midge flies. These little buggers are super annoying and land on everything from your hair and clothes to backpacks and purses. They look kind of like mosquitos, but they do not bite. In fact they just sit there and get smushed pretty easily when you try to wave them off. This was the only thing about our trip that we really found uncomfortable. These flies tend to be near the coast so they were abundant on the ferry and ferry dock. There weren’t as many on the island itself thankfully. Next time we go, we will definitely check to make sure it’s not midge fly season. 

5 Must Things to Do on Mackinac Island

Alright, fellow travelers, it’s time to dive into the exciting activities that Mackinac Island has in store for you. Here are my top five must-do experiences that will make your visit unforgettable:

1.) Hop on a Horse Carriage Taxi Ride:

Embrace the island’s old-world charm by taking a horse-drawn carriage taxi ride. It’s not just a mode of transportation; it’s a delightful journey through time. Sit back, relax, and let the clip-clop of hooves transport you to a bygone era. If you are staying on the island, which I highly recommend, take the horse carriage taxi to your hotel. We stayed at the Grand Hotel and they have they’re own taxi horse carriage. It was a breeze to take up to the hotel from the ferry dock. They put the luggage up on top and you get to enjoy a beautiful ride to the hotel. We were lucky to have the whole carriage to ourselves too!

mackinac island horse carriage

2.) Indulge in Grandeur at the Grand Hotel:

Treat yourself to a luxurious stay at the legendary Grand Hotel. This iconic Victorian-era masterpiece offers world-class amenities, stunning lake views, and impeccable service. Explore the beautiful grounds, sip afternoon tea on the veranda, and immerse yourself in the elegant atmosphere that has enchanted guests for over a century.

grand hotel mackinac island

This iconic hotel has really interesting decor on the inside. It’s very picture worthy and each floor has something different going on. We stayed here for one night and our package included dinner and breakfast. This hotel has a firm dress code policy after a certain time and dinner requires a suit for men and dressy outfits for women. We thoroughly enjoyed our 5 course dinner experience and there were enough vegetarian options as well!

If you are not staying at the hotel, you can visit for a fee. One way to bypass the fee is if you have tea/lunch at the hotel. The grounds are worth exploring. There is a beautiful flower garden and the hotel boasts of the longest porch in the world!

3.) Embark on a Scenic Bike Ride:

Grab a bike and pedal your way around the island’s perimeter on the scenic M-185, the only state highway in the United States without motor vehicles. Feel the gentle breeze as you pass lush forests, picturesque cliffs, and serene shoreline. For an added dose of fun, rent a two-person bike and enjoy a leisurely ride with a friend or loved one.

We rented a bike for 4 hours from a shop in the main downtown area. It took us about an hour to bike around the island. You can make a day of it and bring a picnic and enjoy the beaches along the coastline. There are also things to see along the way if you decide to make stops. 

If you’re curious about what the bike ride looks like, take a look at this video we shot on our Go Pro. 

4.) Step Back in Time at Fort Mackinac:

Unleash your inner history buff with a visit to Fort Mackinac. This well-preserved 19th-century military outpost offers fascinating insights into the island’s strategic significance during the American Revolution and the War of 1812. Explore the exhibits, watch engaging reenactments, and take in panoramic views of the island from the fort’s strategic vantage point.

The fort’s strategic location atop a bluff provides breathtaking views of the surrounding landscape, including Lake Huron and the neighboring islands. We enjoyed walking around the different exhibits and loved seeing the canon firing demonstration. There is also a tea room that overlooks Mackinac island with majestic views of the water. It’s a great place to have lunch and sit on the patio. Lots of vegetarian options here as well!

5.) Satisfy Your Sweet Tooth with Mackinac Island Fudge:

No visit to Mackinac Island is complete without indulging in the island’s famous fudge. Treat your taste buds to a delightful array of flavors, from classic chocolate to creative concoctions like peanut butter cup and sea salt caramel. Explore the charming fudge shops downtown, watch the artisans craft this delectable treat, and don’t forget to bring some home as a sweet souvenir!

We got fudge from two places – Murdick’s and Ryba. Both were also great places to grab gifts for friends and family!

How Long Should you Stay On Mackinac Island? 

How long do you need for these 5 must things to do on Mackinac Island? When it comes to planning your stay on Mackinac Island, it’s essential to strike a balance between experiencing the highlights and savoring the island’s unique atmosphere. While a day trip is possible with the availability of early morning to evening ferry services, I highly recommend staying at least one night to truly immerse yourself in the island’s charm.

During our visit, we opted for a one-night stay, allowing us one full day to explore. However, in hindsight, we wished we had extended our stay, as there were still activities and attractions we wanted to squeeze in. I would suggest planning for a minimum of two days, which should give you ample time to see the main sights and indulge in the island’s offerings. If you desire a more leisurely pace or want to enjoy the beach or pool at the Grand Hotel, consider extending your stay to three days. Ultimately, the choice is yours, but remember, Mackinac Island has a way of captivating your heart, leaving you longing for just a little more time in this enchanting oasis.

mackinac island

Final Tips and Thoughts

Reflecting on our time spent on Mackinac Island, I can confidently say that it was an unforgettable experience. From the captivating carriage rides to the grandeur of the Grand Hotel, and the scenic bike rides along the island’s perimeter, every moment was filled with wonder and delight. Exploring the rich history at Fort Mackinac and indulging in the island’s famous fudge added an extra layer of charm to our journey. As my husband and I look back on our stay, we can’t help but feel a yearning to return and explore more of this enchanting destination.
If you’re planning a trip to Mackinac Island, I hope that this list of 5 must things to do on Mackinac Island has inspired and assisted you in planning your own adventure. Trust me, this island paradise is worth every moment, and I’m sure it will leave you with cherished memories to last a lifetime. Safe travels, and enjoy your time on Mackinac Island!


Posted on Leave a comment

Courage Bagels Review: Tips for an Unforgettable Experience

Courage Bagels Review 

If you’re a fan of bagels, then you need to try Courage Bagels in LA. This hidden gem in Los Angeles is gaining a reputation as one of the best bagel places in the country, and for good reason. We stumbled upon this place when we were trying out a restaurant across the street called Sqirrl. We couldn’t help but notice the huge line outside and decided to do a quick Google search. After reading rave reviews, we were eager to give it a try. We ended up visiting on a Thursday and had an amazing experience. In this review of Courage Bagels, we’ll share what we ordered, our thoughts on the bagels, and tips on how to avoid the long lines.


The Courage Bagels Story: 

Ari Skye started Courage Bagels out of her home in 2017, selling the Montreal bagels off of her bike. In 2020, she opened a window front store in east LA and these bagels grew to an addiction level with lines wrapped around the street. 

My husband and I were not familiar with Montreal style bagels prior to stumbling upon Courage Bagels. Montreal style bagels are crispier than their New York counterparts. The main difference comes from Montreal bagels being baked in a wood-fired oven. The resulting bagel is slightly smaller than New York Bagels and has a smaller hole as well. 

Location: 

Courage Bagels LA is located at 777 N Virgil Ave in Los Angeles, CA 90029-3646. If you’re planning on visiting this delicious bagel spot, you’ll be happy to know that there is plenty of street parking available. When we visited on a Thursday morning around 8:30 am, we were able to find a metered spot right in front of the restaurant. However, it’s important to note that depending on the time of day, parking can get quite busy. So, it’s always a good idea to plan accordingly and give yourself a little extra time to find a spot. 


The Window Front Restaurant Experience: 

The restaurant is a walk-up only with minimal seating on one side of the street. We were fortunate to have arrived at a good time and were able to snag a table for ourselves. The lines did get long after we arrived and it did get extremely busy. 

Before we went to get this Instagram worthy bagels, we did our research on when to arrive at Courage Bagels to avoid lines. We had seen the lines grow immensely when we first stumbled upon this location and people online were stating they had waited 30 min to an hour for bagels. 

Knowing this, we decided to arrive early on a Thursday morning. We got there around 8:35 am and this ended up being perfect timing. There were only 4 people in line before us. It took about 15 minutes from the time we got in line to the time we got our bagels. Now, it’s worth noting that 5 minutes after we got there the line continued to grow and was really long for the entire time we were there. We could’ve been lucky with our timing, though I do suggest going early.

This restaurant is on the pricey side. We ordered two bagels and two drinks which came out to a whopping $47 dollars. I ordered cream cheese and tomato on a plain bagel. They had fresh avocado for additional $6 dollars so I decided to add that. That was also where a lot of the money went as well since my husband added it to his bagel as well. He ordered dealers choice bagel with salmon and half avocado. We also got a mint tea and Pink Lemonade for drinks. 


The Final Verdict: What was our Review of Courage Bagels?

So what was our final Courage Bagels review? Courage Bagels are the most gorgeous bagels I have ever seen. We almost did not want to eat them since they were so beautiful. The tomato looked so red and ripe on my bagel.  These are some of the photos I took. Look how pretty!

Tomato, avocado cream cheese bagel at courage Bagels

My bagel was astounding. It truly was the best bagel I’ve ever eaten. The tomato was juicy, avocado perfectly blended. You can truly feel the organic and fresh ingredients. What really tied it all together was this amazing olive oil that was drizzled on top and some sea salt. I would definitely go back just for this bagel. My husband on the other hand enjoyed his bagel, but wasn’t blown away by it. He said he would order mine next time since he liked it more. 

Salmon Bagel with avocado at Courage Bagels LA

In regards to the drinks, we absolutely loved the mint tea. I highly recommend this. The pink lemonade was too tangy and I would not order this again. My husband added more water to it to make it drinkable. It was a shame because it did come in a fun container. 

Courage Bagels LA drinks - Mint Tea and Pink Lemonade

Courage Bagels is worth the hype. We had a great experience as we got a parking spot right away and had a minimal line. Since it is very expensive, it’s not a place I would frequent weekly. These bagels are more of a treat. Hope you found this Courage Bagel Review helpful! If you tried it out, tell us about your experience in the comments. 

Here are some more articles that may interest you:


DASH Rapid Egg Cooker Review: Should You Get One? (bybindi.com)


Posted on 1 Comment

Quick DIY Turmeric Yogurt Face Mask for Glowing Skin

DIY Turmeric Yogurt Face Mask with Essential Oils

I absolutely love face masks. They’re a perfect way to sit back and relax while giving your skin some TLC. This Quick DIY Turmeric Yogurt Face Mask for Glowing Skin is a great addition to your beauty routine. 

Clean beauty and making skincare products are one of my favorite things because I control the ingredients. 

This face mask isn’t anything new.  Turmeric has been used for centuries in India to prep brides before their weddings. I grew up in an Indian family that used turmeric internally and externally as it provides so many wonderful benefits. 

The addition of yogurt and essential oils takes this mask to another level that will leave your skin soft and glowing! A bonus is that this mask can also double as a gentle face wash. Recently I used this mask consistently leading up to my wedding and absolutely loved the results!

My family and friends also noticed the healthy glow to my usually dull skin too. 

turmeric root and powder for glowing skin

Let’s get started.

DIY Turmeric Yogurt Face Mask 

Why Make Your Own Face Mask?

Many beauty products are filled with chemicals and preservatives and are simply not sustainable for the environment with plastic packaging. With a homemade face mask, you know exactly what you’re putting in it.  You control the ingredients and know with certainty what you place on your body.  

Making face masks at home is fun, easy, and cheap! My husband and I like to make them during our weekly self-care Sunday evenings.  We enjoy the relaxing time together, and it bonds us.  You can make this face mask for yourself or a fun girl’s night in! And the yellow makes for cool photos for the gram!

Benefits of Turmeric Face Mask

This face mask is a powerhouse for skincare: 

  1. Glowing Skin
  2. Soft and Smooth Skin
  3. Antiseptic
  4. Brightening
  5. Moisturizing
  6. Non-Toxic
  7. Plant-Based

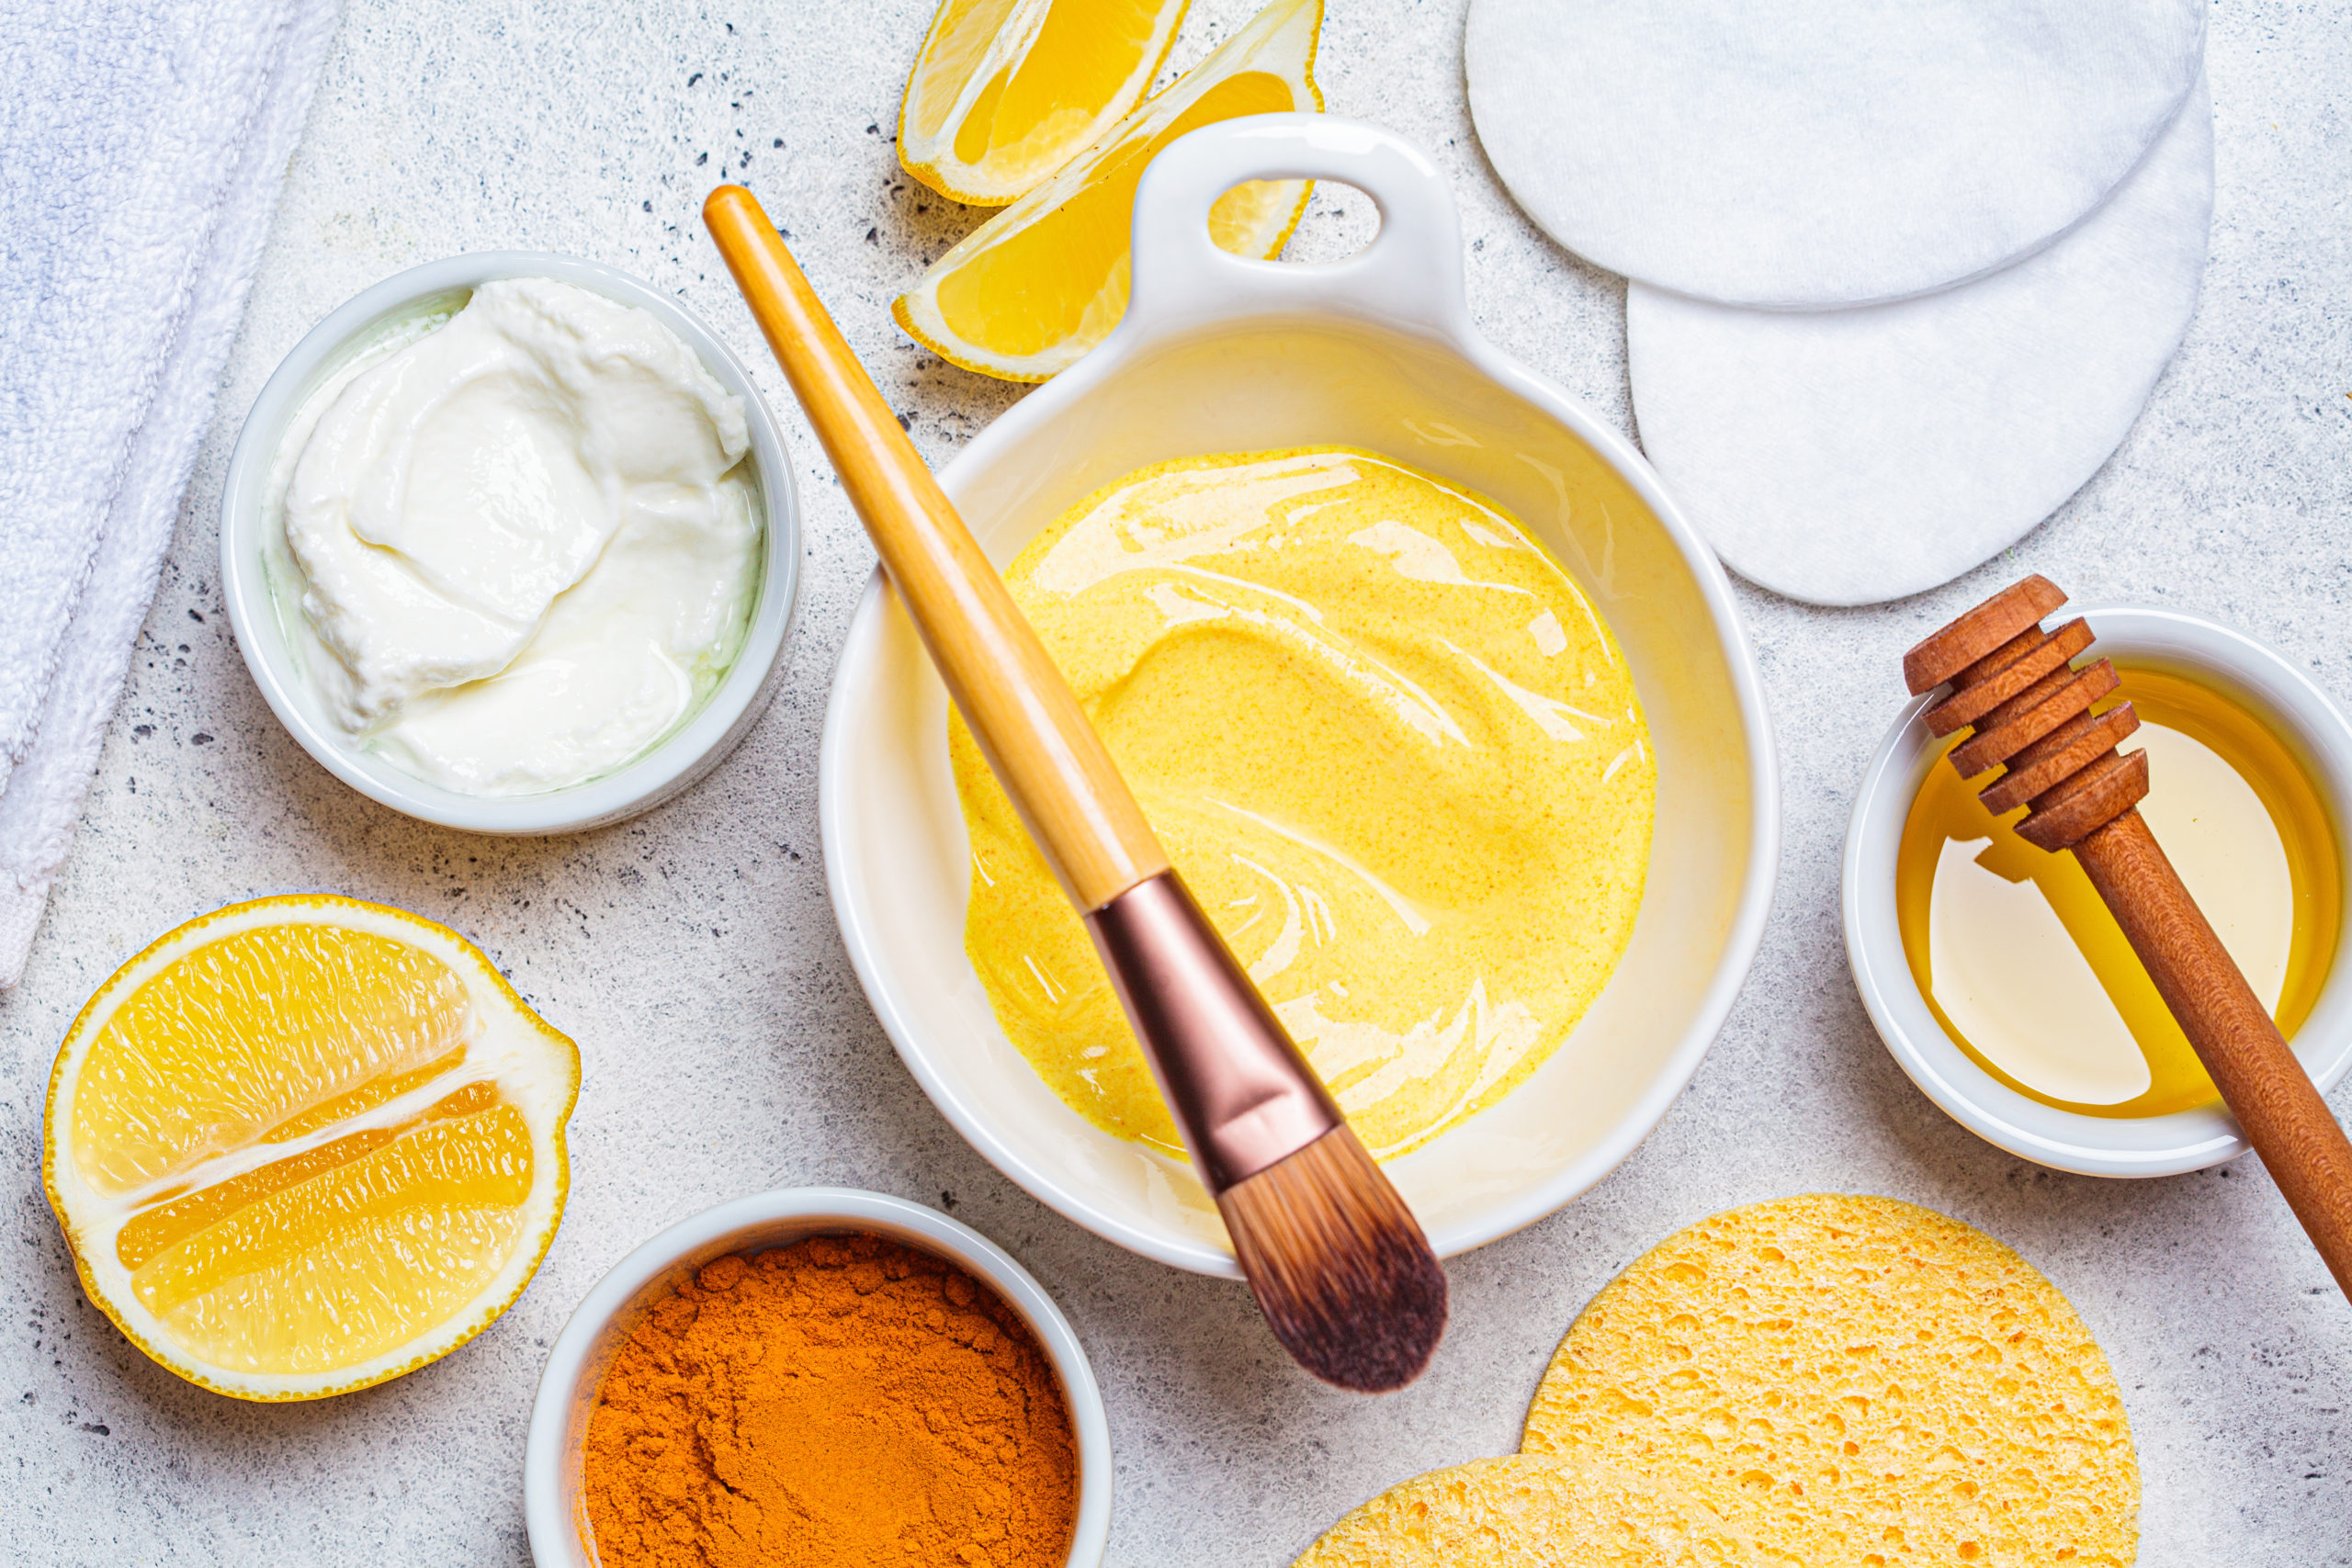
This easy DIY face mask comprises only 5 ingredients: Turmeric, Yogurt, and honey make up the base of this face mask. 

turmeric, honey and yogurt homemade face mask ingredients


Combined with lemon and tea tree essential oil, this homemade face mask will leave you with soft and glowing skin!

Turmeric

This flowering plant is native to the Indian subcontinent. Predominantly used in cooking, this root also packs a punch when used in skincare products. It is anti-inflammatory, calms redness and blemishes. It’s no wonder that Indian brides and grooms use it before their weddings. Turmeric has been used for centuries in Ayurveda and Traditional Chinese Medicine

This is my husband and me before our wedding during the Pithi ceremony, a traditional Gujarati pre-wedding event. Our families brushed the mask on our skin for good luck and healthy, glowing skin!

Interracial couple during pithi/haldi ceremony

Yogurt:

Yogurt is a great gentle cleanser for the skin. The lactic acid found in yogurt also is a natural exfoliator. Yogurt also provides excellent moisturization and hydration, keeping your skin supple. 

Fun Fact: My grandmother only washed her hair with yogurt because it was natural and hydrating. 

Honey:

Honey does wonders for the skin, and many commercial beauty products use this ingredient. Honey is not only antiseptic and anti-inflammatory; it also is a humectant. Meaning it locks in moisture. This powerhouse keeps skin soft and cleans bacteria to help keep acne at bay. 

Lemon Essential Oil:

Lemon is a great brightening ingredient as it naturally lightens the skin. Perfect for evening skin tone and hyperpigmentation. Lemon also helps combat acne. One thing to note is that lemon causes photosensitivity. So you’ll want to stay out of the sun when using this on your skin. Always protect your skin with sunscreen when exposed to the sun. 

When using essential oils, you’ll want to use pure unadulterated oils that are free from chemicals and additives. Fragrance and aromatherapy oils are not the same as the ones you put on your skin. I get my oils from Young Living and Plant Therapy

Tea Tree Essential Oil:

Tea tree oil is great for helping clean the skin and to fight acne. This study found tea tree oil to be as effective as benzoyl peroxide, a common acne treatment ingredient. 

How To Make Turmeric Yogurt Face Mask at Home

Turmeric yogurt and honey face mask recipe (non toxic)

Ingredients:

1 tbsp turmeric

1 tbsp yogurt (I like to use greek yogurt)

1/2 tbsp Honey

1 drop Lemon Essential Oil*

1 drop Tea Tree Essential Oil*

Mixing Bowl and brush

*Essential oils are potent. Always test before using to check for reactions. Follow proper dilution safety for your skin. 

Directions

1.) Mix turmeric and honey together in a small mixing bowl. 

2.) Add honey and mix until incorporated. 

3.) Combine lemon and tea tree essential oil. 

4.) Apply to the face with a brush or clean fingers. Avoid eye area. I use a brush to avoid contaminating the mask with bacteria from my hands. 

5.) Leave on for 10-15 minutes. 

6.) Wash off with warm water and a washcloth. 

Leftovers

I keep leftovers in the fridge for a week as it is perishable. Also, keeping the mask cool provides a nice sensation when you apply it to your face. It really feels great on hot summer days. I like to use this face mask 1-2 times a week. 

You can also use this as a gentle face cleanse. Just apply to your face in the shower and leave it on for a couple of minutes before washing off in a circular manner. 

Turmeric Face Mask Application Notes and Tips:

Turmeric stains everything yellow, and it’s incredibly potent. When using this mask, make sure to wear old clothes you don’t mind staining. When washing your face, be sure to use a darker color washcloth.  Or designate a towel for use with this mask. 

After using this mask, your skin may show a yellow tint. Don’t worry; this isn’t permanent! There are a couple of ways to combat turmeric stains on your face.  

1.) Use a washcloth to take off the mask.  This also helps with extra exfoliation.

2.) Dab a cotton ball soaked with witch hazel and swipe across your face.  

Whatever residue is leftover will go away the next day.  I like to use this mask at night for this reason. Don’t use this if you need to see people after.  Unless you like the yellow look, then go for it!


I hope you enjoy this recipe for a quick DIY turmeric yogurt face mask for glowing skin.  If you try it out,  comment below!

Want to try more DIY clean beauty at home? Check out these recipes:

Diy Lavender Vanilla Lip Balm

Homemade Olive Oil Body Cream

DIY Lip Scrubs with Essential Oils


Follow us on Instagram: @by.bindi


Posted on 8 Comments

Homemade Olive Oil Body Cream with Essential Oils

Whipped Homemade Olive Olive Body Cream Recipe with Shea Butter and Essential oils

Raise your hand if you are plagued with dry, ashy skin. My skin always needs some tender loving care, namely a good skincare routine. This recipe for homemade olive oil body cream is heavenly, easy to make, and smells divine with essential oils!

 I recently got into experimenting with DIY body butter as I love making clean beauty products at home. Things don’t always go well at first, though. My first batch of moisturizing body cream turned out too stiff. The cream whipped up, but it wasn’t as fluffy as  I thought it would be. 

I still used it all. After all, I’m not going to waste these ingredients, making my skin very soft!

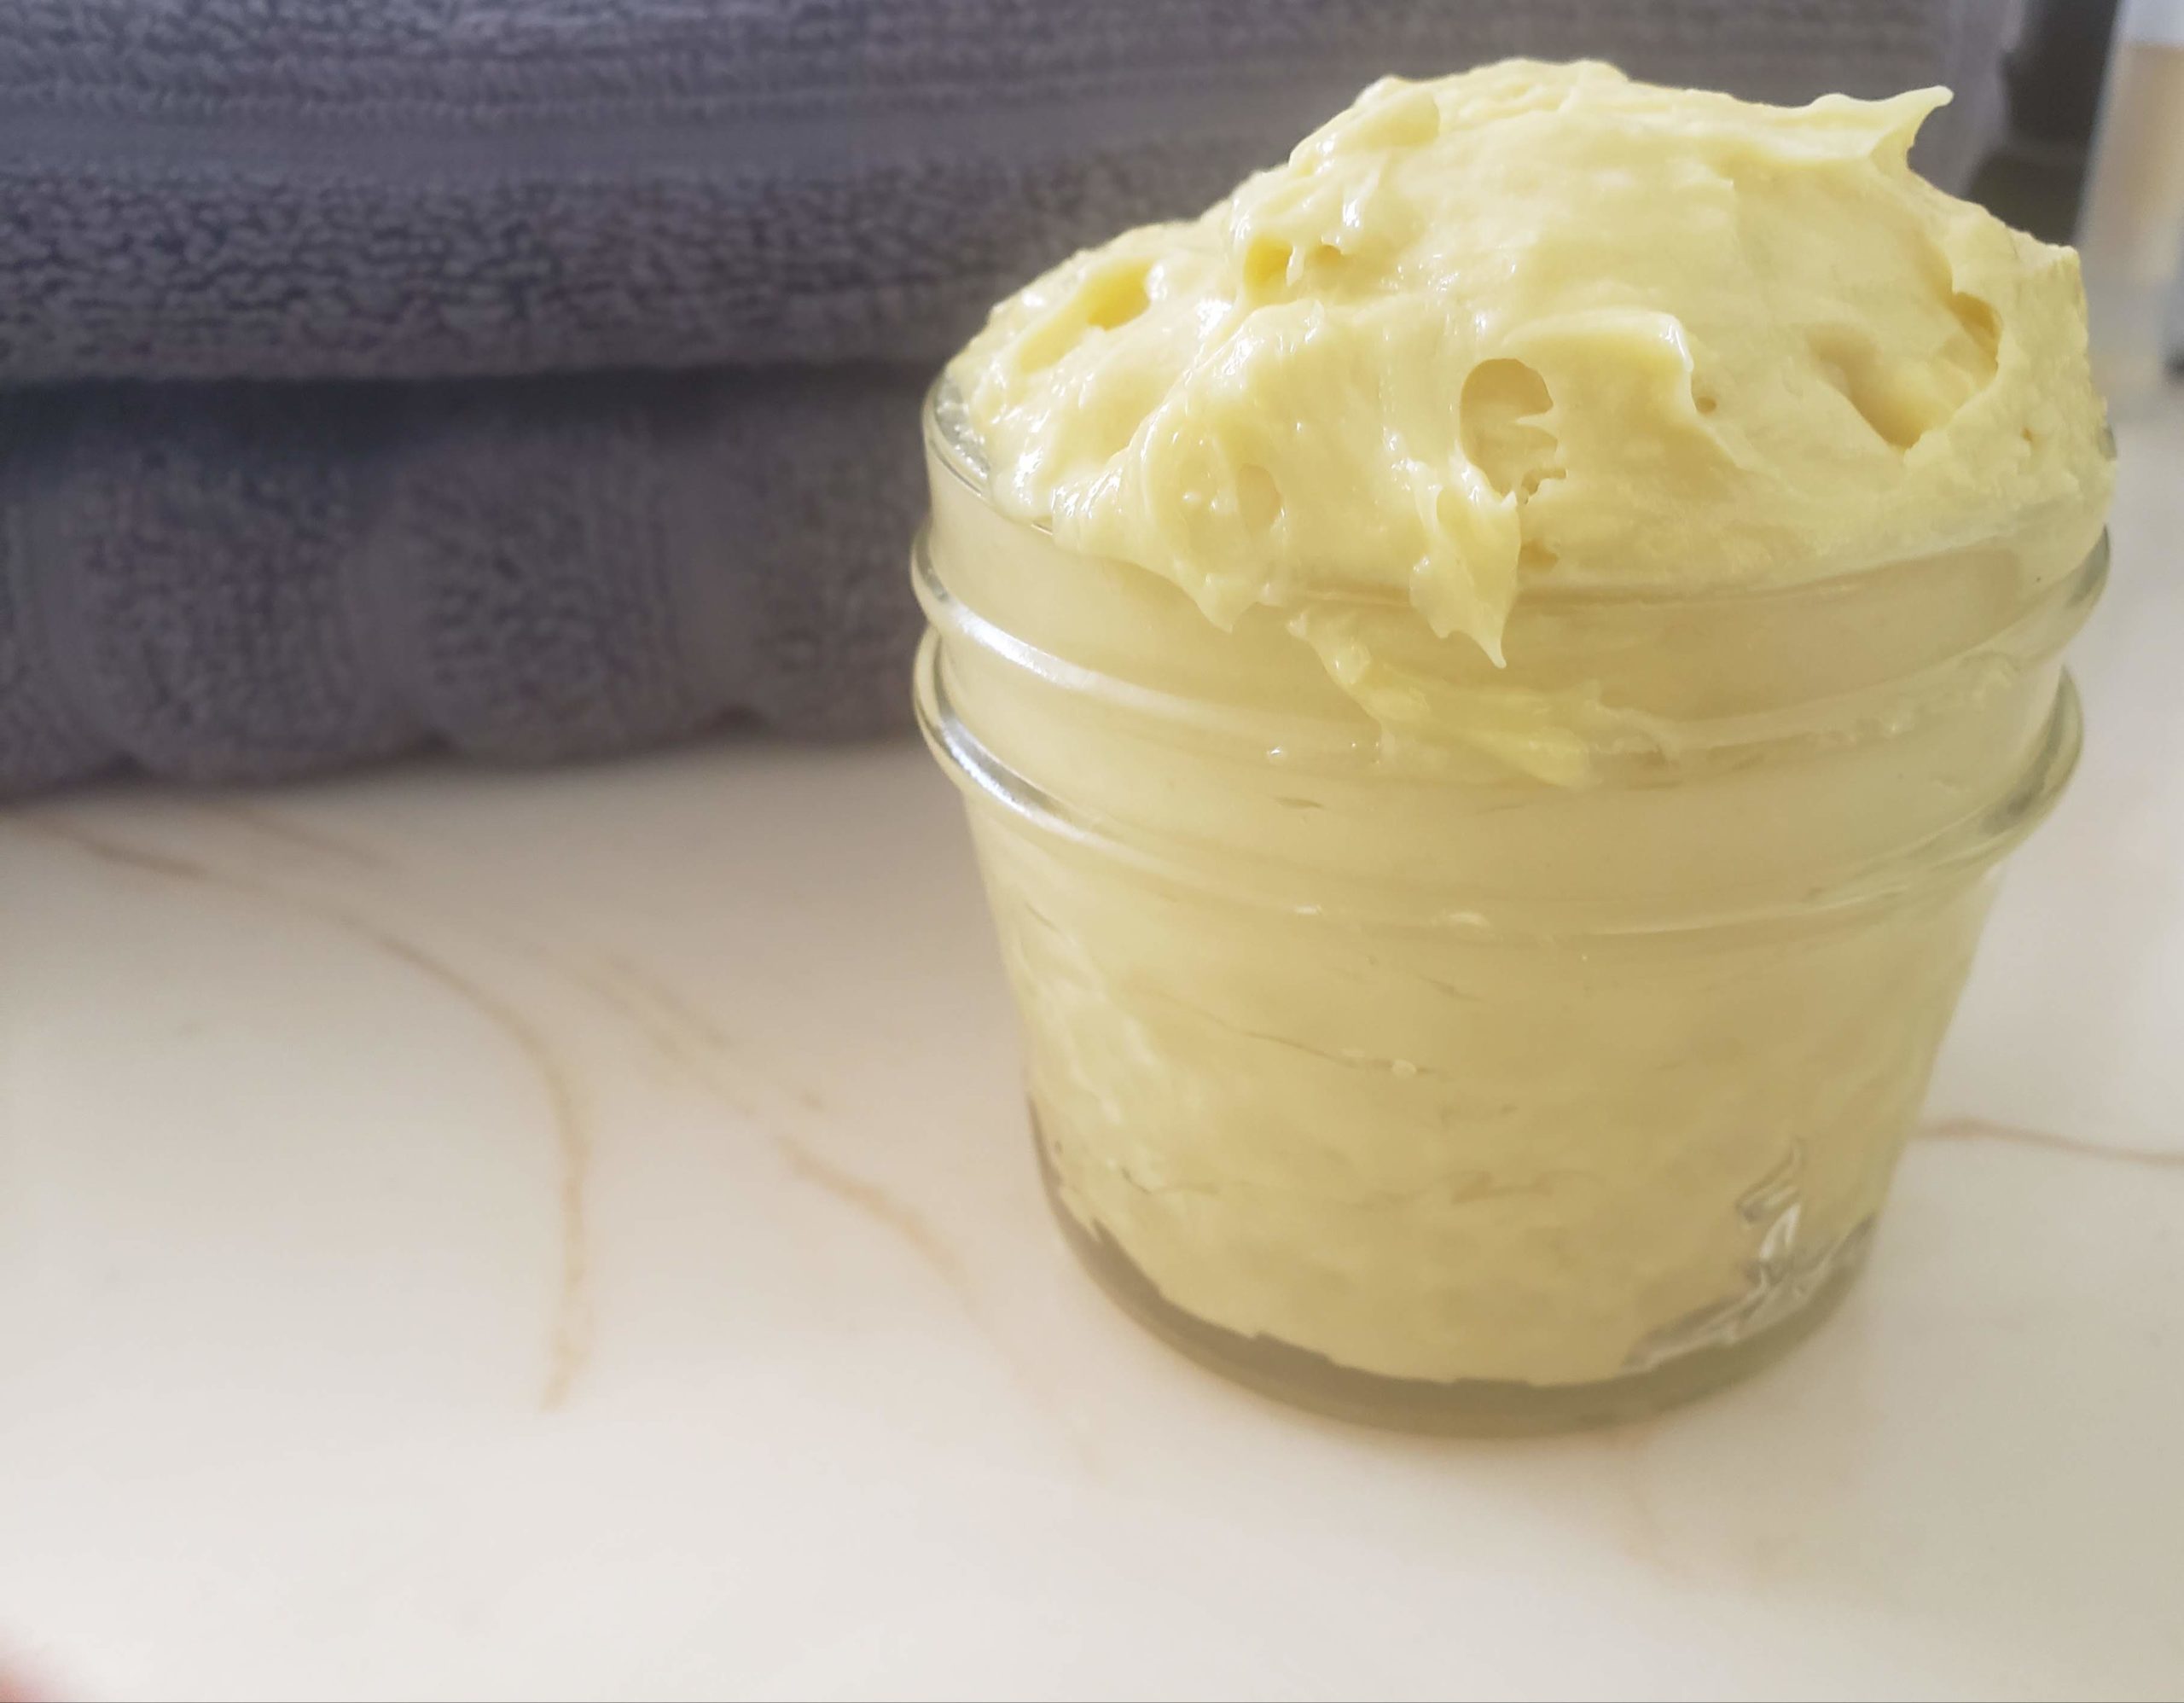
This recipe was my next attempt, and it turned out amazing. This homemade body cream is light, and the blend of essential oils (Frankincense, Palmarosa, and Ylang Ylang) adds a nice floral touch. 

homemade olive oil body cream with ylang ylang, palmarosa and frankincense

The body cream also melts into your skin and doesn’t leave a greasy feeling as other oil-based butters tend to do. 

Let’s get started!

This post contains affiliate links. If you use these links to buy something I may earn a commission. Thanks!

Why Make a Homemade Body Cream? 

Our skin is our largest organ, and it is important to treat it right. It’s are the biggest defense against the outside elements, after all. A lot of store-bought body creams and butter have questionable ingredients and chemical preservatives. 

With a DIY body cream, you control the ingredients. You can customize it for your specific skin concerns. Plus, it’s fun to use the skincare products you made yourself!

Homemade body cream also is cost-effective. After the initial investment in the oils and butters, you’ll only use a little bit for each jar, so over time, you’ll save quite a bit of money. And who doesn’t like to save money? 

Benefits of Olive Oil Body Cream

This body cream is made with nontoxic ingredients that are highly moisturizing. Take a look at these powerhouse ingredients. 

Beeswax: 

beeswax pellets, yellow

Beeswax is a natural wax produced by honey bees. It is edible and non-toxic, thus making it a great ingredient for skincare and clean beauty products. 

This wax is great at creating a protective layer and trapping moisture as it’s a humectant. This combination makes beeswax a perfect ingredient in lip balm recipes. 

Shea butter:

shea butter

Shea butter is a fat derived from nuts. It comes from the African Shea tree. This butter is a very popular ingredient in body butters as it’s incredibly nourishing. 

It is very thick and can be greasy if used on its own. When combined with other butters and oils, it provides incredible moisturizing properties. Shea butter is also edible and non-toxic. 

And, even though this butter comes from a nut, it has a  low chance of triggering nut allergies

Coconut Oil: 

coconut oil

Coconut oil is one of the most popular ingredients in DIY beauty recipes. This oil provides so many great benefits for our skin. It protects skin from environmental damage, hydrates, and can minimize fine lines and wrinkles. 

Also, because it absorbs easily, it won’t leave a greasy feeling on your skin. Coconut oil does have a high comedogenic rating (4). I use fractionated coconut oil which has a comedogenic rating of 2. 

Sweet Almond Oil: 

Sweet almond oil is such a powerhouse. It not only is great at moisturizing, but it also can lighten dark spots. Over time, our lips can lose their vibrant pink color, and this oil helps even the tone. 

Vitamin E Oil: 

Vitamin E is a popular anti-aging gold mine. It’s no wonder it’s used in many skincare products. This oil is thicker than others, and you only need a little bit to get the job done. Vitamin E oil is perfect for dry and chapped lips as it encourages cell turnover and leads to the skin regenerating faster. 

Frankincense: 

Frankincense Serrata essential oil bottle, Plant Therapy

Known as the king of oils for its vast benefits, Frankincense essential oil has been used for centuries. It’s even biblical! Frankincense is an aromatic resin that comes from the tree Boswellia. This liquid gold can improve skin tone and elasticity which is great if you’re looking for antiaging elements. 

Palmarosa: 

Young Living Palmarosa Essential Oil bottle, DIY Body Cream Recipe

Palmarosa essential oil comes from a grass native to India and Indochina. This light, floral oil can stimulate and rejuvenate the skin to look healthy and toned. It is also very moisturizing. 

Ylang Ylang: 

Young Living Ylang Ylang Essential Oil bottle, homemade body butter recipe

Ylang Ylang comes from the Cananga tree, which is native throughout South Asia, such as India, Malaysia, and the Philippines. This lovely oil has a scent that can lift your mood and calm anxiety—the perfect combo for a morning or night cream. 

How to Make Homemade Olive Oil Body Cream

Whipped Homemade Olive Olive Body Cream Recipe with Shea Butter and Essential oils

Ingredients

1/4 c Olive Oil

4 tbsp Shea Butter

1 tbsp Coconut Oil

1 tsp Sweet Almond Oil

1 tsp Vitamin E oil

2 tbsp + 1 tsp Beeswax Pellets

15-20 drops essential oil (I used Frankincense, Palmarosa, Ylang Ylang)

Mason Jar or Small Container

Double Boiler

Stand Mixer


Notes: 

  • This recipe fills a small 2 oz container.

Directions: 

  1. In a double boiler, melt shea butter, beeswax pellets, and oils (except essential oils if using) over low heat. 
  2. Remove from heat and add essential oils. 
  3. Chill in the fridge from 45 minutes to 1 hour. 
  4. Transfer mixture to a mixer. On the high setting, whip until smooth. 
  5. Transfer to a mason jar or small container. 

How to Use Your Whipped Body Butter

This nourishing homemade olive oil body cream is perfect to use right after a shower. Tap away excess water with a towel and apply your body cream. A little goes a long way, so you won’t have to lather it on. Also, since this is an oil-based cream, let it absorb before putting it on. I usually put a robe on while I”m getting ready, and I’m ready to put on clothes within 5-10 minutes. The cream does absorb and won’t leave a greasy feeling. However, keep in mind it is an oil-based cream. 

This homemade cream is also perfect to put on at night before bed. I like to put it on twice a day for extra moisturizing properties. I always wake up with super soft skin! And, with regular use, your skin won’t be dry and ashy anymore. 

Storing Your Homemade Body Cream

Since this cream is free of preservatives, use it regularly. For me, a 2 oz container lasts about 3-4 weeks. I love this aspect as I can whip up a batch every month and change essential oils as I like. I love to experiment with scents depending on the seasons. 

The vitamin E oil in this cream will help prevent mold. Try to avoid contamination by keeping cream away from water. You can store the cream in the bathroom. I keep mine right on the countertop, so it’s ready for use every day!

I hope you enjoy this recipe for homemade olive oil body cream! If you make it, please comment below and share any photos on social media – @by.bindi (Instagram). 

Want more DIY recipes? Try this Lavender Vanilla Lip Balm Recipe that is completely non-toxic and nourishing. 

Posted on 5 Comments

Easy Personalized Bachelorette Water Bottles With Cricut

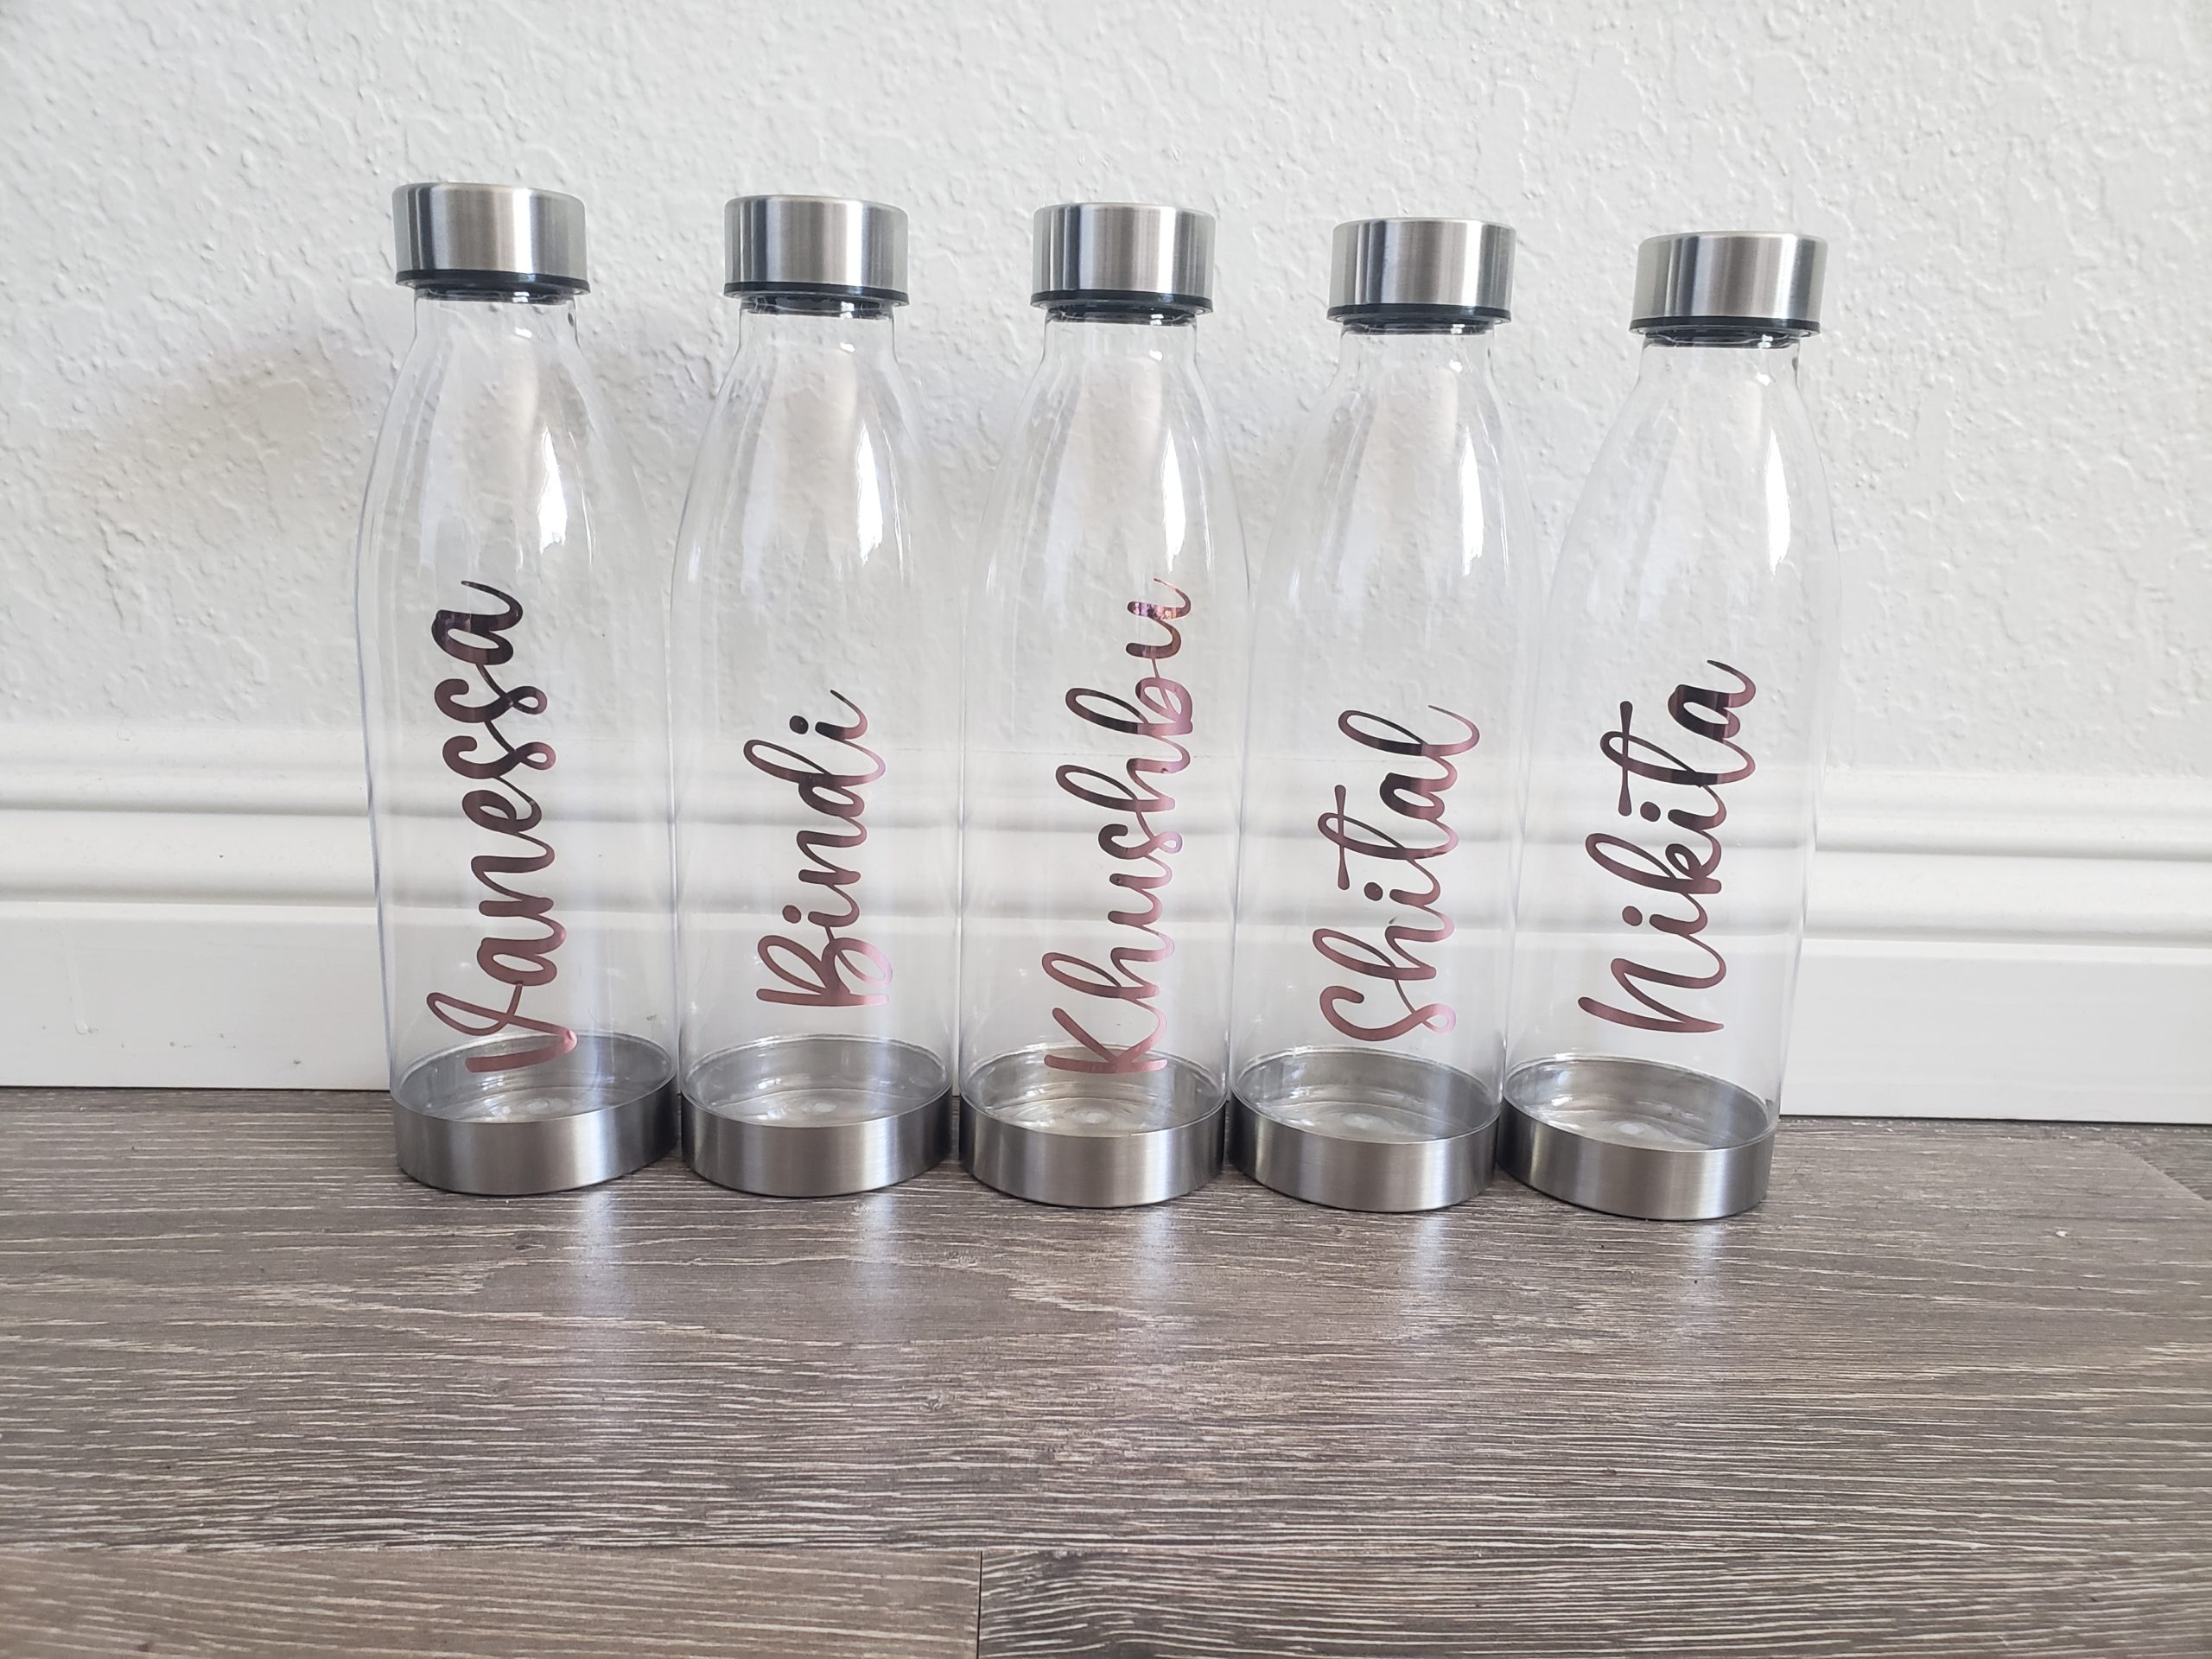
personalized vinyl water bottles

Have you seen all those cute personalized bachelorette water bottles on Pinterest and Etsy? They are so adorable! They also can be pretty pricey. If you’re on a budget for your wedding and like to DIY items, this easy Cricut tutorial is for you! You’ll learn how to make vinyl decals, transfer them and create super adorable bottles and tumblers for your bach!

I am planning my sister’s bachelorette, and I wanted to create adorable water bottles that we can use by the pool and such. I love to DIY my projects and thought; let’s try making it myself. I’m so glad I did because the result was a fraction of the cost, and I didn’t sacrifice quality at all! Each bottle comes out to less than $3.00 each. 

All the other bridesmaids loved the bottles too. 

This post contains affiliate links. If you use these links to buy something I may earn a commission. Thanks!

Easy Personalized Bachelorette Water Bottles  (Tutorial)

Materials: 

Permanent Vinyl ( I used this Rose Gold Vinyl)*

Cricut

Light Grip Mat

Weeding Tool

Water Bottle** (I chose clear for my project)

transfer tape


Notes: 

*This vinyl comes with a protective clear sheet. Remove this before you place the vinyl on the circuit mat. 

**This tutorial works with water bottles and tumblers. If you’re using a different bottle than the one I used, you can use a measuring tape to figure out your decal size. 

Instructions

There are 4 steps to making your personalized bachelorette water bottles.

  1. Create your text/cut file in Cricut Design Space. 
  2. Cut your vinyl decal with Cricut
  3. Apply transfer tape to your decal
  4. Apply decal to your water bottle. 

Here are detailed instructions for each step.

How to Make Vinyl Decals with Cricut

For my bottles, I decided to use Metallic Rose Gold Vinyl. I absolutely love how shiny and glossy this vinyl is, and it comes out so pretty and elegant. It’s gorgeous, and I can’t stop looking at it!

To make your personalized bachelorette bottles, you’ll start by making your decal with your Cricut. 

Choosing a Decal Size

There are two ways to make decals: 

  1. Use the same width for your size. 
  2. Use the same font. 

When you use the same width, longer names will appear smaller and shorter names will be bigger. With this option, decals will have different heights. 

With option #2, your decals will be cohesive. For my project, I decided to go with option 2 because I am placing my decals vertically and wanted the same height for them. 

Instructions

  1. Open up  Cricut Design Space.  Choose a new project.Cricut Design Space New Project Screen
  2. Select Text from the panel on the left. how to add text in cricut design space
  3. Type your desired name into the text box. For this example, we are using “Vanessa. “Typing Name into Text box in Cricut Design Space
  4. Change your font to 72 pt and Christmas Farmhouse. 
    1. Christmas Farmhouse is a licensed font. I got mine from Creative Fabrica membership. Creative Fabrica is a wonderful website to get fonts. If you don’t want to pay for the membership, you can look for a font that is available for personal use or use a font that is already in your system. Cricut Design Space Text
  5. Highlight and Ungroup your text (This will let you move each letter around). Ungrouping text in Cricut Design Space
  6. Move the letters to attach them so that the name is cohesive. You can skip this step if you are okay with the spaces between the letters. I wanted my writing to be script. text in cricut design space
  7. Select your text and weld (bottom right-hand corner). This puts your text back together as one piece. weld text in cricut design space
  8. Change the color to match the vinyl color. For this project, I chose a rose gold color. change color in cricut design space
  9. Select Make it from the upper left-hand corner. make it in cricut design space
  10. Change the size to match your vinyl. I used 12 x 12. Once the proper size is selected, hit continue from the bottom left corner. change material size in cricut design space
  11. Change the dial on your Cricut to Vinyl. 
  12. Remove clear protective covering from your vinyl—place vinyl on a light grip mat. 
  13. Load your light grip mat into the Cricut by aligning your mat and hitting the arrow button.
  14. Select Make It on your Computer and the flashing C on your Cricut. 
  15. At this point, your Cricut will cut the name. When finished, unload by hitting the arrow button. 

How to Weed Your Vinyl Decal

Using your weeder, carefully lift the edges of the vinyl up. Use the weeder to help peel away the excess material. 

weeding vinyl


How to Transfer Your Decals 

Now that you have your decal weeded, you’ll prep it for transfer to the water bottles. Cut the same size transfer tape as your decal. Carefully remove the carrier paper backing from the clear transfer tape. Take the transfer tape and place it directly on top of your decal. You can now move onto applying your personalized decal to the water bottle.

vinyl and transfer tape

vinyl with transfer tape

Vinyl Application Instructions: 

  1. Clean the application surface area with alcohol or soap & water. Dry thoroughly.water bottle with personalized vinyl name
  2. Using a squeegee/scraper or credit card, press firmly on the back of the decal to ensure that the decal sticks to the application transfer paper (clear tape).
  3. Peel the paper backing away from the decal very slowly. If the decal is still on the carrier paper, use the credit card again to firmly rub until the decal lifts on to transfer the paper completely. Go slow and press firmly from all directions. 
  4. Apply decal to cleaned and dry area, pressing firmly using squeegee or credit card to adhere decal to application surface. Be sure to go slowly to avoid any bubbles. It’s best to start pressing from the center outward. 

personalized vinyl water bottles

Notes: 

  • This vinyl is permanent. 
  • Handwash surface only. Decals are NOT microwave or dishwasher safe.

Tips and Tricks

How to Avoid Air Bubbles On Your Vinyl

Sometimes you will see air bubbles pop up when you transfer your vinyl. Here are ways to get a smooth transfer. 

I hope you enjoyed this tutorial for personalized bachelorette water bottles tutorial. If you make these bottles, I’d love to see your creations. Tag me on Instagram @by.bindi. 

Want more Cricut tutorials for bachelorette favors? Try making these confetti hearts to add to your favor bags or bridesmaid proposal boxes. Subscribe to my weekly newsletter to stay updated on the latest blog posts. 

Looking for cute ready-made wedding favors? 

Posted on 4 Comments

Dash Rapid Egg Cooker Review: Should You Get One?

DASH Rapid Egg Cooker Review

I am obsessed with eggs. Scrambled…omelets..hard-boiled…yum! Since eggs are big in our household, I’m always looking for ways to cook them efficiently. Recently, we received an egg cooker as a gift for our upcoming wedding. This article will focus on an in-depth DASH Rapid Egg Cooker Review: what is it, how to use it, and should you get one? 

There are definitely lots of pros to this appliance. Cook everything in one place with little mess, yes, please! I absolutely hate having to clean stuck-on egg bits from pans after making scrambled eggs. I can never seem to find the right non-stick pan that eggs won’t stick to! 

In this review, you will also find some cons to the appliance and tips and tricks to make the appliance work efficiently. 

This post contains affiliate links. If you use these links to buy something I may earn a commission. Thanks!

DASH Rapid Egg Cooker Review

What is the DASH Rapid Egg Cooker? 

DASH Rapid Egg Cooker

The DASH Rapid Egg Cooker is a 6 egg capacity egg cooker for hard-boiled, poached, scrambled eggs and omelets. It has options for soft/medium/hard-boiled eggs and works fast to save you time and water. Weighing under a pound, the egg cooker is lightweight and compact. An auto-shut-off feature prevents overcooking (no more gray/green yolks in hard-boiled eggs!). 

With over 36k reviews on Amazon, this rapid egg cooker is very popular. It’s also affordable at a price point of $19.99. 

Unboxing the Egg Cooker

Unboxing DASH Rapid Egg Cooker, Boiling Tray, Poaching Tray, User Manual

When we received our DASH Rapid Egg Cooker, we were pleasantly surprised by how compact the appliance was. I am a big cook, and I love my kitchen gadgets. It’s essential to me to have something that doesn’t take up much space as I already have a storage unit filled with appliances. The egg cooker is 6.5 inches tall and 7.5 inches wide, taking up less than a foot of space!

The egg cooker comes with a boiling tray to make hard-boiled eggs (cook up to 6 at a time), a poaching tray (cooks up to 2 eggs at a time), and an omelet tray (cooks up to two eggs at a time), a measuring cup for water, and a handle attachment to help lift the boiling tray.

At first glance, the omelet tray is small. Think petite single-serving versus the giant ones you get at a diner. 

Also included is an instructions manual. The booklet outlines how to cook different types of eggs as well as recipes. You’ll find other foods you can cook at the very end of the booklet, such as broccoli!

How to Use the DASH Rapid Egg Cooker? 

Though the egg cooker is straightforward to use and does work rapidly, it is not foolproof. There is some experimentation with how much water to add as it does not correlate to what the manual says. This isn’t a dealbreaker; it just means there is some trial and error to achieve the perfectly cooked eggs you want. 

Even with this limitation, the egg cooker is much more efficient than having to boil water stovetop. 

How to Make Hard-Boiled Eggs with the DASH Rapid Egg Cooker: 

Making hard-boiled eggs is super easy with this cooker. 

  1. Start with the unit unplugged. 
  2. Use the provided measuring cup to pour the designated amount of cold water onto the heating plate.*
  3. Insert boiling tray handle into the boiling tray and place it on top of the heating plate. 
  4. Add eggs to the boiling tray slots (up to 6 eggs). 
  5. Cover the lid and plug in the cooker. 
  6. Press the power button to start cooking. 
  7. When the eggs are done, and the water has boiled off, the machine will sound (a jingle will play). Press the power button to silence the buzzer. 
  8. Uncover the lid and remove eggs with tongs. Be careful when opening the lid as it will be hot and steamy.
  9. Place eggs in cold water to stop cooking. 

Notes: 

  • The amount of water placed into the boiling tray in step #2 will change depending on how many eggs you use and the size of the eggs. For 6 eggs, I filled the measuring cup up to the hard-boiled line and then added another half of the cup. This was the perfect amount and the eggs cooked perfectly. 

How to Make Poached Eggs with the DASH Rapid Cooker: 

Poached eggs in Dash rapid egg cooker

Poached eggs are significantly easier with the appliance, though similar to the hard-boiled eggs, you have to fiddle with the water measurements. 

  1. Fill the provided measure cup with cold water to the “Omelette/Poached” line. Pour onto the heating plate.*
  2. Place the boiling tray over the heating plate. 
  3. Lightly spray cooking oil onto the poaching tray and place it on top of the heating plate. 
  4. Break an egg into the poaching tray slot (capacity for 2 eggs). 
  5. Cover the lid, plug into the socket, and press the start button. 
  6. When the buzzer sounds, turn the power off. Carefully remove the cover lid, be careful with the hot steam. 

Notes: 

  • The first time I used the poaching tray, I used both slots to make 2 eggs. I followed the directions for the water, and it was not enough. The bottom of the poached egg was still runny. I realized I need to double the water for 2 eggs. The poached eggs turned out wonderfully after I got the water ratio right. It cooked fast, comes out of the tray easily, and had a great texture. 
  • If you cook and find your eggs are runny, simply add some more water to the heating plate and cook again. 
Measuring Cup with water
Not Enough Water for Poached Eggs

How to Make an Omelet with the DASH Rapid Cooker: 

uncooked omelet in DASH rapid egg coooker

Omelets are my favorite thing to make so far with the cooker. They turn out really nice, and I love the ease of making it. 

  1. Fill the measuring cup with cold water to the “Omelette/Poached” line. Pour water onto the heating plate.*
  2. Place boiling tray on top of the heating plate. 
  3. Spray cooking oil to the omelet tray and place it on top of the boiling tray. 
  4. Add your eggs and any fixings to the omelet tray. 
  5. Cover the lid and plug in the appliance. Press the power button to start cooking. 
  6. When the buzzer sounds, turn the power off. Carefully remove the cover lid, be careful with the hot steam. 
  7. Remove eggs with a spatula. 

Notes: 

  • I used more water than the marking on the measuring cup for the omelet. My first omelet was not cooked fully underneath. I used 1.5 times the designated amount, and this cooked perfectly. 
  • If you find the bottom of your omelet is runny, add more water to the heating plate and cook again. 

What Else Can You Make in the Egg Cooker? 

I was pleasantly surprised to see that I could cook other items aside from eggs in the cooker. Since it is a steamer, it works great with veggies. Here are some items you can cook: 

  • Broccoli
  • Asparagus
  • Edamame
  • Frozen Corn

Bowl of green Broccoli

Regarding the DASH Rapid Egg Cooker review, this feature is a huge plus in my book. I love that I can use one appliance to make breakfast and have a side of veggies. It really helps with keeping the dish load down. However, due to the compact size of the cooker, you can’t make huge amounts at a time. It really is for one serving. So if you are cooking for a family, I don’t suggest using this to steam veggies. 

For breakfast, this works for me as I only cook for myself. So far, I have tried steaming broccoli and spinach with great success. 

How to Clean the Egg Cooker: 

One thing I absolutely love about this egg cooker is how easy it is to clean. I HATE doing the dishes. This appliance cleans really easily, and that really cuts my workload to focus on other things. 

After you are done cooking, let the machine cool down. You can wash the boiling tray, poaching tray, omelet tray and cover the lid in the sink with warm soapy water. When the appliance has fully cooled, wipe down the heating plate with a wet cloth. 

And that’s about it!

You can store all the parts within the cooker, so that makes it super easy to store. 

Over time you may need to do a deeper cleaning of the heating plate with a water/vinegar solution to remove mineral deposits. The manual mentions the egg cooker won’t rust. 

DASH Rapid Egg Cooker Review: Should You Get One? 

Overall, I do recommend this product. Ever since I got it, I have used it every morning for my breakfast.

Pros: 

  • Easy and efficiency
  • Compact
  • Affordable
  • Easy to Clean

Cons: 

  • The water measurements needed do require some experimentation to cook the eggs fully. 
  • Some people don’t like the buzzer sounds at the end of cooking. I don’t mind it; it’s nice-sounding music. 
  • When using the appliance to steam veggies, keep in mind the size is small.

If you’re looking for an egg cooker that cooks rapidly and doesn’t require much work, this is it. 

I hope you enjoyed this Dash Rapid Cooker Review. Want to see more reviews like this? Check out the Bertello Pizza Oven Review

Posted on 3 Comments

Journal Prompts for Writers to Beat Writer’s Block

journal prompts for writers

Do you have writer’s block? Do you want to write, but that dreaded white page stares back at you? Journal prompts for writers can help beat writer’s block. 

Writers block, white page, pages crumbled in a ball

When I was a kid, I loved to journal. I had an expansive imagination and loved to write stories. As an adult, I often draw on the things I wrote as a child for inspiration in my writing. Whether you are writing fiction short stories or fact-based articles, having a human element to your writing will engage your readers. 

These journal prompts for writers are specifically tailored to nurture your imagination and keep all your ideas in one place. Whenever you have writer’s block, you’ll have your arsenal ready to work for you. 

What is Writer’s Block? 

The dreaded writer’s block hits seasoned, and newbie writer’s alike. Simply put, it’s a condition where a writer cannot think of what to write. This leads to staring at an empty page, followed by lots of procrastination (usually Netflix binges!) followed by some more procrastination. 

Vintage inscription made by old typewriter, HELP!

It’s not a fun place to be when you want to write and can’t come up with a single idea. It’s even worse when this happens with a deadline looming.

Mentally, writer’s block is draining. You question why you even chose to write in the first place. You start to second guess your choices overall, which can lead to a harmful path for writers. If writer’s block goes unchecked, it could lead to abandoning projects and writing altogether. 

The Benefits of Journaling for Writers

You write for a living, or you write because you’re passionate about it. Why do you need to add journaling to the mix? 

Journaling is a great tool to cultivate your writing skills. This is for your eyes only. There are many benefits of journaling for writers: 

  1. Journaling engages you to write without constraints. 
  2. It helps you plan and track your progress. 
  3. Brain Dump” journaling can help you focus as you get your ideas together. 

Now that you have the why let’s look at some prompts to help you slay writer’s block. 

Journal Prompts for Writers

Journal Writing Prompts for Plot Development

journal writing prompts for plot development

  1. Describe a dramatic event that happened recently with your friends/family.
  2. Take the plot of your favorite movie and change it, so it takes place underwater. 
  3. Write a story where a disabled man attempts to rob an older woman.
  4. Take your favorite book and movie and create a plot mashup between the two. 
  5. Write what happens when a kid’s first day of school is interrupted by an earthquake.
  6. Create a story based on a trending topic on Twitter. 
  7. Take two news headlines and write a story.
  8. A character from your favorite childhood movie is drafted to war with another planet. 
  9. Describe the craziest event of your life and replace yourself with a scientist. 
  10. What happens when an unscrupulous teen falls for her wealthy boss?

Journal Writing Prompts for Character Development

journal prompts for character development, different types of characters

  1. Describe someone who you met this week. 
  2. What is your impression of your neighbor?
  3. What mannerisms do you hate about a friend?
  4. What hobbies that someone in your life is doing are you jealous of?
  5. What is the strangest profession you can think of?
  6. What are some tics your family has?
  7. Who is the funniest person you know?
  8. What is the most traumatic thing to happen to someone?
  9. Who is your best friend envious of?
  10. Describe a friend or family member who is held back by their personality. 

Journal Writing Prompts for Setting

beautiful beach setting, colorful sunset

  1. Describe a small town that aliens are buying. 
  2. Where would an undercover botanist go to let loose?
  3. What does a war-torn galaxy look like?
  4. Write about an overpopulated prison. 
  5. Describe an apartment complex that is out of place in a wealthy suburb. 
  6. Where do the homeless live on Mars? 
  7. The first place a wife goes after seeing her husband kiss a goat. 
  8. Where does one hold a wedding between two rival intergalactic nations? 
  9. What’s the backdrop for an epic love story? 
  10. Describe a coastal community after the ocean dries up. 

Journal Writing Prompts for Dialogue

two people talking with a dialogue bubble

Write dialogue based on the following scenes: 

  1. A husband and wife discover one has been lying about their family. 
  2. A concerned parent reprimands a teacher for being an internet-famous social media influencer.
  3. A lonely man talks to his fish as if it was his dead daughter. 
  4. Two siblings get stranded after their car battery dies. 
  5. An estranged daughter gives the eulogy at her mother’s funeral. 
  6. An elderly couple fights: the wife is hysterical, and the husband is overcome with laughter. 
  7. A bridesmaid tells the groom the bride is missing. 
  8. An astrologer shares a bench with a 
  9. A group of co-workers on a train ride to their CEO’s baby shower. 
  10. A parent calls their child after committing a crime. 

How to Use Journal Prompts 

The best way to maximize writing efficiency is to use these prompts daily.  There are two reasons for this. 

  1. When you practice an activity daily, you automatically get better at it. 
  2. You create discipline through consistent habits. 

Try using these journal prompts for writers first in the morning or at night before you go to sleep. You can write freely without limitations or give yourself a time limit for an added challenge. For example, try giving yourself 10 minutes one day and 5 minutes the next. You can play around with what works with your needs. 

You also want to stop yourself from editing your work. Journaling is freeform writing. Don’t get bogged down if sentences are run on or there are grammatical errors. This is not the time to judge your work. 

Text written with a vintage typewriter - That's my story

There are no rules to journaling. It’s a very individual practice. If you’re new to journaling, with time, you will figure out your comfort level. Tailor these prompts to help you with your writing journey. Let your mind take you wherever it wants to go. Don’t stifle any creativity that pours out during this process. 

And lastly, enjoy the process!

Did you like these journal prompts for writers and want to use more prompts? Check out Journal Prompts for Success. 

Posted on Leave a comment

New Blog Analytics: 3 Month Review (Mar-April 2021)

new blog traffic analytics, computer with statistics

We are now into month 3 of this blog! I’m proud of my consistency and growing this site. As someone who usually starts a project hot and then gives up, sticking with this blog is all the more rewarding.  With 90 days behind me, I wanted to take the time to write up some new blog analytics

Before I delve into my month 3 stats, I just wanted to give a little background this past month. I spent 2.5 weeks on the east coast to prep for my upcoming wedding. With the traveling and preparations, I didn’t have as much time to write this month.

It is something I am disappointed in. But that is life. I have to give myself some slack. Wedding planning is tough work, and I am happy with how that’s coming together. 

There will be consistency sometimes, and sometimes you’ll fail. How you keep going will separate you from those who quit. I have every intention of catching back up in month 4 with this blog!

New Blog Analytics: Month 3

 If you are new here, I started this blog in January 2021 with my first blog post on Jan 9 (How to Make Reusable Crochet Face Scrubbies in 10 minutes).


Crochet Face Scrubbies

I created this blog to comprise everything mind, body, and soul. This is a place for creative tutorials, positive guidance for self-improvement, and healthy DIY recipes. I found myself creating separate Instagram accounts and Etsy stores for things I enjoyed, and I wanted to funnel it all into one place. Hence By Bindi was born!

After the first-month learning curve, I have done things to help build this blog and key learnings I came across to improve my goals. You can take a peek at my 1 month blog review here

Let’s take a look at my new blog analytics for month 3. 

Things I Have Learned in 3 Months of Blogging

Blog Research

As I navigate this new blogging world, I am continuing to research how to blog successfully. This means something different for everyone.

For me, making this blog, success looks like seeing good and engaged traffic and being able to share what I love to a community of like-minded people. 

How to implement SEO to blog posts has been a huge focus area for me. I want to learn all I can about SEO as everything I read says that investing time up front will pay off down the road. It is definitely a slow burn, but I’m hopeful all the effort will pay off by 6 months. 

Another big area I focused on was Keyword Research. Previously, I was writing about things I enjoyed and had only done the minimal keyword research. I realized that longtail keywords really are the jackpot. 

blog research with laptop and coffee

Here are some great articles and websites that I found useful this month. 

Keyword Reserach Guide

I found this beginner’s guide to keyword research by ahrefs.com pretty helpful this month. I do use their research tool, though I have not paid for the premium. It does help to see what users are searching for and what keywords are difficult to rank for. While I believe you should write things you want to write, if you are trying to rank, you have to be strategic about it.  

How to Create a Round-Up Blog Post

I love round-up posts and wanted to write one for a while. Creating a round-up post is on my to-do list for month 4. Round-up posts can increase traffic when done well and also are a great way to promote yourself without being spammy. I’m going to try my hand at it and see how it goes!

Website Updates: 

One major change I made this month is implementing the Easy Table of Contents plugin. This plugin is super easy to use and has helped me tailor my posts in a more digestible way. I’m always looking to improve my writing, and have a table of contents was a great addition. 

Month 3 Review

Let’s break down the new blog analytics. Last month I made a goal to aim for 11 blog posts a month. I was on track the first half of the month. However, I got too busy with wedding planning in the last two weeks of the month. I traveled to the east coast, and while I accomplished a lot for the upcoming wedding (got all my outfits, yay!), I didn’t have as much time to write. 

I wrote 7 blog posts my first month and 11 in my second month. 

In my third month, I wrote. 6 blog posts. I am disappointed with my number. But, next month, I’m aiming for 11 again. 

While I did not meet my goal, I did try to continue to hit higher word count posts and have been doing well. I still need to write a post that is 3k words. This is more of a long-term goal at the moment. Hoping to hit this in the next couple of months. 

These 6 blog posts break down as follows: 

March 11, 2021: New Blog Traffic Analysis: 2 Month Review

March 15, 2021: Striped Crochet Wash Cloth Pattern

March 19, 2021: Powerful Daily Affirmations for Self Love

March 24, 2021: DIY Lavender Vanilla Lip Balm Sticks (Non-Toxic Recipe)

March 31, 2021: Bertello Pizza Oven Review (With Recipes and Photos)

April 11, 2021: Easy Textured Crochet Dish Scrubbies Pattern (Reusable)

Despite my uneven publishing schedule, I did get a post out at least once a week. This is the bare minimum I want for my blog. I am definitely hitting that point where I tend to quit due to other priorities. But, I want to keep pushing through, so I need to keep myself on track. 

Month 3 New Blog Traffic Analysis

My blog traffic is growing consistently, and that does motivate me to keep going. As long as my traffic grows, I know I’m doing something right!

increasing blog traffic

This was the first month I decided to share an article on my personal Facebook page. I usually only use Instagram and Pinterest to promote the blog under a specific business account. I feel weird spamming my friends on my personal pages. However, the post I did share (The Pizza Oven Review) was a huge hit! It was really well received and shared. This brought a lot of traffic to my blog. 

I even got a writing gig out of it. Win!

So what did my 3-month blog traffic look like? 

Here is the overview of blog traffic from Jan 9 – Feb 9 (Month 1)

  • 28 first time visitors
  • 270 monthly page views
  • 130 user engagement events

Here are my Month 2 Stats (Feb 9 – March 9)

  • 83 first time visitors – 196% increase 
  • 1.2k monthly page views – 344% increase 
  • 617 user engagement events – 374% increase

Here are my Month 2 Stats (Mar 9 – April 9)

  • 231 first time visitors – 56% increase 
  • 3.4k monthly page views – 54% increase 
  • 1.9k user engagement events – 48% increase

Month 3 didn’t have the dramatic increase between months 1-2, but that’s okay! I am still on an upward trajectory, and I’m happy with that. Last month I mentioned my goal was to hit 3,000 page views a month or 100 page views a day. I thought it would take me 5-6 months to hit that number, but I accomplished it in 3 months. 

I am happy with how that turned out. 

Page Views and Blog Post Word Counts

I’m always interested in seeing how word counts correlate to page views. Last month I mentioned that longer blog posts rank higher on Google as you are covering more information. I love data, so I’ve been tracking my word counts monthly, and it’s a good one to track for new blog analytics. 

This month I managed to write one article over 2k, which I’m really proud of. This article was a super fun one to write. 

blog page views

Here are the word counts for my 6 blog posts for March 2021: 

New Blog Traffic Analysis: 2 Month Review(1,765 words)

Striped Crochet Washcloth Pattern (461 words)

Powerful Daily Affirmations for Self Love (1,058 words)

DIY Lavender Vanilla Sticks (non-toxic recipe) (1,298 words)

Bertello Pizza Oven Review (with recipes and photos) (2,116 words)

Easy Textured Crochet Dish Scrubbies Pattern (Reusable) (769 words)

Blog Posts under 1Kwords: 2/6 (33%) | Blog Posts Over 1k words: 4/6 (66%) | Blog Posts Over 2k words: 1/6 (16%)

My most viewed article in month 2 was Daily Affirmations for Self Love with 288 monthly views. Previously my most viewed post was Want Long, Thick and Luxurious Hair? Try these Natural Indian Hair Masks! with 91 monthly views. 

It will still some time to see how on-page SEO and long-word posts help drive traffic. I should have more data on this after six months of consistent blogging. 

Blog Revenue and Monthly Cost Breakdown

blog cost and revenue breakdown

Cost and revenue are a big part of new blog analytics. In month 1-2 of my blog, I made $0 in revenue. In month 3, I am starting to make money, but it is pennies.  Since this blog is still new, I don’t expect to monetize until 3-6 months. Probably closer to 6 months. 

In month 3, I joined two ad networks: 

Skimlinks:

Skimlinks is an affiliate marketing network that adds code to your site to turn links you write into affiliate links. It’s a good way for beginners to start making money as you don’t have to apply to individual affiliate networks. However, you do need to have some traffic as you make money with clicks. 

I did not make any money using Skimlinks this month. 

Infolinks:

Infolinks is an ad platform that is easy to access for beginner bloggers. I was able to get accepted within a day of applying on their site. 

With Infolinks, I made a whopping $0.86. It’s not much, but it’s a start! I’m curious how the next month will look. 

Here are my monthly costs to run the blog: 

Total cost for Month 3: $37.98

Overall Total cost for 3 months: $119.96 

Revenue Month 3: $0.86

Profit/Loss: $119.10

I want to keep track of how much I spend each month, so once I can monetize, I have a better picture of where I stand. 

Blog Marketing Breakdown

My goal for this blog is to use synergistic platforms to promote my posts. Right now, my two big marketing platforms are Pinterest and Youtube. 

This month I made one Youtube video to go with my post: 

What’s next for this blog?

Based on my new blog analytics, I have learned some things that I want to implement for month 4. 

Month 4 Goals: 

  • Post 3-4 times a week (Try adding Sunday to the mix)
  • Have a minimum of 11 posts for the month
  • Stay consistent with marketing on Pinterest, Twitter, and Youtube. 
  • Write a 3k word blog post (this may be a reach, but I want to continue to push myself)

I’m excited to see what month 4 has in store for me! Have any tips or guidance for a new blogger? Comment below!

Posted on 5 Comments

Easy Textured Crochet Dish Scrubbies Pattern (Reusable)

Easy textured crochet dish scrubbies pattern

I love switching home products to reusable ones.  This easy textured crochet dish scrubbies pattern is a perfect way to create something functional and pretty. It’s also very beginner-friendly!

I created this pattern after falling in love with Red Heart’s scrubby yarn.  I’d seen it in Michael’s before but never used it. This week I decided to buy some and boy was it a pleasant surprise! I love the yarn texture.  It’s perfect for making crochet dish scrubbies. 

Red heart scrubby yarn Marble

The yarn is soft yet textured.  It does a great job with cleaning dishes and it lathers up so well! After making 1 reusable sponge for my mom,  she and my aunt requested 5 more. After that my sister-in-law wanted 12! Needless to say, these are a big hit in my family!

This textured crochet dish scrubbies pattern works in the round and uses one stitch: half double crochet (hdc). It’s very beginner-friendly and works up fast.  I can make one within 10-15 minutes.

You’re welcome to sell any products you create using this pattern. I always appreciate design credit.  You are not allowed to sell this pattern as your own. 

Let’s make some crochet dish scrubbies!

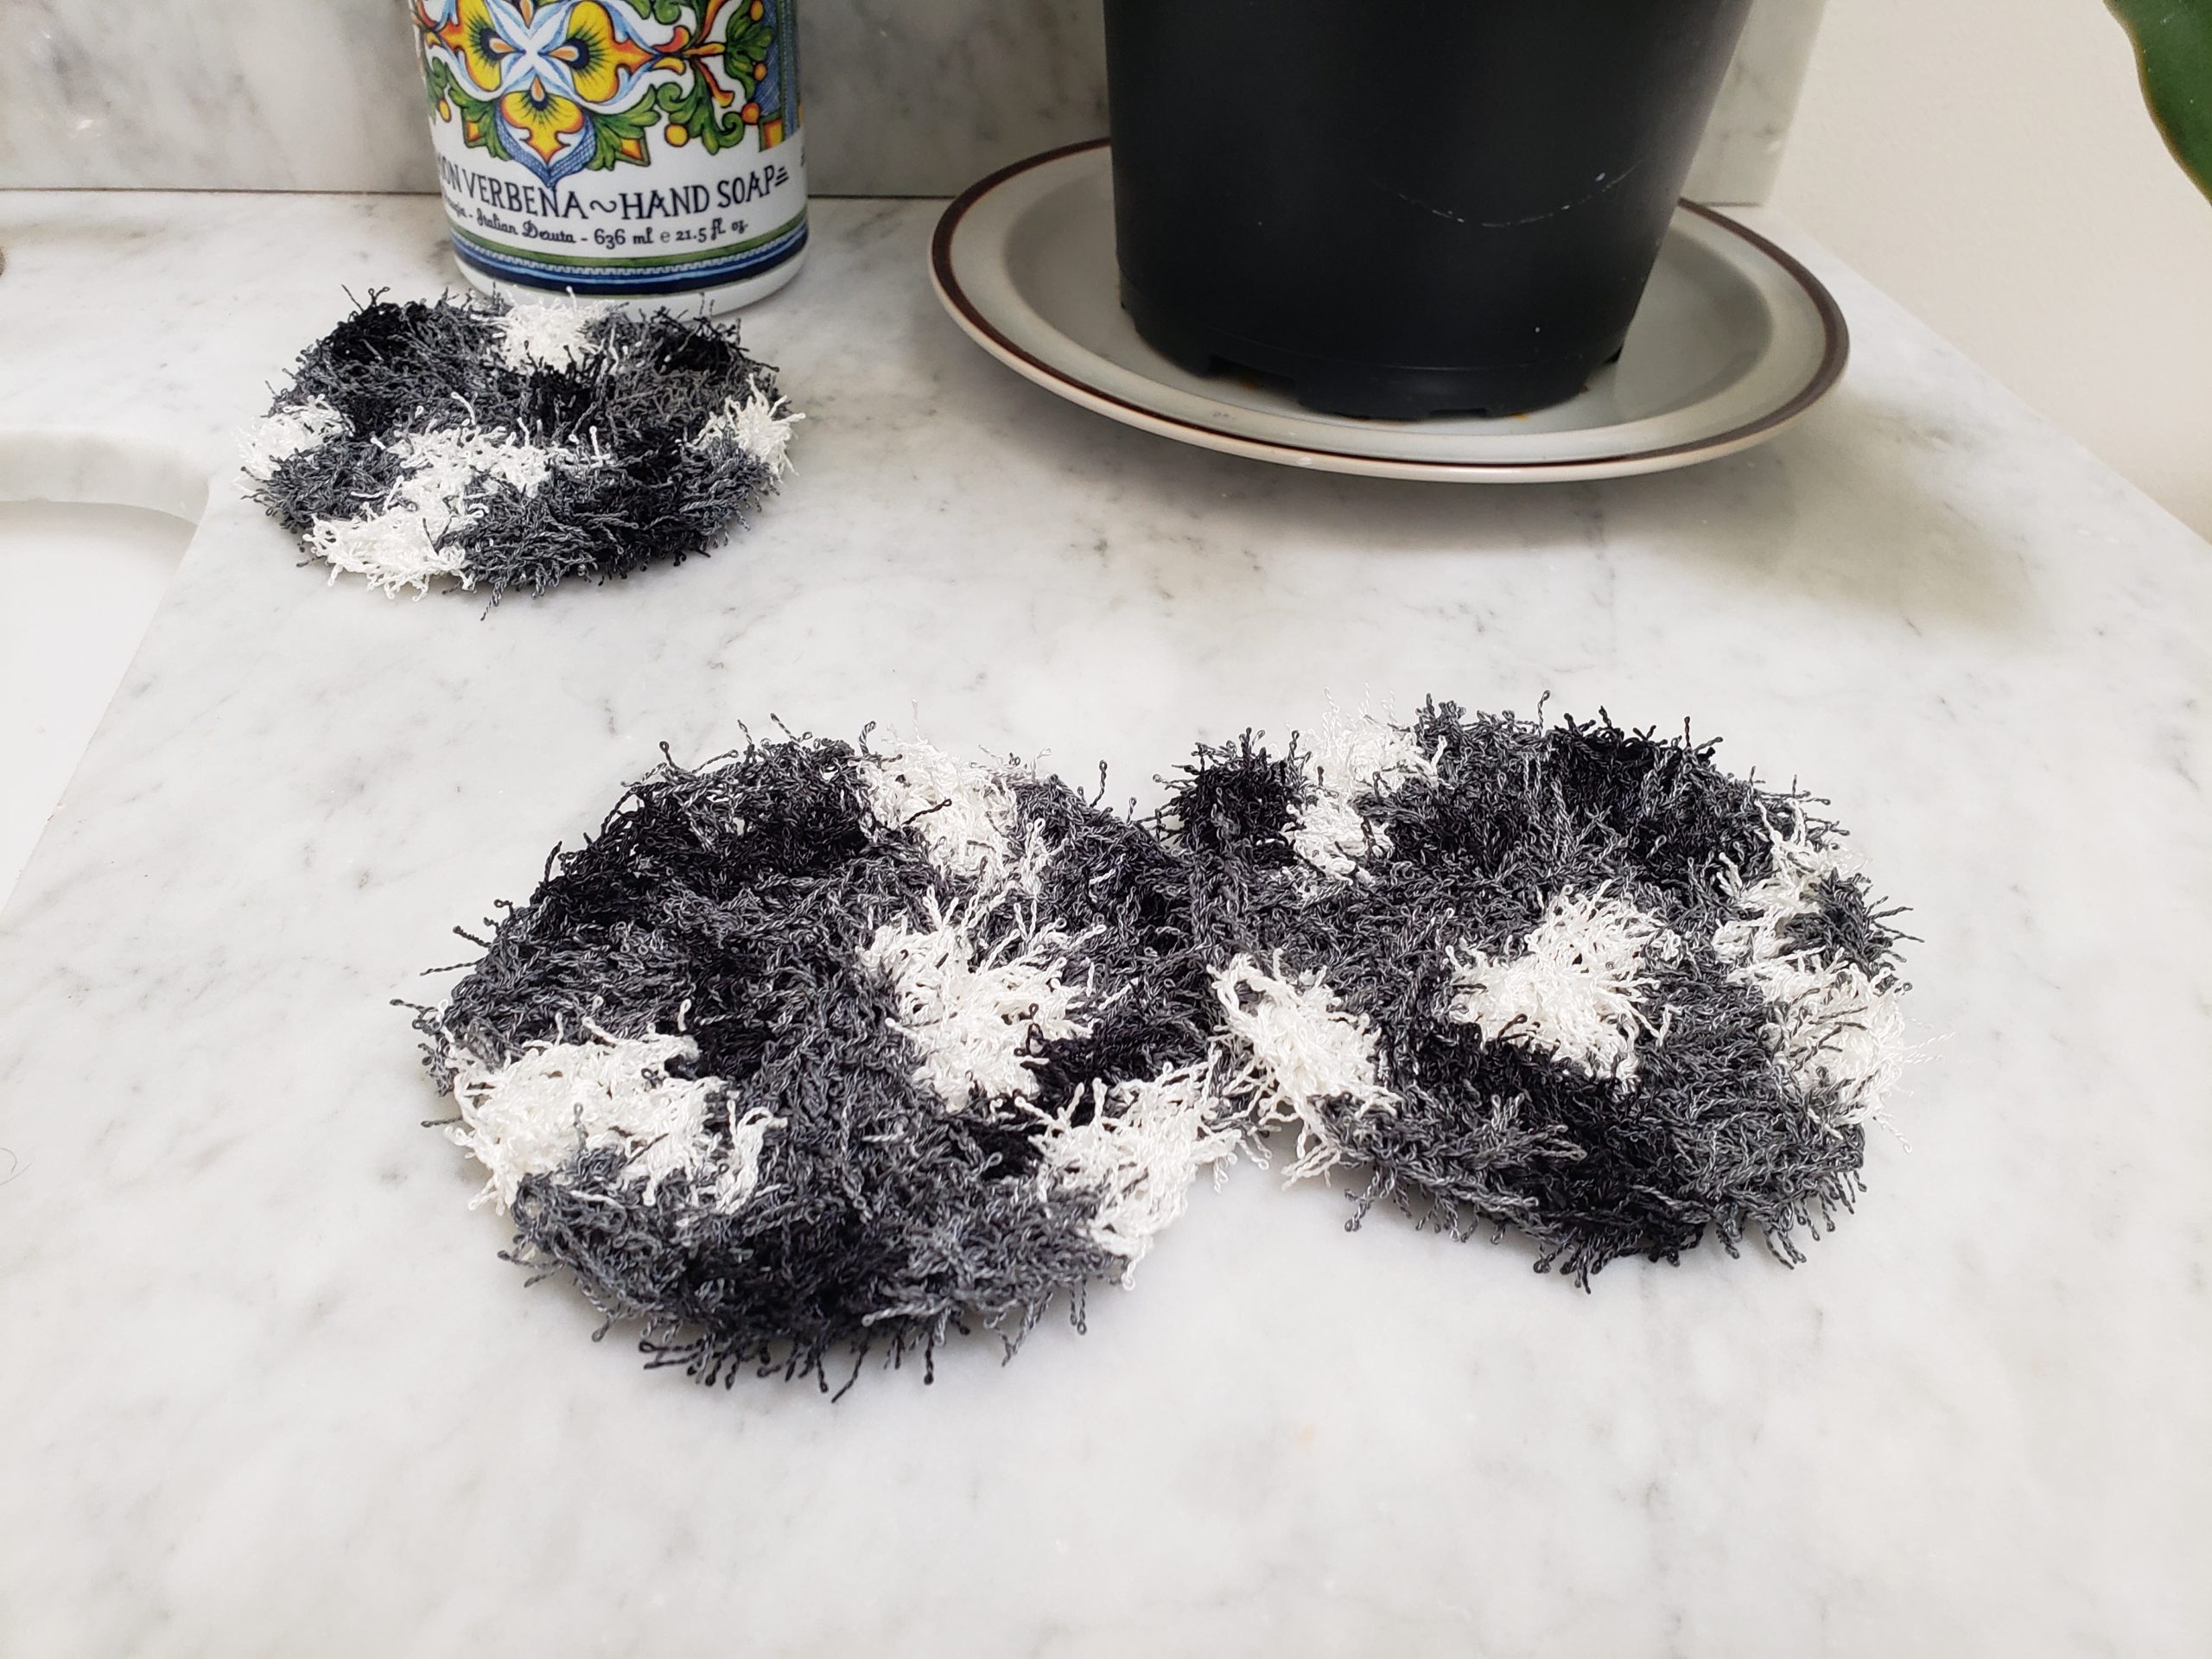
Black and white textured crochet dish scrubbies

Why Should You Use Reusable Dish Scrubbies Instead of Disposable Sponges?

1.) It’s Environmentally Friendly 

As humans,  we create an unimaginable amount of waste every day.  Much of this waste is not biodegradable, meaning it won’t break down. Rather it piles up in our landfills, polluting our beautiful planet. 

Disposable sponges add to this waste problem as we constantly need to buy more to handle our weekly dish load.  Reusable sponges and scrubbies last longer, eliminating the amount of waste created. 

Reusable Crochet Dish Scrubbies

2.) It’s More Hygienic than Sponges 

Since these scrubbies are reusable and easy to make enough for a week’s worth of use, you’ll be able to stop spreading bacteria onto your dishes. Simply throw your dish scrubbies in with your kitchen laundry items and reuse them as needed.  I like to use one per day and wash them all at the end of the week. 

This is way easier than cleaning sponges that tend to go unwashed on sink counters and become bacteria breeding grounds. 

3.) It’s Cost-Effective

DIY reusable sponges are cheap to make! One skein of dish scrubby yarn costs about $4.50-5.00 and makes between 5 and 6 scrubbies. With proper care these scrubbies will last much longer than your disposable sponges, saving you money in the long run. 

We all love to save money!

Why Crochet Dish Scrubbies Yourself?

Because it’s fun and easy! Crocheting is such a great hobby that can be done anywhere. 

If you’re a novice or advanced crocheter, you’ll enjoy this pattern. Plus it’s so satisfying to use something you’ve made yourself.  You’re more likely to incorporate it into your routine. And, you get to decide exactly what colors you want so you can customize the scrubbies to your home decor.

Easy textured crochet dish scrubbies pattern

Easy Textured Crochet Dish Scrubbies Pattern 

Supplies

1 skein dish scrubby yarn (I used the color Marble)

H 5.0 MM crochet hook

Stitch markers

Weaving needles

Stitches

Half Double Crochet (hdc)

Yarn over,  insert hook into stitch, yarn over, and pull through 1 loop. You will have 3 loops remaining on hook.  Yarn over and pull through all loops. 

Pattern Notes

  • This yarn is textured and it might be hard to see your stitches depending on the color you choose. I kept my stitches loose which helped. 
  • Chain 1 at the beginning of round 1-4 does not count as a stitch. When using a stitch marker,  add to your first stitch, not chain 1. 

Textured Dish Scrubbies Pattern 

Foundation: ch 3, sl to first ch,  ch1

How to make crochet dish scrubbies

Row 1: 9 hdc into circle, sl to first hdc, ch 1 (9 stitches)

Crochet dish scrubbies pattern


Row 2: *2 hdc* into first stitch, repeat from * to * 8 more times. Sl to first stitch and ch 1 (18 stitches)

Half Double crochet dish scrubbies

Row 3: *2 hdc in first stitch and 1 hdc in the next*. Repeat from * to * 9 times. Sl to first stitch and ch 1 (27 stitches)

Black and white textured crochet dish scrubbies

Row 4: *2 hdc into first stitch*. Repeat from * to * 26 times.  Sl to first stitch (54 stitches)

Diy reusable Crochet Dish Scrubbies

Fasten off and weave in ends. 

And that’s it! Hope enjoy this textured crochet dish scrubbies pattern. I love to see any creations you make.  Tag me on Instagram @by.bindi.

Want to try more crochet patterns? Check out this striped crochet washcloth pattern and beginner-friendly single crochet washcloth pattern


Are you a beginner crocheter? Check out these tutorials:

How to Single Crochet

How to make a Slip Knot

Posted on 9 Comments

Bertello Pizza Oven Review (With Recipes and Photos)

Bertello pizza oven review, wood fired pizza oven

I am a big pizza fan!  I mean, who isn’t?! Growing up on the east coast,  pizza was a big part of life.  After moving to the west coast,  it’s been tough finding good pizza.  My in-laws recently gifted us a Bertello pizza oven, and it’s been a wonderful experience. This post will focus on an in-depth Bertello pizza oven review, a step-by-step guide on how to use the pizza oven, followed by some yummy pizza recipes

Wood fired Margherita Pizza


Bertello Pizza Oven Review

Why choose a pizza oven for your home?

You have a conventional oven; why do you need a wood-fired pizza oven? 

Pizza ovens get significantly hotter than your conventional oven (upwards of 800 degrees). This leads to cooking pizzas so fast! Wood-fired ovens work by trapping heal within the walls of the oven. It is also a very traditional way of making pizza. 

If you want NY-style pizza, you have to replicate how they cook their pizza. Granted, you won’t have the New York water to get the distinct flavor, but it will still be very delicious! Definitely better than anything you make in the regular oven. 

The wood-fried aspect really gives the pizza a deeper flavor.  

pizza oven and wood fired pizza

What is the Bertello Pizza Oven?

Featured on Shark Tank,  this oven is a good budget option at the $300 range.  We came across it when we were doing our Amazon wedding registry, and it had great reviews. You can get it on Amazon.

Created by entrepreneur brothers, Andy and Eric Bert, the mini outdoor oven is portable. It is also a hybrid model, meaning you can use wood as fuel or propane. The pizza oven can go past 900F and produces authentic Neopolitan pizzas in under 2 minutes. 

If you use propane, you’ll need to purchase a propane tank and gas attachment.  We did not go the propane route, and our pizzas still cook beautifully and taste amazing!

The oven itself is on the smaller side and works well if you don’t have a lot of space. We have a small balcony, and the oven fits perfectly there. It’s nice to have the pizza oven experience without having to spend a huge amount of money and need a giant backyard. 

Bertello pizza oven review, wood fired pizza oven

Getting Started with the Bertello Pizza Oven 

There is definitely a learning curve to using this oven,  so be sure to do your research before starting.  My husband and I were too excited, and we did minimal research, which consisted of reading amazon reviews and watching some YouTube videos.  

Unboxing the Oven:

The oven is very easy to put together.  It is heavy, so I definitely appreciated that my husband put it together. 

The instructions helped with getting the oven together. But it was not helpful in providing a step-by-step guide of how to use the Bertello pizza oven. Through trial and error,  we have figured out a system that works for us now. 

The Bartello oven comes with the following:

  • Pizza stone
  • Wood/Charcoal/Fuel Tray
  • Tongs
  • Pizza peel
  • Scoop for wood chips/pellets

Detailed Bertello Oven Pizza Review

Attempt #1:

Our first attempt at the oven was late on a Friday evening. We were very excited to try it out. However, I don’t suggest doing this at night. It’s easier to see what you are doing during the daytime. When you get better at using the oven, you can use it at night if you like. 

For fuel, we bought the following from Home Depot:

We loaded 6-7 charcoal briquettes into the back slot and lit them in the fire with tumbleweed as a starter. We saw in a YouTube video that you should light the coal and leave it for about an hour until it turns white.  After this,  you add wood and pellets to get the fire going.  

Our first attempt was disastrous. Our fire was nowhere near what it should have been, and the pizza stone was not heating up properly. We stupidly put the pizza in, and it stuck to the bottom.  It was a disaster!

We also had a lot of trouble trying to get the pizza off of the peel and into the oven.  It would stick and clump together. 

We ended up with 1 pizza that was semi-edible.  But overall, this was a FAIL!

Attempt #2

We played around with the fire to get it roaring. We were able to build it up but ran into similar issues of the oven not heating towards the front end.  This would lead to the pizza sticking and being impossible to turn.  We ended up with a couple of “calzones.” 

We watched the video from the creator, who did help a bit with arranging the pizza.  We were loading our pizza with too much sauce and cheese.  You really have to go minimalistic with toppings. 

Attempt #3

My husband was ready to call it quits at this point.  We didn’t understand how it was so easy for others, but we were having so much trouble. O

Was it not using propane? Or should we get a temperature gun? Our Bertello oven review wasn’t looking so great thus far. But, we didn’t want to give up either. Other people had such great photos and enjoyed their oven. 

We had to figure out what we were doing wrong. 

Finally, after an hour of scouring the internet, we happened upon this gem of a video. 

We saw that for the oven to really work,  the flames have to hit the roof of the oven and almost come out the front. Watch the video, and you’ll see epic flames.

We had a baby fire going and thought that would be enough.  A lightbulb went off, and we decided to try again, this time armed with knowledge.  

Here is the exact process we used.  Follow this, and you’ll have amazing wood-fired pizzas in no time!

How to Use the Bertello Pizza Oven (With Pictures)

1.) Situate the oven onto a stable table. We use two end tables and it works great. Add 4-5 charcoal briquettes to the fuel tray. Place tumbleweed in the center to create a pyramid. Light on fire and close the door cover. Let it do its thing for 30 min to an hour until the coals turn white. 

Pizza oven tray with coal bricks and tumbleweed

How to light fire in pizza oven

2.) In the meantime,  prep your pizza dough and toppings. I used this recipe from Bobby Flay, which turned out beautifully. Due to the size of the oven, we stuck to smaller personal sizes. You can make 6 pizzas with the Bobby Flay recipe. 8-10 inches is a good size for this oven. 

3.) When rolling out your pizza dough,  use a generous amount of flour, so it doesn’t stick. I like to use this silicone mat as it has convenient templates for pizzas by inch so you can roll to the correct size.  Sprinkle flour onto your pizza peel, and transfer rolled dough to it. I used all-purpose flour. You want enough so the dough doesn’t stick. 

4.) Add a 1-2 spoonfuls of sauce.  It doesn’t sound like much,  but that’s really all you need.  Add your toppings, don’t overdo it. Keep it light.  

Uncooked four cheese pizza on pizza peel

5.) Check the oven to see if it’s ready.  When the coals are white,  add your wood chunks and/or pellets.  We use half a cup to a cup of hickory pellets.  Wait until the fire is roaring. This will take a couple of minutes. You can use a fan blowing towards the back tray door to help it along.  You can also use a temperature gun to check the temp,  but we don’t. If you do use a temp gun, you’ll want the back to be around 800F and the front higher than 500F. 

Wood fired pizza oven, roaring flames, bartello pizza oven

6.) When it’s ready, and the flames are hitting the top roof,  slide your pizza in. You want to aim for the middle of the oven. We have had success when it’s been more towards the front, but this is volatile as it’ll depend on how hot the front of the stone is. If your fire is really roaring, you’ll be able to do this. 

7.) At this point, you’ll need to watch to check when to turn your pizza.  Sometimes we’ve turned it in every 20 seconds, and other times every 5 seconds.  You’ll know to turn when cheese is bubbling.  Turn 4 times, so it cooks evenly.  Be patient, as this process can take some time to maneuver. Depending on how hot the oven is, sometimes burns will happen. It’s trial and error and with repeated use,  you will become a pro. 

8.) Your pizza should be done in a minute or two! We try to have a backup pizza ready to go so we can put it in just as the first is finishing. The fire should last 1-3 pizzas before you need to refuel.

Wood fired Margherita Pizza

9.) Refueling is easy. Just add more wood or pellets. 

Notes:

There are certain tools that can help you with the process of making pizzas in the oven—a temperature gun and turning peel.

Using this oven is definitely a two-person job.  You probably could do it with one person,  but it might be stressful. More helpers speed up the process.

Making your own pizza at home can be a process,  but we really enjoy it now that we know what we’re doing.  Our final Bertello oven review is that it is a fun thing to have.  Our oven gets a lot of use in our home, and we do weekly lunch dates with friends to use it.  Everyone loves it! It’s a great activity to do with the company. 

Plus the pizza tastes amazing!

Here are some of our favorite recipes:

White Four-Cheese Garlic Pizza Recipe

Wood fired white four cheese pizza with garlic and olive oil

Ingredients:

Homemade or store-bought pizza dough

1 tbsp Olive oil

Mozzarella cheese sliced

Ricotta cheese

Shaved Parmesan

Grated Romano

1 clove Garlic sliced

Directions: 

1.) Roll pizza dough to 8-10 inches

2.) Spread 1 tbsp olive oil to coat the top.  

3.) Add garlic slices and top with cheese

4.) Bake in the wood fried oven for 1-2 minutes 


Classic Margherita Pizza Recipe

Wood fired Margherita Pizza

Ingredients: 

Homemade or store-bought pizza dough

1-2 tbsp Pizza sauce

Mozzarella sliced

Chopped basil

Directions:

1.) Roll pizza dough to 8-10 inches

2.) Spread 1-2 tbsp pizza sauce

3.) Top with Mozzarella slices and basil

4.) Cook for 1-2 min in the pizza oven


Spicy Wood Fried Pizza Recipe:

Spicy wood fired pizza recipe

Homemade or store-bought pizza dough

1-2 tbsp Pizza sauce

1 tbsp hot oil

Mozzarella sliced

Romano Grated

Jalapeños slices

Directions:

1.) Roll pizza dough to 8-10 inches

2.) Spread 1 tbsp hot oil

3.) Add 1-2 tbsp pizza sauce

4.) Top with Mozzarella slices and grated Romano. Add Jalapeños.

5.) Cook 1-2 minutes in the pizza oven. 

How to Care for Your Pizza Oven

Now that you’ve made all the yummy pizza in your belly, you’ll need to clean your pizza oven. This is pretty low maintenance. After your oven has completely, remove the fuel tray and discard the ashes. You can use an old towel or paper towels to wipe the inside clean. 

Next, you’ll want to clean your pizza stone. Pizza stones are porous items and you want to refrain from using soap on your stone. This is because the stone will absorb the soap and you’ll pizza will taste like suds. Pizza stones don’t need soap anyway as the heat from the fire will kill bacteria. 800+ degrees is really hot!

To clean your pizza oven: 

  1. Scrub off any food particles. Use either a sponge or a wooden spatula. Don’t use metal as you will damage the surface. 
  2. Using just water, gently scrub the surface. 
  3. If your surface is burnt, mix 50:50 part water with baking soda. Spread the paste and let it sit for 5-10 minutes. Wash away with water and repeat as needed. 
  4. If your pizza oven is severely caked, you can put it in a conventional oven at 500F. Place the stone on the top rack right when you turn the oven on. Do not put the stone into a hot oven, it needs to rise in temperature slowly. Leave in for about an hour. After the oven and stone have cooled, remove and scrub off burnt bits.
  5. After you’ve cleaned the pizza stone, return it back to the oven. We store our oven outside on our balcony.

I hope you enjoyed this Bertello Pizza Oven Review.  Did you try any of these recipes? Comment below!

Subscribe to the newsletter to keep updated on blog posts. Follow me on Instagram @by.bindi. 

Did you eat too much pizza? Check out 11 Ways to Lose Weight and Keep it Off