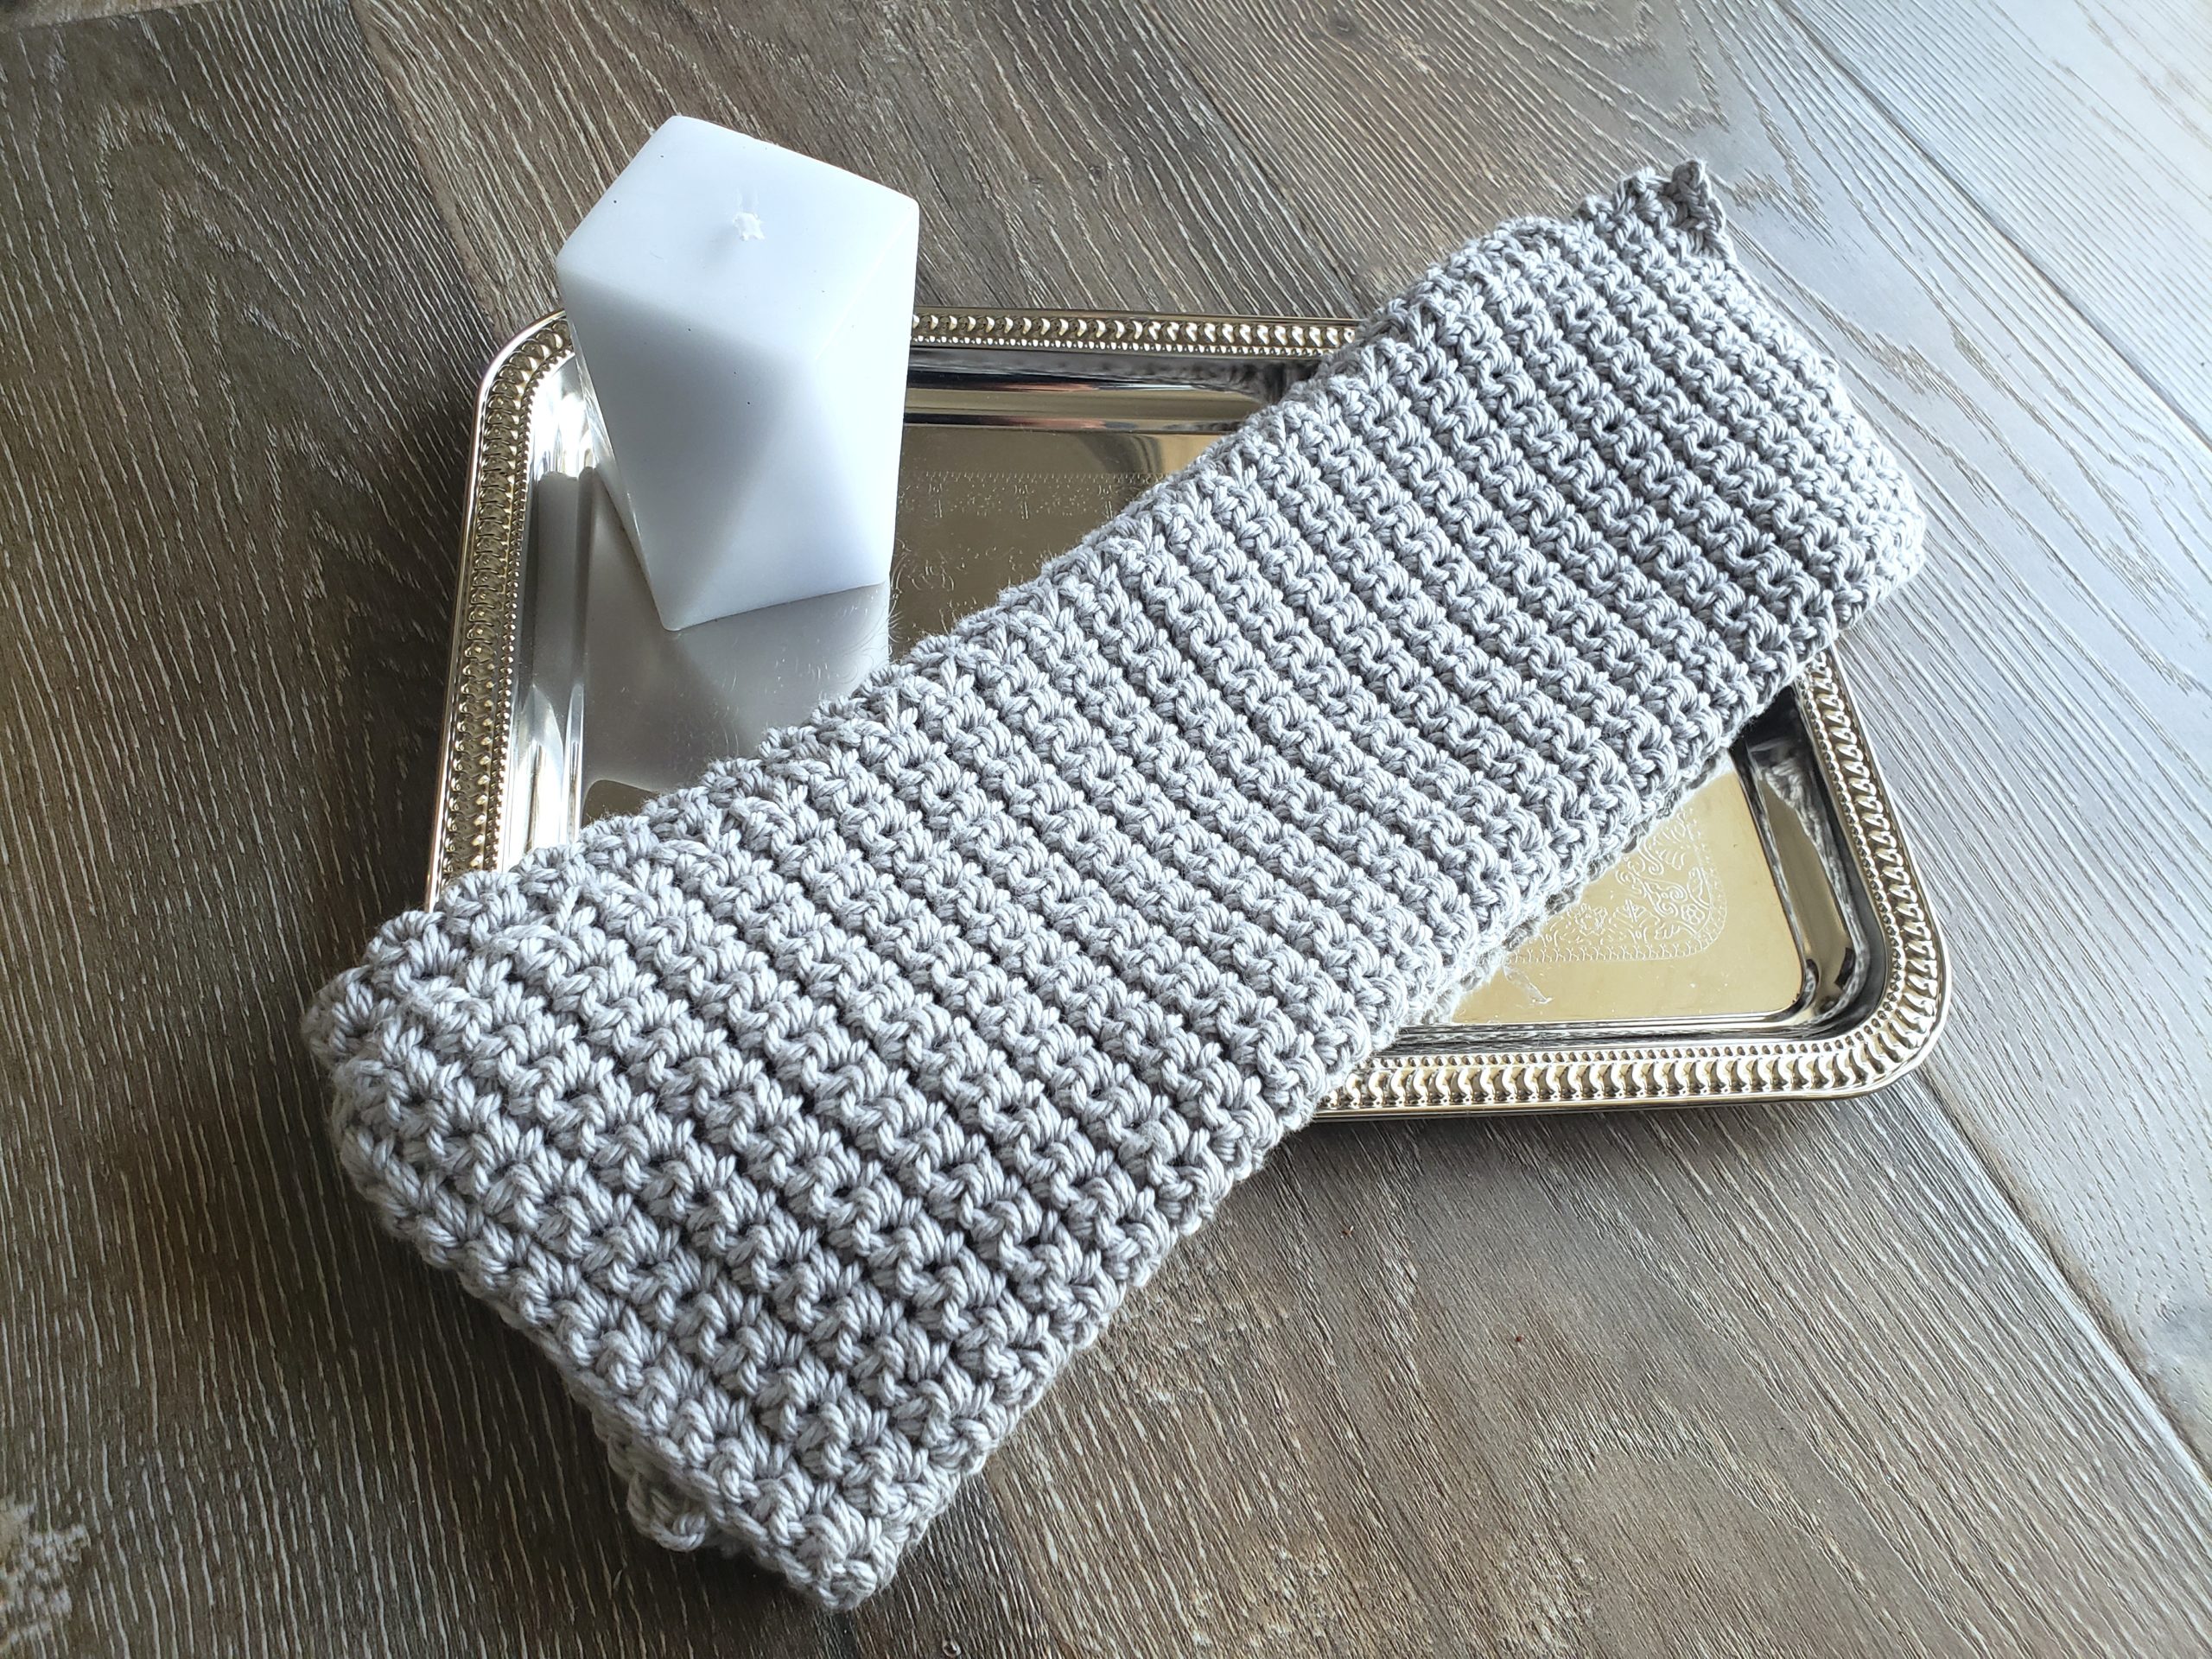
Handmade washcloths are the perfect project for beginner crocheters. They don’t take up too much time, can be completed with one type of stitch and they are forgiving if you make mistakes! This easy beginner’s crochet washcloth pattern features the single crochet stitch and looks elegant.
This free crochet pattern comes together quickly and has a lovely texture that is great for washing dishes or exfoliating your face. With 100% cotton yarn it is completely eco-friendly and gentle enough to use on the skin.

What Makes a Beginner’s Crochet Pattern Easy?
Crochet patterns that feature medium worsted yarn and minimum stitches are great for beginner crocheters. Medium-weight yarn is easy to work with because it isn’t too thin. The other great thing about this pattern is that it uses just one stitch!
All you need to know is the single crochet stitch. I love using the single crochet stitch as it’s easy, comes together fast and the end result looks so sophisticated. This beginner-friendly crochet pattern is a square washcloth which also makes it easy to work with.
These washcloths can also be used as dishcloths and are made of 100% cotton yarn. Cotton is absorbent, a key element needed when making projects that will consistently get wet.
How to Use Your Finished Crochet Washcloths
These washcloths work up pretty fast, I finished one in under 2 hours. You can use them for yourself or gift them to friends and family in spa gift sets. They are completely eco-friendly and plant-based.
I am obsessed with washcloths and have many in various sizes. There’s something so special about handmade washcloths. The first one I ever made, my husband was shocked that it didn’t come from a store. Great compliment!
You are welcome to sell any finished products. I would appreciate pattern credit if you do so. You cannot sell this pattern as your own.
Easy Beginner’s Crochet Washcloth Pattern: Featuring Single Crochet Stitch

Supplies:
1 skein 100% Medium Worsted Cotton Yarn (I used I Love This Yarn from Hobby Lobby in Dove)
I9 Crochet Hook
Stitch Markers
Needles to weave ends
Scissors
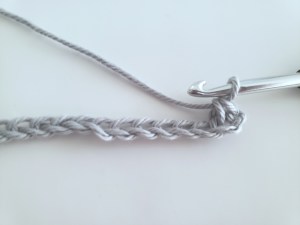
Stitch:
Single Crochet (SC):
Insert hook into stitch, yarn over, and pull through stitch (2 loops on hook). Yarn over and pull through both loops.
Here’s a video tutorial on how to crochet the single crochet stitch.
Finished Dimensions:
12 in x 12 in
Notes:
- The pattern is written in US terms.
- Chain 1 at the start of a row does not count as a stitch. It is there for structural purposes. Always place your stitch in the first stitch.
- This crochet washcloth pattern will end up being 12 in 12 in. If you would like a smaller or larger size, add or decrease the number of chains in your foundation. Just make sure to use an even number of chains.
- Guage is not important for this pattern. You can use a ruler to check your dimensions as you work if you need to.
Instructions:
Foundation: Tie a slip knot and chain 41.

Row 1: 1 Single Crochet (sc) in 2nd chain from hook. Repeat 39 more times (40 stitches)

Row 2: Chain 1 and sc into the first stitch. Place a stitch marker if needed. Repeat 39 times (40 stitches)

Row 3 – 50: Repeat Row 2 instructions.

Fasten off and weave in ends.
To weave in ends:
Thread your end yarn through a needle.

Insert the needle through 6-8 stitches. Pull through.

Skip the first strand of the stitch and insert the needle in the opposite direction through 6-8 stitches. Pull through.


Cut the yarn.

There you have it, an easy beginner’s crochet washcloth pattern that will leave you with a super cute washcloth! For care instructions follow the notes that come with the yarn.
Did you make this pattern? Tag me and show me your creations. I’d love to see them! Instagram: @By.Bindi