Have you seen those cute personalized vinyl decals and thought, “Hey, I want to try to make this at home?”
Well, you can with this beginner-friendly DIY guide!
Personalizing items is so much fun! It’s probably one of my favorite DIY Cricut projects. In this free tutorial, you’ll learn how to make personalized vinyl decals with Cricut that you can use to decorate any item you want!
Why should you make personalized vinyl decals?
You can use these name decals to personalize coffee mugs, wine glasses, and much more! They are great for jazzing up drinkware in your home. This past new year’s I made my own 2021 champagne flutes and didn’t have to buy them!
They’re also great for bachelorette and wedding DIY projects. Creating custom gifts is so easy.
Personally, I also sell these on my Etsy store and I have sold many of these worldwide.
What are you waiting for? Let’s get started!
This post contains affiliate links. If you use these links to buy something I may earn a commission. Thanks!
How to Make Personalized Vinyl Decals With Cricut
Supplies List:
Vinyl
There are many types of vinyl out there and what you use will change based on your project. I use Oracle 651 for my permanent vinyl projects and Oracle 631 for temporary vinyl. These types of vinyl work with hard surfaces such as glass.
Oracle 651 brand is great to work with and it can be used outside as well. For this tutorial, I used Oracle 651 in gold.
Note: Oracle 651 is not an iron-on vinyl. This won’t work with T-shirts and fabric.
Transfer Tape
Transfer tape is used to remove your personalized vinyl decal from its carrier paper to help you transfer it to your project surface.
A weeder is used to help you remove the excess bits from the carrier paper.
Notes:
When you first start out with creating your personalized vinyl decals in Cricut, you want to stick to clear legible fonts and larger sizes. As you get more comfortable, you can move to a cursive font. This is because smaller fonts and scripts are delicate and harder to weed. It requires more expertise and patience.
Instructions:
Open a new project in Design Space:
Click the text box from the left-hand panel:

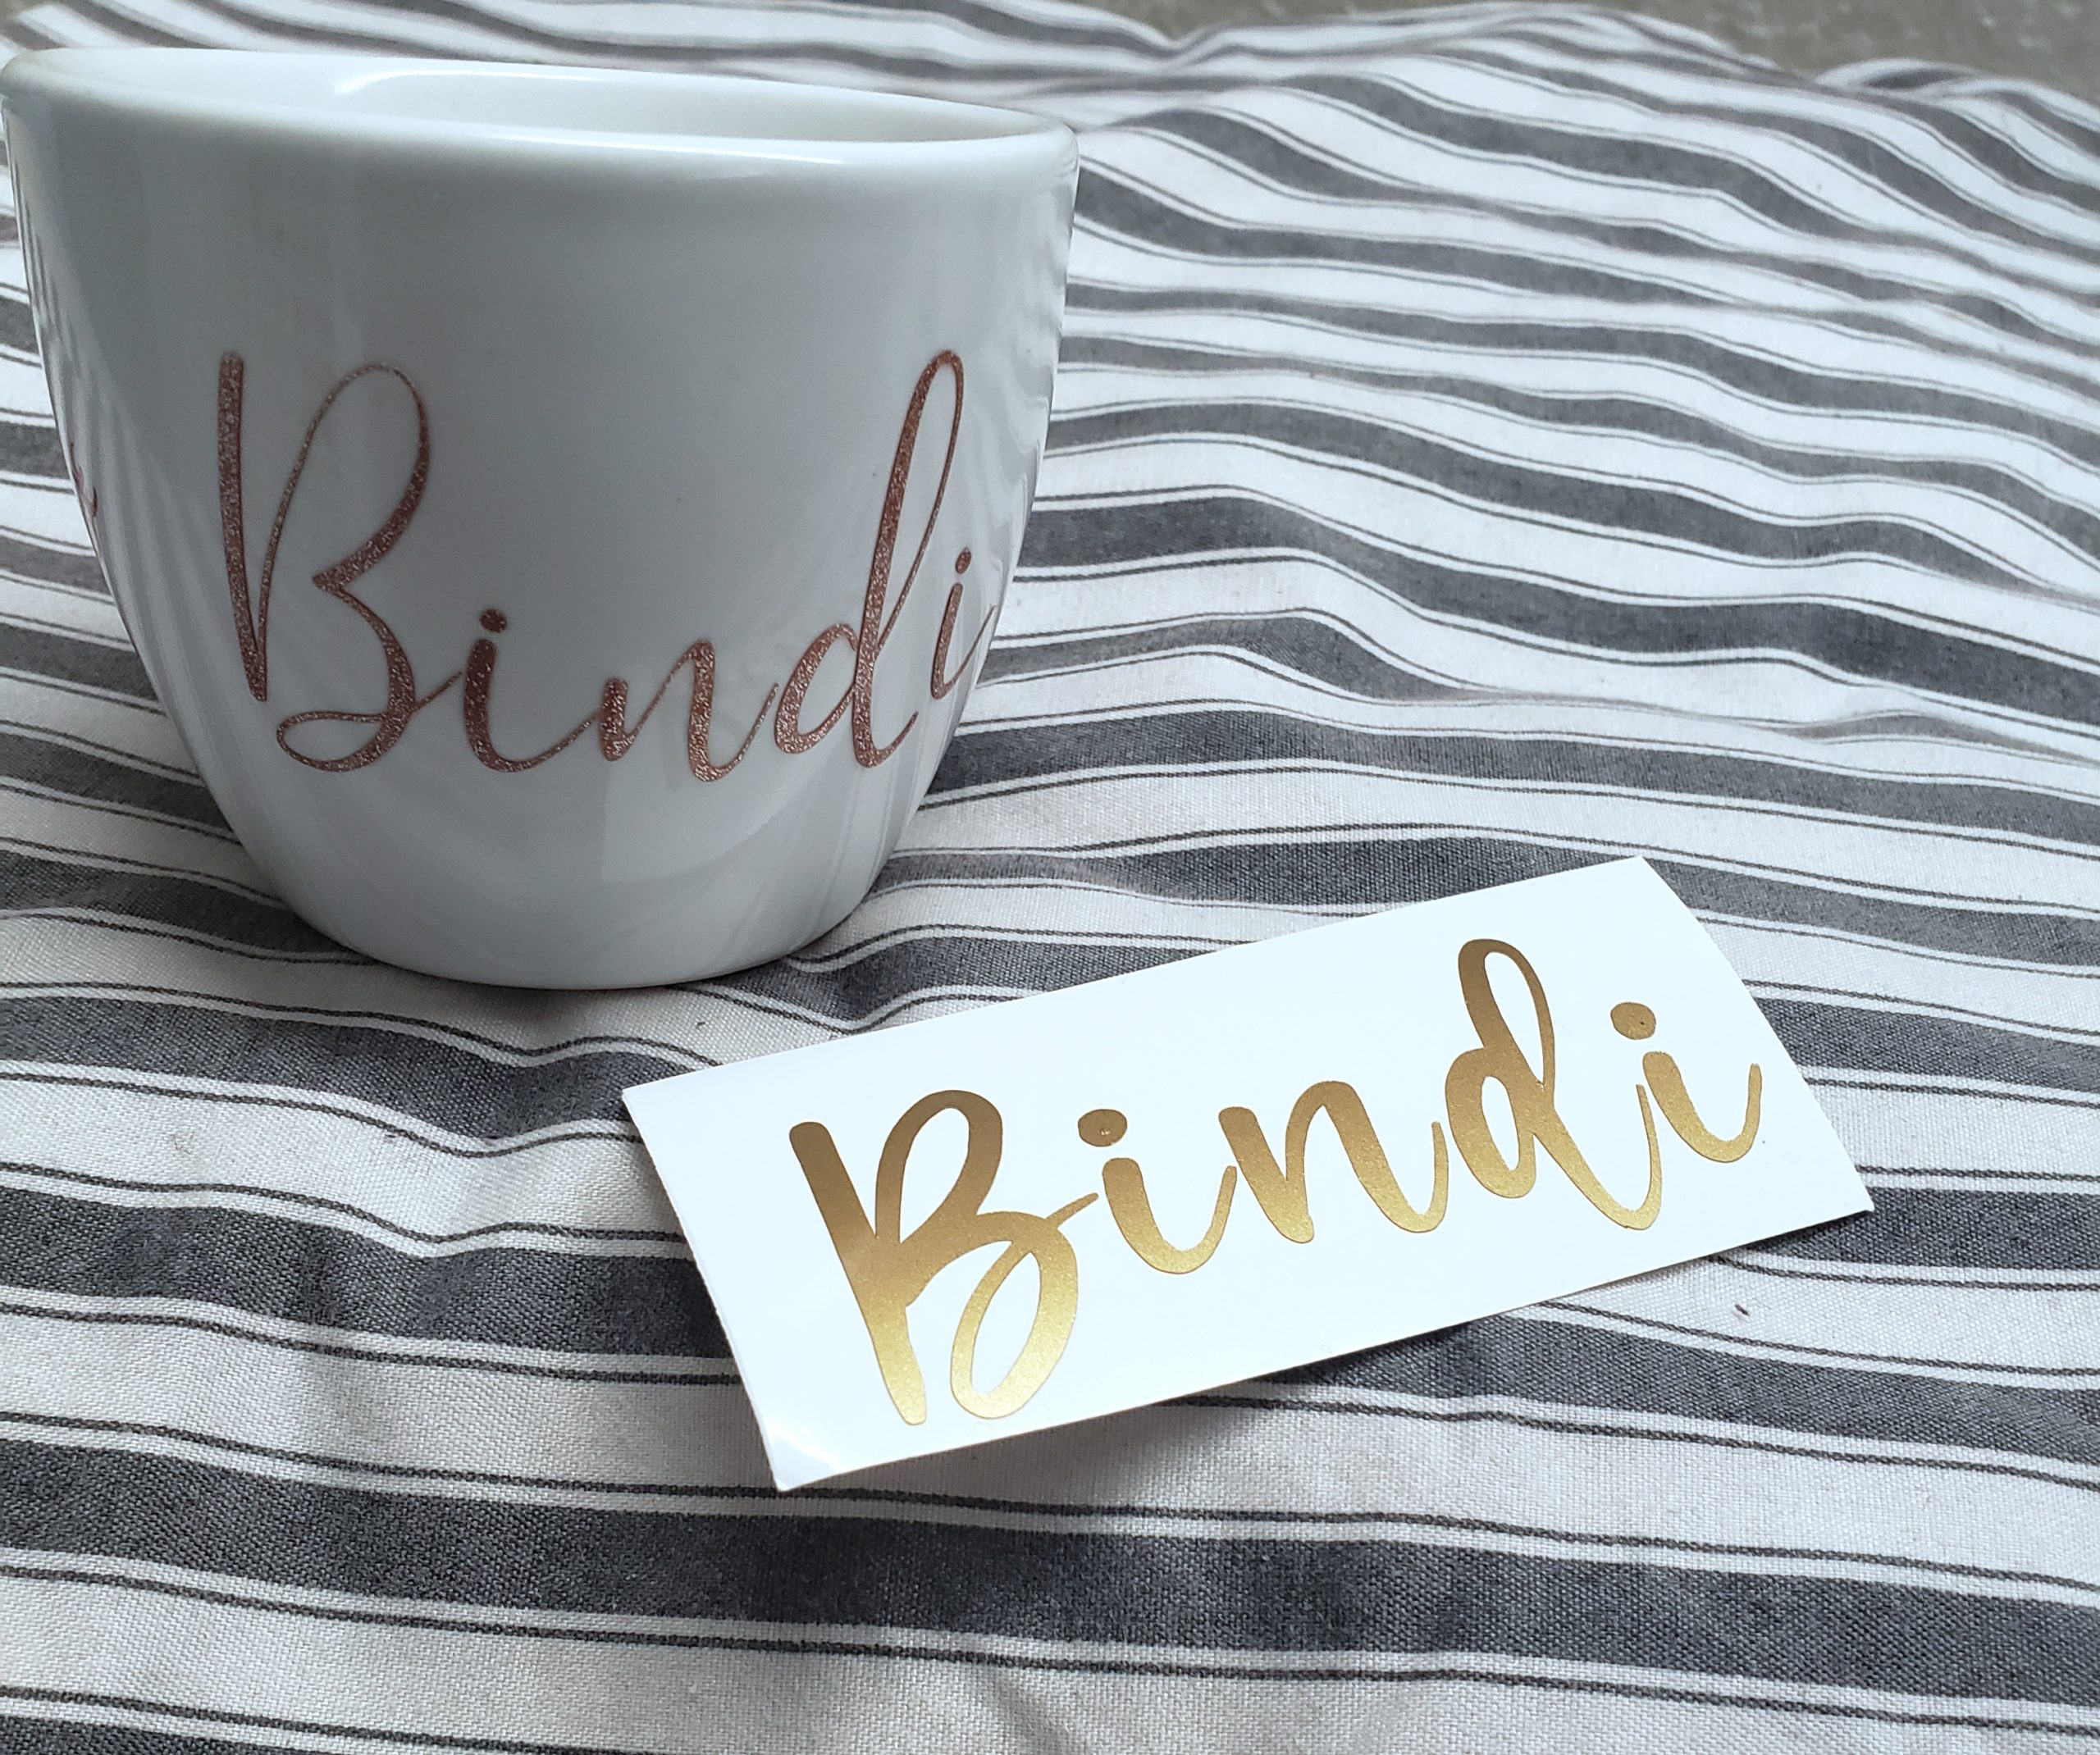
Write your desired name. For this tutorial, I’m using my name (Bindi).

Change font in the top panel. For beginners, first, start with an easy thick font. Once you get comfortable with the process, you can experiment with other fonts. I chose Arial and Bold for style.

Next, we will change our size. 3 inches width is the smallest size you should go with as a beginner. Note that if your name is long, it will appear smaller as it will have less height than a shorter name. Here are some examples of how names change based on character length. It’s important to take this into account when you are determining the width size.

Here is the name Alexandra with a width of 3 inches. You can see it’s a much smaller font to make it fit.

Once you have your text the size and font you want, set the color to match your vinyl. I changed mine to gold.

Select Make it in the right corner.

On the next page choose the size of your vinyl. Mine is 12 x 12. Move to next page.

Change the dial on your Cricut to Vinyl.
Load your mat and hit the flashing C to cut your project.
Once Cricut finishes. Cut the name from the sheet of vinyl and start weeding.
How to Weed a Vinyl Decal:
Using your weeder, carefully lift the edges of the vinyl up. Use the weeder to help peel away the excess material.
Troubleshooting
Sometimes, you may see some cutting problems with Cricut depending on the type of vinyl you use.
I have had issues with Paper Studio and Glitter vinyl not cutting through because they are thicker. In these instances, you will need to experiment.
You can increase the cut pressure by selecting custom on your dial and browse materials.

Play around with the settings and add multi-cut if needed.

I’ve also found success with the Iron-On setting.
When you are ready to apply to a surface, apply transfer tape to the decal.
Vinyl Application Instructions:
- Clean the application surface area with alcohol or soap & water. Dry thoroughly.
- Using a squeegee or credit card, press firmly on the back of decal to ensure that the decal sticks to the application transfer paper (clear tape).
- Peel the paper backing away from the decal very slowly. If the decal is still on the carrier paper, using credit card again to firmly rub until decal lifts on to transfer paper completely. Go slow and press firmly from all directions.
- Apply decal to cleaned and dry area, pressing firmly using squeegee or credit card to adhere decal to application surface. Be sure to go slowly to avoid any bubbles. It’s best to start pressing from the center outward.
Vinyl Decal Aftercare and How to Seal Your Vinyl Decal:
Please note that your item after the vinyl application is NOT microwave or dishwasher safe. You can handwash your items for maximum longevity.
If you would like your vinyl decal surfaces to be microwave and dishwasher safe, there are some things you can do to seal the vinyl.
- Epoxy Resin:
- This is one of the more popular methods to seal vinyl. Vinyl stays put and resin keeps the decal’s vibrant colors.
- The downside is that epoxy resin is toxic and very tough to handle. Using this method requires a lot of preparation and time. Follow proper instructions and make sure to use gloves and a ventilating respirator mask to avoid breathing fumes.
- This tutorial is a great resource if you’re looking to use this method.
- Mod Podge:
- Mod Podge is dishwasher and microwave safe is used to paint over your decal surface.
- This sealant is water-based so it is non-toxic.
- Spray Sealant:
- A spray sealant helps with building an even coating on your surface. You’ll need a liquid polyurethane spray.
- Use in a well-ventilated area and wear proper masks.
- This is a good sealant spray.
- Crystalac Brite Tone:
- This is a great epoxy alternative as it’s non-toxic.
- It goes on in thin layers so it can take time to build-up to the thickness you like.
Hope you enjoyed this step-by-step guide to make personalized vinyl decals with Cricut. How did your decals turn out? Comment below or tag your photos on Instagram – @By.Bindi. I would love to see your creations.