Posted on 6 Comments

17 Inspirational Self-Love Quotes to Improve Mental Clarity and Confidence

Inspirational Self-Love Quotes

February is the month of love. While we categorize couple’s in love and basking in Galentine’s love, we also need to make time for self-love. Making yourself a priority will help you be the best version of yourself, leading to a happier and healthier life experience.

I’ve gathered these 17 inspirational self-love quotes to help improve mental clarity whenever you need a little pick me up. 

Inspirational Self-Love Quotes

How Can Self-Love Quotes Inspire You? 

Practicing self-love improves your self-esteem and mental clarity. Often, we are our own worst critics. The toxic things we say in our minds about ourselves, we never would dare utter to another person. 

You work hard and spend time thinking about everyone around you. It’s important to take time out of your day to celebrate yourself and your accomplishments. 

Quotes are great reminders to be kinder to ourselves. Ways to use self-love quotes: 

  • Pin them to your phone for easy access. You’ll be able to look at them on the go whenever you need a little self-love reminder. 
  • Print them out or write them down on a sticky pad. Place the quotes around your home where you will come across them: bathroom mirror, fridge, and nightstand. 
  • Share your favorite ones with friends and spread self-love. 
  • Create a collage of quotes and make a piece of wall art. 

Inspirational Self-Love Quotes

17 Inspirational Self-Love Quotes to Improve Mental Clarity and Confidence:

1.) “No one can make you feel inferior without your consent. ” Eleanor Roosevelt

Inspirational Self Love Quote, No one can make you feel inferior without your consent Eleanor Roosevelt

We can’t control what others around us say to us or about us. However, we have the ultimate control over our reaction. We can choose to respect ourselves and know our worth. Your self-confidence comes from within and isn’t tied to others. You have every right to be yourself, unapologetically. 

2.) “Be your own reason to smile”

inspirational self love quote, be your own reason to smile

Often, we bend over backward to make others happy and attach our own happiness to those around us. Find your purpose and reason to smile. It can be as simple as a chocolate cake or a stroll through a park. When you are content with yourself, you will be able to radiate these positive vibes into other aspects of your life. 

3.) “To love oneself, is the beginning of a lifelong romance” Oscar Wilde

Inspirational Self Love Quote, To love oneself is the beginning of a lifelong romance Oscar Wilde

When was the last time you took yourself on a “me” date and enjoyed your own company? If the pandemic has taught us anything, it’s that we have to rely on ourselves. We are more than enough to entertain ourselves. When we give ourselves permission to have fun alone, we strip away all of the societal barriers. There is no judgment. 

4.) “You, yourself, as much as anyone in the entire universe, deserve your love and affection.” Buddha

inspirational self love quotes, you yourself as much as anyone else in the universe deserve your love and affection, Buddha

Give yourself the abundant love you shower onto others around you. Show yourself kindness when you are struggling and champion your achievements when you succeed. Daily affirmations of self-love will build you up and give you a foundation when you are tackling tough times. 

5.) “Forgiveness is a gift you give yourself.” Maya Angelou

inspirational self love quotes, forgiveness is a gift you give yourself, Maya Angelous

Forgive what happened in the past. The most you can do is learn from your mistakes and move on from them. Give yourself room for growth. It’s okay to make mistakes. We are human after all and no one is perfect. When you continue to beat yourself up, you will only live in pain. 

6.) “Beauty begins the moment you decided to be yourself.” Coco Chanel

You never need to fill anyone’s expectations. Be yourself and you will shine. Only we determine what we are worth and when you believe you are beautiful and extraordinary, no one can take that away from you. 

7.) “Believe you can and you’re halfway there.” Theodore Roosevelt

TheTheodore Roosevelt Self Love Quote

Rather than coming up with all the ways you will fail, come up with all the ways you will succeed. The only one holding yourself back is you and when you let yourself believe in your skills, the sky is the limit. You can and will achieve your dreams and no one will stand in your way. 

8.) “Low self-esteem is like driving through life with the hand brake on.” Maxwell Maltz

When you don’t believe in yourself and think you aren’t good enough, you go through life with a fog. You miss out on all the things that could bring you joy and happiness. By simply letting yourself be yourself and asserting you are enough, you allow yourself to move forward in life. The boundaries and barriers that hold you back will disappear and you will be freer. 

9.) “How you love yourself is how you teach others to love you” Rupi Kaur

Set the bar high for yourself and treat it as the gold standard. You are worth respect and proper love. When you elevate your worth, you automatically shun those who could hurt you. If others around you don’t treat you the way you need to be treated, cut them out. You will attract good loving people when you take care of yourself. 

10.) “I am more than my scars.”

We tend to quantify our self-worth with our failures and successes. We are much more than that. The pain and hurt of your life are only a part of who you are. There is much more to you as a person. Explore what makes you, you, and celebrate who you are. Everyone has flaws and that is what makes us unique. 

11.) “Never allow someone to be your priority while allowing yourself to be their option.” Mark Twain

This quote applies to both personal relationships and friendships. If you find yourself going above and beyond for people who only come to you when they’re in trouble, rethink the relationship. There are plenty of people out there who will appreciate you. Grow and nurture these relationships. You should never be just an option to someone. 

12.) “The more you love yourself, the less nonsense you’ll tolerate.”

When you know your worth, you are less likely be pushed around. Take the time to appreciate you are and don’t settle for anything else than what you deserve. 

13.) “Happiness is an inside job.”

Don’t ever attach your happiness to someone else. Many times you hear someone say I’ll be happy when I am in a relationship, have money, have XYZ. While these things are important, they do not equate to true happiness. True happiness comes when you let yourself be who you are and accept that you are amazing with or without material things. 

14.) “My imperfections make me unique and special.”

We are all flawed humans. No one is perfect. It’s our unique qualities that make us stand out in the crowd. Own who you are. There is no such thing as normal and that is completely okay. 

15.) “To love who you are, accept your experiences.”

The good, the bad, and the ugly made you who you are today. Your experiences, good or bad shape you. Accept them, acknowledge them, and know that they made you into an incredible person. 

16.) “The greatest lesson in life is that you are responsible for your life.” – Oprah Winfrey

While we cannot control what life throws our way, we do control our responses and actions in life. We choose how to react. When we take control of our lives regardless of what comes our way, we become stronger. You have the power to take on anything. 

17.) “You alone are enough, you have nothing to prove to anyone.” – Maya Angelou

Live life on your terms and be confident in yourself. You are completely fine the way you are. You don’t need to change to fit someone else’s mold. 

These 17 inspirational self-love quotes are here to help improve your mental clarity when you feel low. They will comfort you and show you that you are a strong and capable person. When you believe in your light, others can’t help but see how great you are.

And, if they can’t, then they don’t deserve your light!
 

Posted on Leave a comment

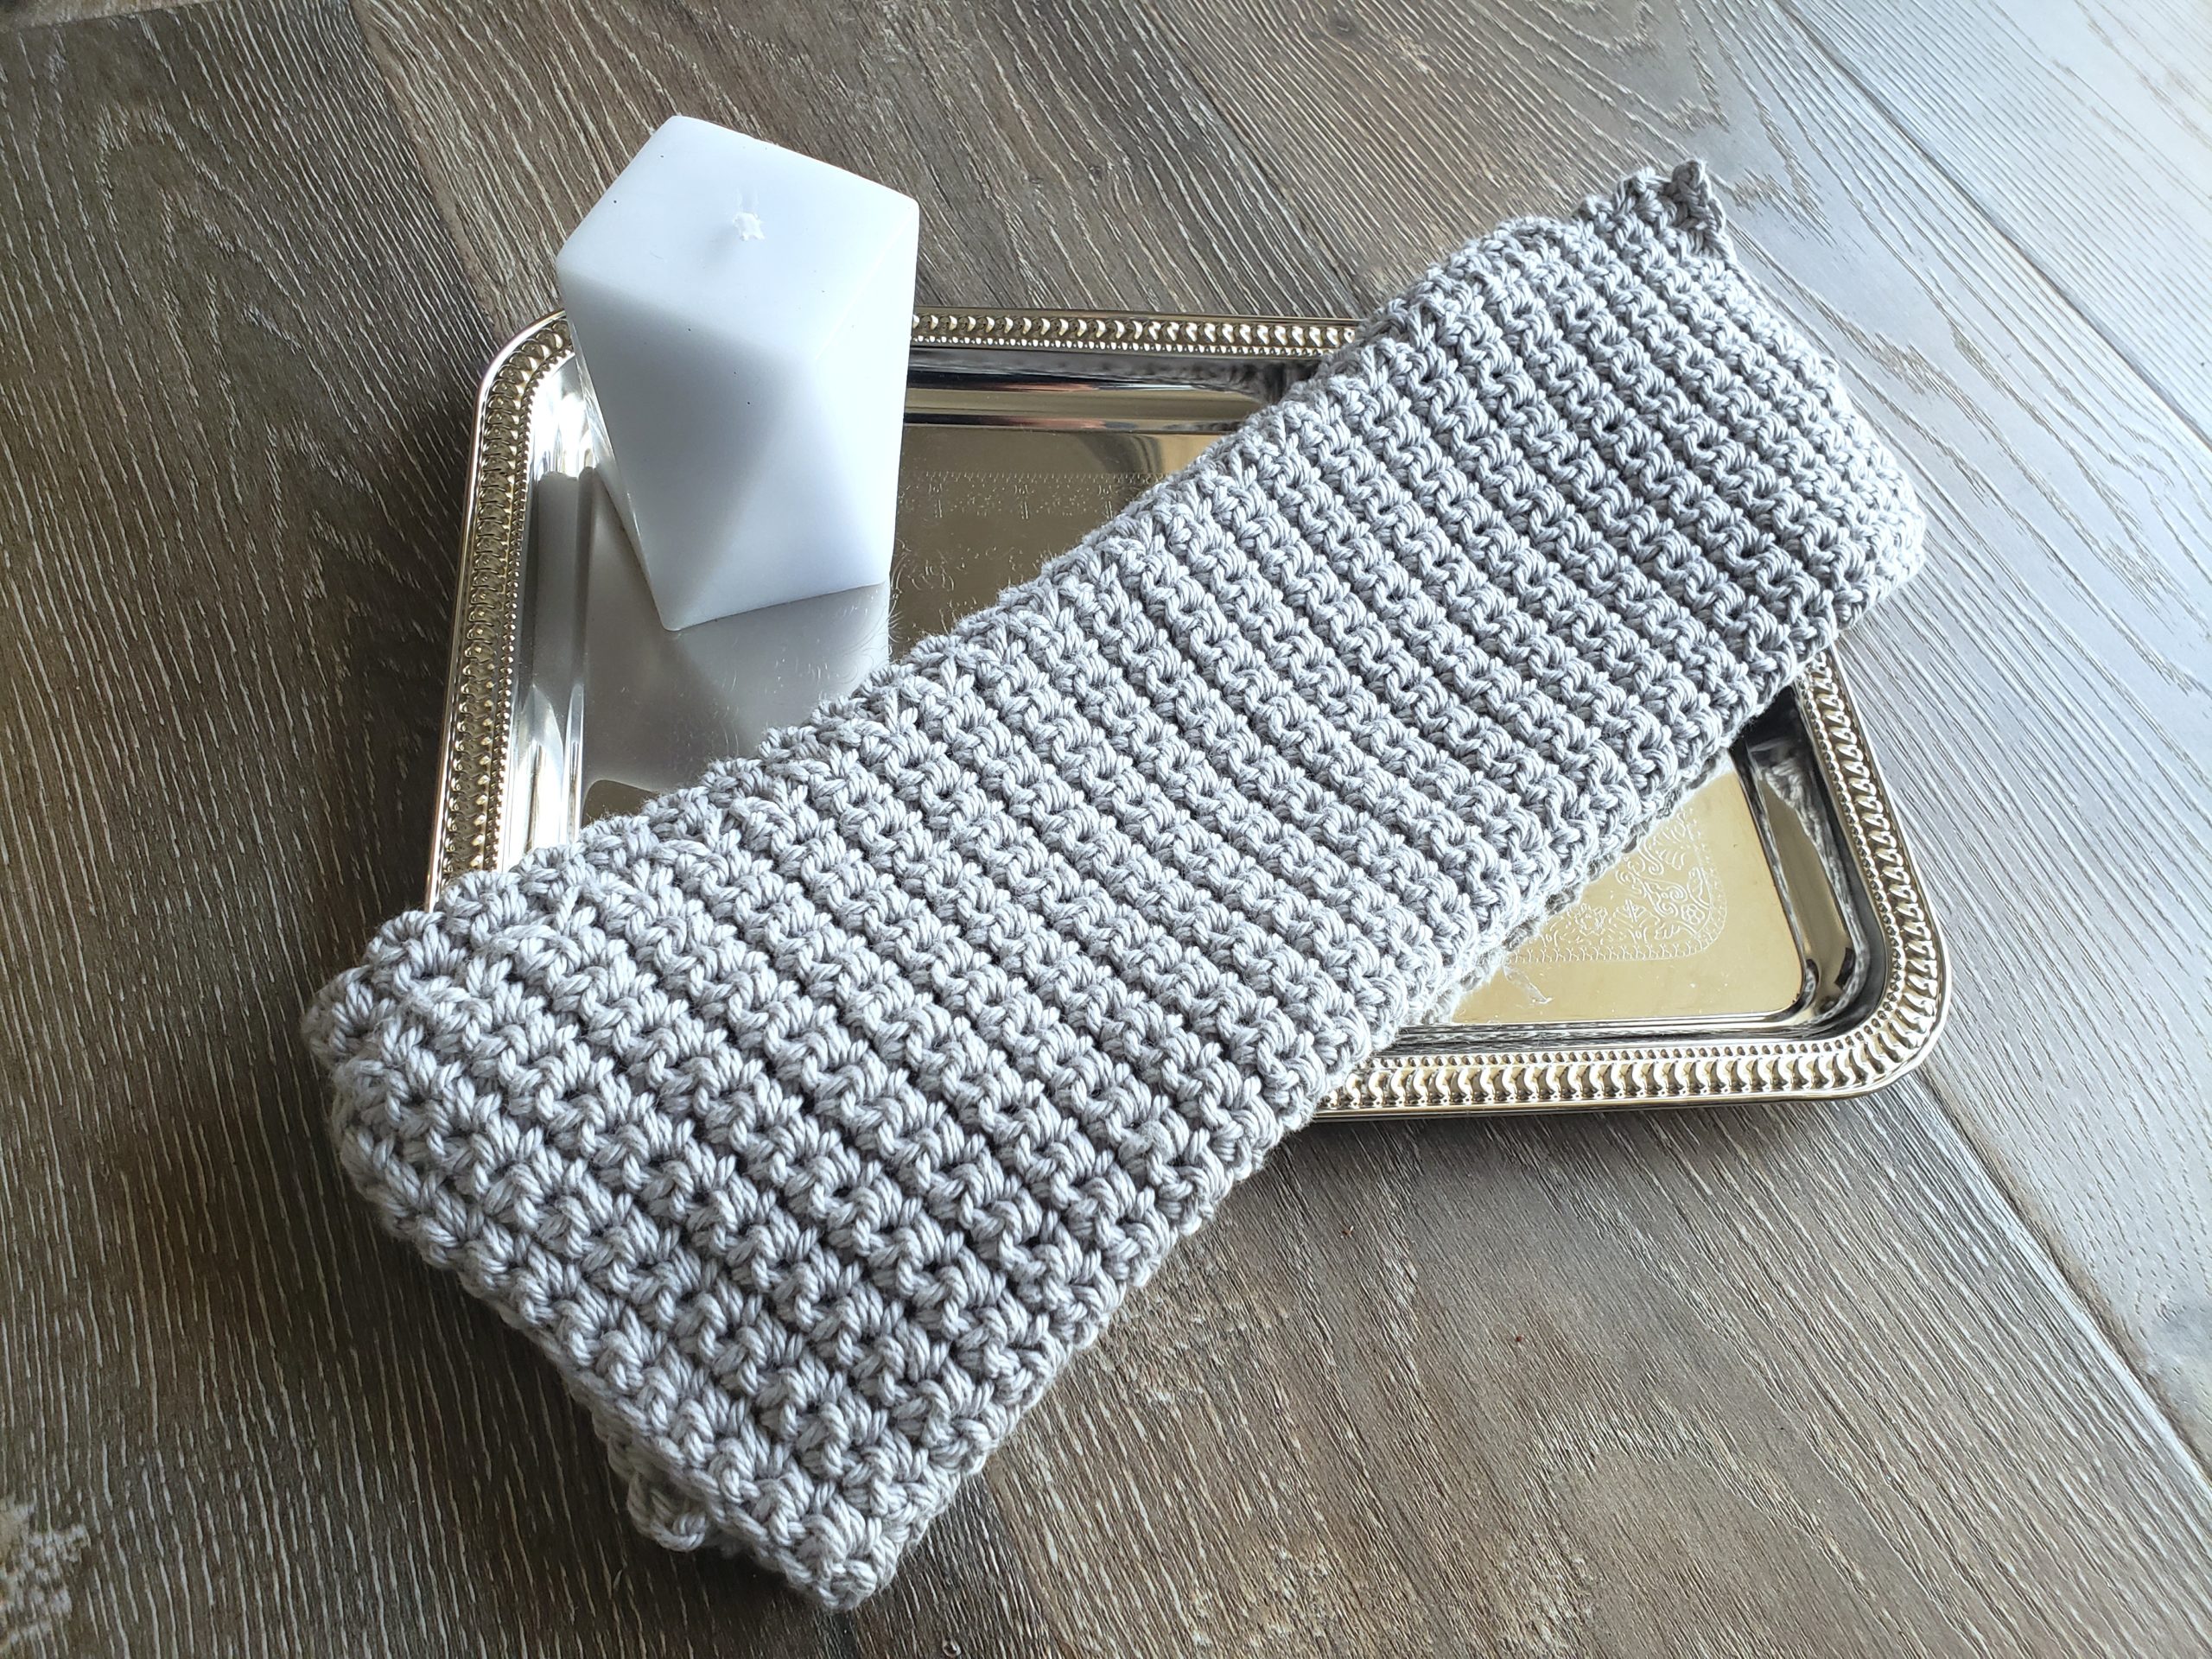
Easy Beginner’s Crochet Washcloth Pattern: Featuring Single Crochet Stitch

Handmade washcloths are the perfect project for beginner crocheters. They don’t take up too much time, can be completed with one type of stitch and they are forgiving if you make mistakes! This easy beginner’s crochet washcloth pattern features the single crochet stitch and looks elegant. 

This free crochet pattern comes together quickly and has a lovely texture that is great for washing dishes or exfoliating your face. With 100% cotton yarn it is completely eco-friendly and gentle enough to use on the skin. 

What Makes a Beginner’s Crochet Pattern Easy? 

Crochet patterns that feature medium worsted yarn and minimum stitches are great for beginner crocheters. Medium-weight yarn is easy to work with because it isn’t too thin. The other great thing about this pattern is that it uses just one stitch!

All you need to know is the single crochet stitch. I love using the single crochet stitch as it’s easy, comes together fast and the end result looks so sophisticated. This beginner-friendly crochet pattern is a square washcloth which also makes it easy to work with. 

These washcloths can also be used as dishcloths and are made of 100% cotton yarn. Cotton is absorbent, a key element needed when making projects that will consistently get wet. 

How to Use Your Finished Crochet Washcloths

These washcloths work up pretty fast, I finished one in under 2 hours. You can use them for yourself or gift them to friends and family in spa gift sets. They are completely eco-friendly and plant-based. 

I am obsessed with washcloths and have many in various sizes. There’s something so special about handmade washcloths. The first one I ever made, my husband was shocked that it didn’t come from a store. Great compliment!
You are welcome to sell any finished products. I would appreciate pattern credit if you do so. You cannot sell this pattern as your own. 

Easy Beginner’s Crochet Washcloth Pattern: Featuring Single Crochet Stitch

Supplies: 

1 skein 100% Medium Worsted Cotton Yarn (I used I Love This Yarn from Hobby Lobby in Dove)

I9 Crochet Hook

Stitch Markers

Needles to weave ends

Scissors

Stitch: 

Single Crochet (SC):

Insert hook into stitch, yarn over, and pull through stitch (2 loops on hook). Yarn over and pull through both loops. 

Here’s a video tutorial on how to crochet the single crochet stitch. 

Finished Dimensions: 

12 in x 12 in

Notes: 

  • The pattern is written in US terms. 
  • Chain 1 at the start of a row does not count as a stitch. It is there for structural purposes. Always place your stitch in the first stitch. 
  • This crochet washcloth pattern will end up being 12 in 12 in. If you would like a smaller or larger size, add or decrease the number of chains in your foundation. Just make sure to use an even number of chains. 
  • Guage is not important for this pattern. You can use a ruler to check your dimensions as you work if you need to. 

Instructions: 

Foundation: Tie a slip knot and chain 41. 

Crocheting for Beginner's, How to Make a Slip Knot

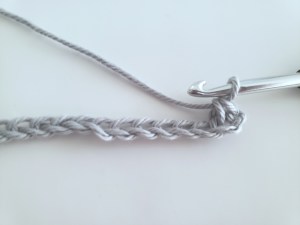
Row 1: 1 Single Crochet (sc) in 2nd chain from hook. Repeat 39 more times (40 stitches)

Crocheting for Beginner's, How to Make a Slip KnotCrocheting for Beginner's, How to Make a Slip Knot

Row 2: Chain 1 and sc into the first stitch. Place a stitch marker if needed. Repeat 39 times (40 stitches)

Crocheting for Beginner's, How to Make a Slip Knot

Row 3 – 50: Repeat Row 2 instructions. 

Fasten off and weave in ends.

To weave in ends: 

Thread your end yarn through a needle. 

Insert the needle through 6-8 stitches. Pull through. 

Skip the first strand of the stitch and insert the needle in the opposite direction through 6-8 stitches. Pull through. 

Cut the yarn. 

There you have it, an easy beginner’s crochet washcloth pattern that will leave you with a super cute washcloth! For care instructions follow the notes that come with the yarn. 

Did you make this pattern? Tag me and show me your creations. I’d love to see them! Instagram: @By.Bindi

Posted on 3 Comments

A Beginner’s Guide to Crocheting: How to Make a Slip Knot

Crocheting for Beginner's, How to Make a Slip Knot

Did you start crocheting recently? Have you come across a slip knot in a crochet pattern? If so, you might be wondering how to make a slip knot. In this beginner’s crochet tutorial with easy-to-follow pictures, you’ll learn everything you need to start your project.  

If you’re someone who needs a visual, there’s also a video to follow along with as well!

A slip knot is a fundamental element when starting any crochet project and it’s very easy to master for beginners.

What is a Slip Knot?

A slip knot is used to create the first chain of your project. 

When my mom taught me to crochet almost 20 years ago, she did not teach me the slip knot. I would just tie a loop and cast it on the hook.  Needless to say, this left my early projects looking pretty uneven. 

You live and learn, right?

Why use a Slip Knot in Your Crochet Projects?

Slip knots make it easy to adjust the knot to the hook.  You call pull and tighten without the worry of the knot tightening completely. This helps keep your starting chains even. 

A slip knot also sets a good rhythm for your crochet project. The first building block that will lead to a great finished piece!

A Beginner’s Guide to Crocheting: How to Make a Slip Knot:

This post contains affiliate links. If you use these links to buy something I may earn a commission. Thanks!

Supplies:

Crochet Hook

Yarn 

Notes: 

For this tutorial, I used an I9 crochet hook and medium worsted acrylic yarn.  When you are a beginner crocheter, it’s easier to work with yarn that is cheaper and a little thicker. It’s more forgiving.

If you don’t have a crochet kit, this is the one I use.  It has many hooks in various sizes and comes with a cute pouch. I love it because it has everything I need ready to go and keeps me organized. 

Instructions:

Leave 6-8 inches of yarn tail and make a loop around your finger with the yarn. 

How to Make a slip knot pretzel method

Take your yarn tail and throw it across the loop on your finger.

how to make a crochet slip knot for beginners

From behind, bring the yarn tail to the right side. You will form a pretzel. 

Insert crochet hook through the yarn in the middle of the pretzel and pull up. 

Tighten as needed. 

Congratulations! You’ve completed a crochet slip knot.  

I hope you found this beginner’s guide to crocheting helpful. Now that you know how to make a slip knot,  you’re on your way to making all the crochet pieces!

Posted on 3 Comments

5 DIY Natural Lip Scrub Recipes with Essential Oils

5 DIY Natural Lip Scrub Recipes with Essential Oils

5 DIY Natural Lip Scrub Recipes With Essential Oils

DIY natural lip scrubs are the best.  They exfoliate well, leaving your lips silky soft, and smooth.  And, they are completely non-toxic!

Kissable lips, yes please!

About 5 years ago I started to replace my beauty products with homemade non-toxic versions. I was using too many products that were chemical-laden and became concerned about using better products for my body.

I especially love making lip scrubs at home. As someone who constantly picks at my lips (horrible habit!), they are always chapped and rough. These recipes have saved me many times. 

It’s so easy to make the change to non-toxic living and your body will thank you!

Our body is the only place we get to live in and it’s important we take care and nourish it properly. 

Why Make Natural Lip Scrubs at Home?

Lip scrubs from the store have all sorts of unnatural chemicals that aren’t good for your body.  Store-bought lip scrubs with questionable ingredients are particularly alarming due to the proximity of placing scrubs near the mouth that can be ingested.

Even though the FDA okays these products, it’s better when you know exactly what’s in your scrubs. When making lip scrubs at home, stick with edible ingredients. 

5 DIY Natural Lip Scrub Recipes

Another benefit to homemade lip scrubs is that they are cost-effective.  DIY Natural lip scrubs require minimal ingredients so your initial investment will go a long way.  

Benefits of Using Essential Oils in DIY Natural Lip Scrubs

Essential oils are plant-based ingredients making them great non-toxic alternatives in DIY recipes. Plants have offered humans remedies for centuries. Our ancestors mixed concoctions together at home and we can benefit from their knowledge. 

Non Toxic DIY Lip Scrub Recipe with Essential Oils

Nature gives us so much that can be incorporated into our skincare regimen. 

Essential oils also have multiple benefits so you can experiment and tailor a recipe to meet your exact needs. Do you want radiant lips and tackle anti-aging? Use Frankincense essential oil. Do you want to brighten your lips and make a vibrant smelling scrub? Use lemon essential oil! 

Essential Oil Safety

When you make your own natural lip scrubs with essential oils,  it’s important to note the safety elements.  Essential oils are highly potent and a little goes a long way. 

In this case, too much of a good thing is not better! Always do a patch test to check for any reactions. Experiment to find what works for your skin.  

Research proper dilution ratios. When you use a product often, you’ll want to scale back on how much essential oil you put in your products. Using carrier oils such as coconut oil will help dilute the oils for safe usage. 

Listen to your body. There are many recipes floating around the internet and what works for one person may not work exactly the same for you. Recipes are customizable and use this fact to create something that is safe for your body. 

If you find any discomfort at all, wash off with water and lower the dilution ratio. 

Which Essential Oils Brands Should You Use for DIY Recipes? 

Not all essential oils are created equal. It’s important you do the research on brands and sourcing so you know that you are using pure, undiluted essential oils in your DIY recipes. 

Things to look for when buying essential oils: 

  • They are sourced where the plant is grown
  • They are 100% pure with no fillers or additives

DIY Natural Lip Scrub Recipes with Essential Oils

Reputable Companies: 

  • Young Living Essential Oils (This is the brand I use)*
    • Young living has a seed to seal guarantee and they source their oils from all over the world where the plants are grown in their natural habitat. 
    • Amazing blends are exclusive to this company. 
    • Higher price point due to the company being MLM. 
  • Revive
    • Affordable price point
    • Scents try to mimic Young Living, but sometimes they are “off”. 
    • Oils are 100% pure without additives. 
  • Plant Therapy
    • Affordable price point
    • Sells oils in larger size bottles which is great for commonly used oils such as Lemon. 
    • Products are free from GMOS and they use third-party testing to give consumers in-depth reporting on what is exactly in their oils. 
*If you would like to purchase Young Living oils, you can use my member number: 24512468.

Cheaper is not better. I have tried many, many brands over the years. Cheaper brands can pass when you’re using them strictly for aromatherapy purposes. If you are putting oils on your body, you want to make sure they are pure. 

After all, there’s no point in making a natural lip scrub at home if your key ingredient is tainted with fillers!

This post contains affiliate links. If you use these links to buy something I may earn a commission. Thanks!

Here are 5 DIY Natural Lip Scrub Recipes with Essential Oils

Chapped Lip Scrub Recipe

This recipe is perfect for the wintertime when our puckers get dry and cracked.  No one likes that feeling! Try this recipe out and follow with some coconut oil to seal moisture in.

Lavender is a great all-purpose healing oil. It not only helps to reduce dryness, but it can repair the damage that comes from having chapped lips. 

Diy non toxic lip scrub recipe with Lavender essential oil

Ingredients: 

1 tbsp organic cane sugar

1/2 tbsp organic honey

1 tsp coconut oil

1 drop Lavender essential oil

Lip scrub container

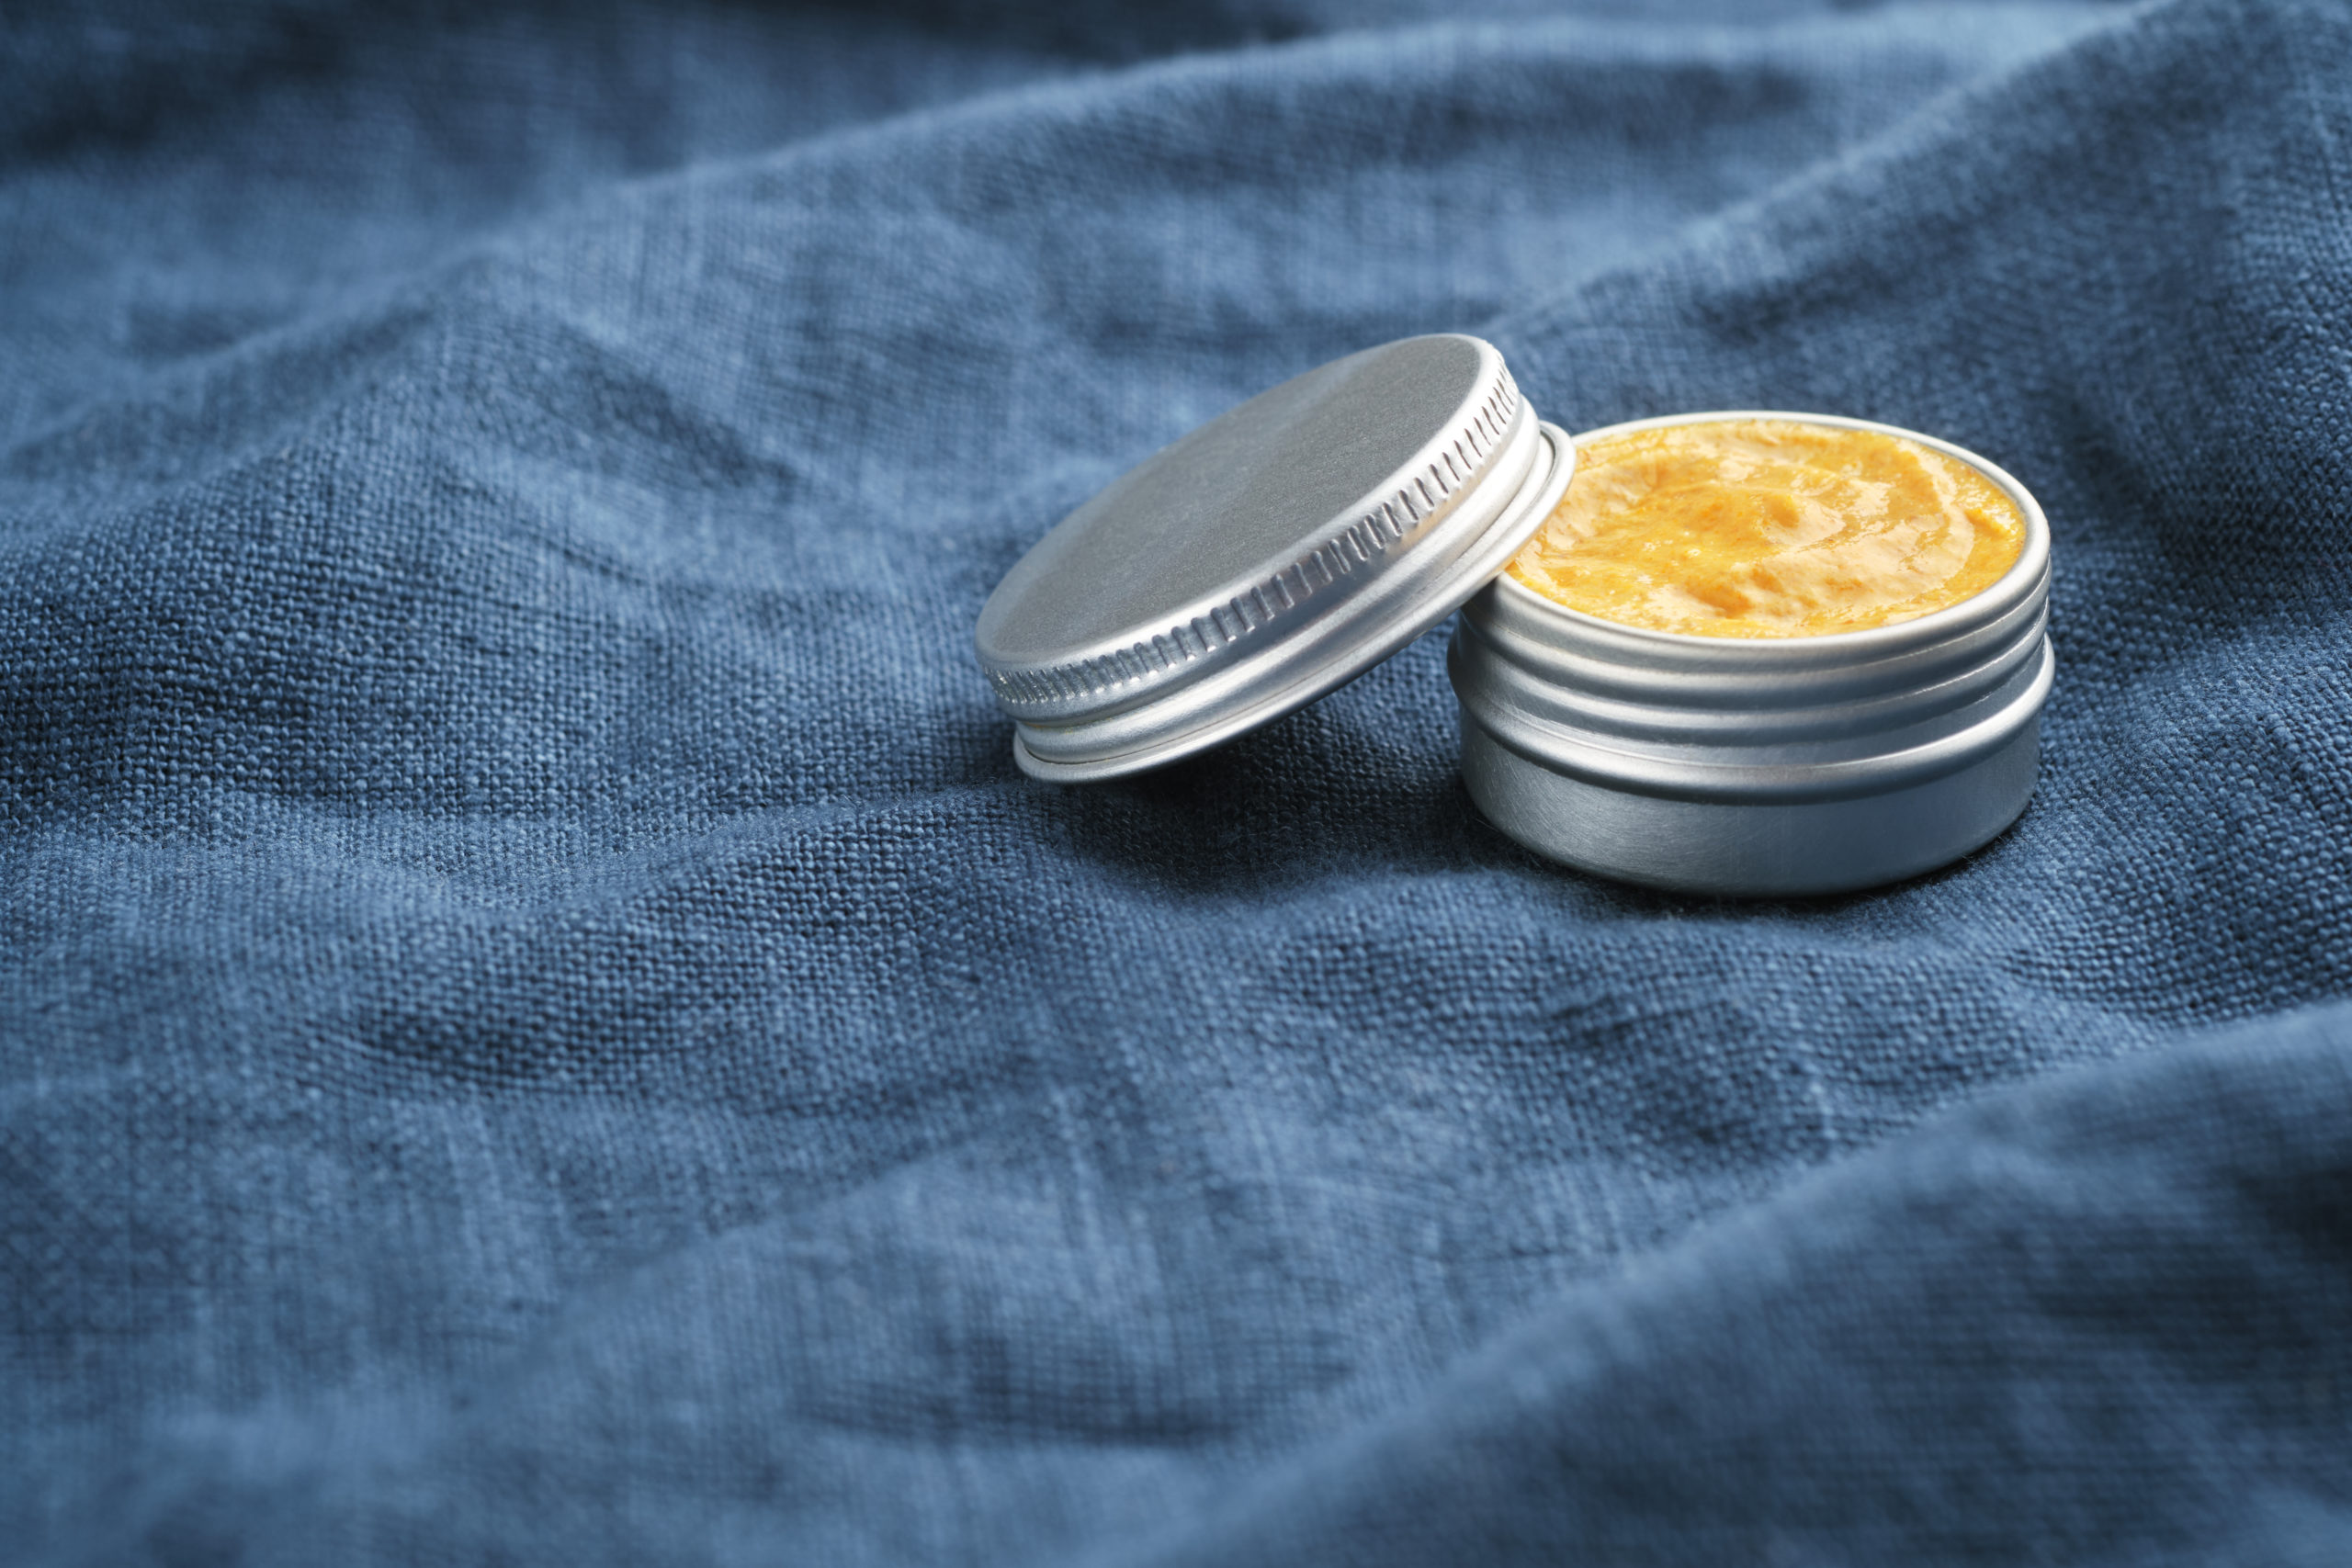
How to make: In a small mixing bowl, mix ingredients together. Transfer to lip scrub container. Store in a dark and cool place. 

Silky Soft Lip Scrub Recipe

Sweet almond oil in this recipe helps alleviate the built-up dead skin cells on your lips and keeps them moisturized for all-around softness that lasts. 

Ingredients: 

1 tbsp organic cane sugar

1/2 tbsp organic honey

1 tsp sweet almond oil

1 drop carrot seed oil

Lip scrub container

How to make: In a small mixing bowl, mix ingredients together. Transfer to lip scrub container. Store in a dark and cool place. 

Glow Lip Scrub Recipe

Daily wear and tear plus environmental effects can dull our lips. UV and sun damage darken our lips over time. If you’re looking to get that radiant glow back on your lips,  this lip scrub recipe is perfect for you.  

Lemon essential oil is a key brightening ingredient, while Geranium adds a lovely floral scent. 

diy recipe for glow lip scrub

Ingredients: 

1 tbsp organic cane sugar

1/2 tbsp organic honey

1 tsp coconut oil

1 drop Lemon essential oil

1 drop Geranium essential oil

Lip scrub container

How to make: In a small mixing bowl, mix ingredients together. Transfer to lip scrub container. Store in a dark and cool place. 

Anti Aging Lip Scrub Recipe 

Do you have wrinkles you want to combat on your lips? This lip scrub is great for tightening our delicate skin. 

Olive oil is rich in omega fatty acids that are great for anti-aging. Frankincense is good at softening wrinkles over time. 

Ingredients: 

1 tbsp organic cane sugar

1/2 tbsp organic honey

1 tsp olive oil

1 drop Frankincense essential oil

1 drop Lavender essential oil

Lip scrub container

How to make: In a small mixing bowl, mix ingredients together. Transfer to lip scrub container. Store in a dark and cool place. 

Ultra Hydrating Lip Scrub

Winter not only chaps our lips, but it also sucks the moisture out. This leaves our lips in an uncomfortable condition.  Try this hydrating lip scrub recipe to lock moisture in and bring the suppleness back to your lips.  

Avocado oil hydrates and moisturizes your lips without leaving a heavy oily residue.

DIY hydrating lip scrub recipe with Avocado OIl 

Ingredients: 

1 tbsp organic cane sugar

1/2 tbsp organic honey

1 tsp avocado oil

1 drop Lavender essential oil

1 drop Geranium essential oil

Lip scrub container

How to make: In a small mixing bowl, mix ingredients together. Transfer to lip scrub container. Store in a dark and cool place. 

How to Use your DIY Natural Lip Scrubs at Home: 

These DIY natural lip scrub recipes work up fast and will save you money over time.  Use the scrubs once a week for best results.

You want to use a gentle circular motion as the skin on your lips is thin. Exfoliate lightly to avoid any injuries. 

Since you will be using fresh ingredients, make smaller batches for the best shelf life.  

These scrubs also make cute gifts.  Add them to a homemade spa gift set for a perfect perfect gift.  Thoughtful, non-toxic, and useful!

Did you make this recipe? Comment below and what you think. Tag us on social media with your photos – @by.bindi.  I’d love to see them.  


Posted on 2 Comments

50 Journal Prompts for Success

50 Journal Prompts for Success

There are so many benefits to daily journaling. I like to journal first thing in the morning as a form of “mind” dump. It really helps me to focus by clearing my head of extraneous information. Did you know you could use journal prompts for success? 

Journal prompts are great to use when you want to write and need a guide. Sometimes we can pour words onto the page and other times we stare at the blank page for hours. Prompts help you focus your direction.

When you use these journal prompts for success, you specifically direct your energy towards achieving your dreams. 

 The path to success requires a vision and a plan. Consistent journaling using these prompts can help you realize your goals. Having an outline will aid in tailoring your roadmap to put you on the right path. 

Whether you have professional or personal endeavors, here are 50 journal prompts for success. Try using one a day to build your plan.

50 Journal Prompts for Success

  1. Today I want to accomplish…
  2. Tomorrow I will…
  3. In 5 years I want to be…
  4. In 5 years I want to have…
  5. Mistakes I learned from the past…
  6. My recent failures are…
  7. My childhood dream was…
  8. A dream that would make me happy today…
  9. Things I have succeeded in…
  10. I will feel successful when I achieve…
  11. If I could change one thing in the past, it would be…
  12. If I won the lottery I would…
  13. How can I use my time more wisely?
  14. What are my biggest distractions? 
  15. If I could do anything I wanted,  I would…
  16. My biggest weakness is…
  17. My strongest attributes are…
  18. Where can I make changes in my life for self-improvement?
  19. Things I can do for self-care… 
  20. How can my network help me right now?
  21. What are my plans to accomplish my near term goals?
  22. How will I achieve long term goals?
  23. When I reach a milestone, I will celebrate by…
  24. What do I need to do for financial security?
  25. How do I handle failure?
  26. How do I handle my achievements?
  27. I’m passionate about…
  28. I do what I do because…
  29. I’m inspired by…
  30. Who has been a good mentor to you?
  31. What advice would you give yourself 5 years ago?
  32. Are you happy right now?
  33. What would make you happy right now?
  34. What insecurities stop you from being confident in your abilities?
  35. How do you overcome insecurities?
  36. If you could time travel and meet anyone, who would it be?
  37. What product/idea/thing do you wish you thought of?
  38. What is your favorite book?
  39. What success story stood out to you?
  40. Who is your biggest cheerleader?
  41. What are your favorite motivational quotes and why?
  42. Where do you find your inspiration/ideas?
  43. What problem do you need help with right now?
  44. What are your favorite resources that help solve your problems?
  45. How can you learn more about your goals?
  46. What are 5 things on your bucket list?
  47. What skills do I have that others need?
  48. What opportunity did you have that you missed?
  49. What would be an ideal opportunity right now?
  50. I am thankful for…

These 50 Journal prompts for success will help you figure out what your goals are and how to pursue them effectively. Did you use any of these prompts? Comment below on how it turned out!

Posted on 4 Comments

Cook and Workout: 5 Minute Veggie Quesadilla Workout (With Recipe)

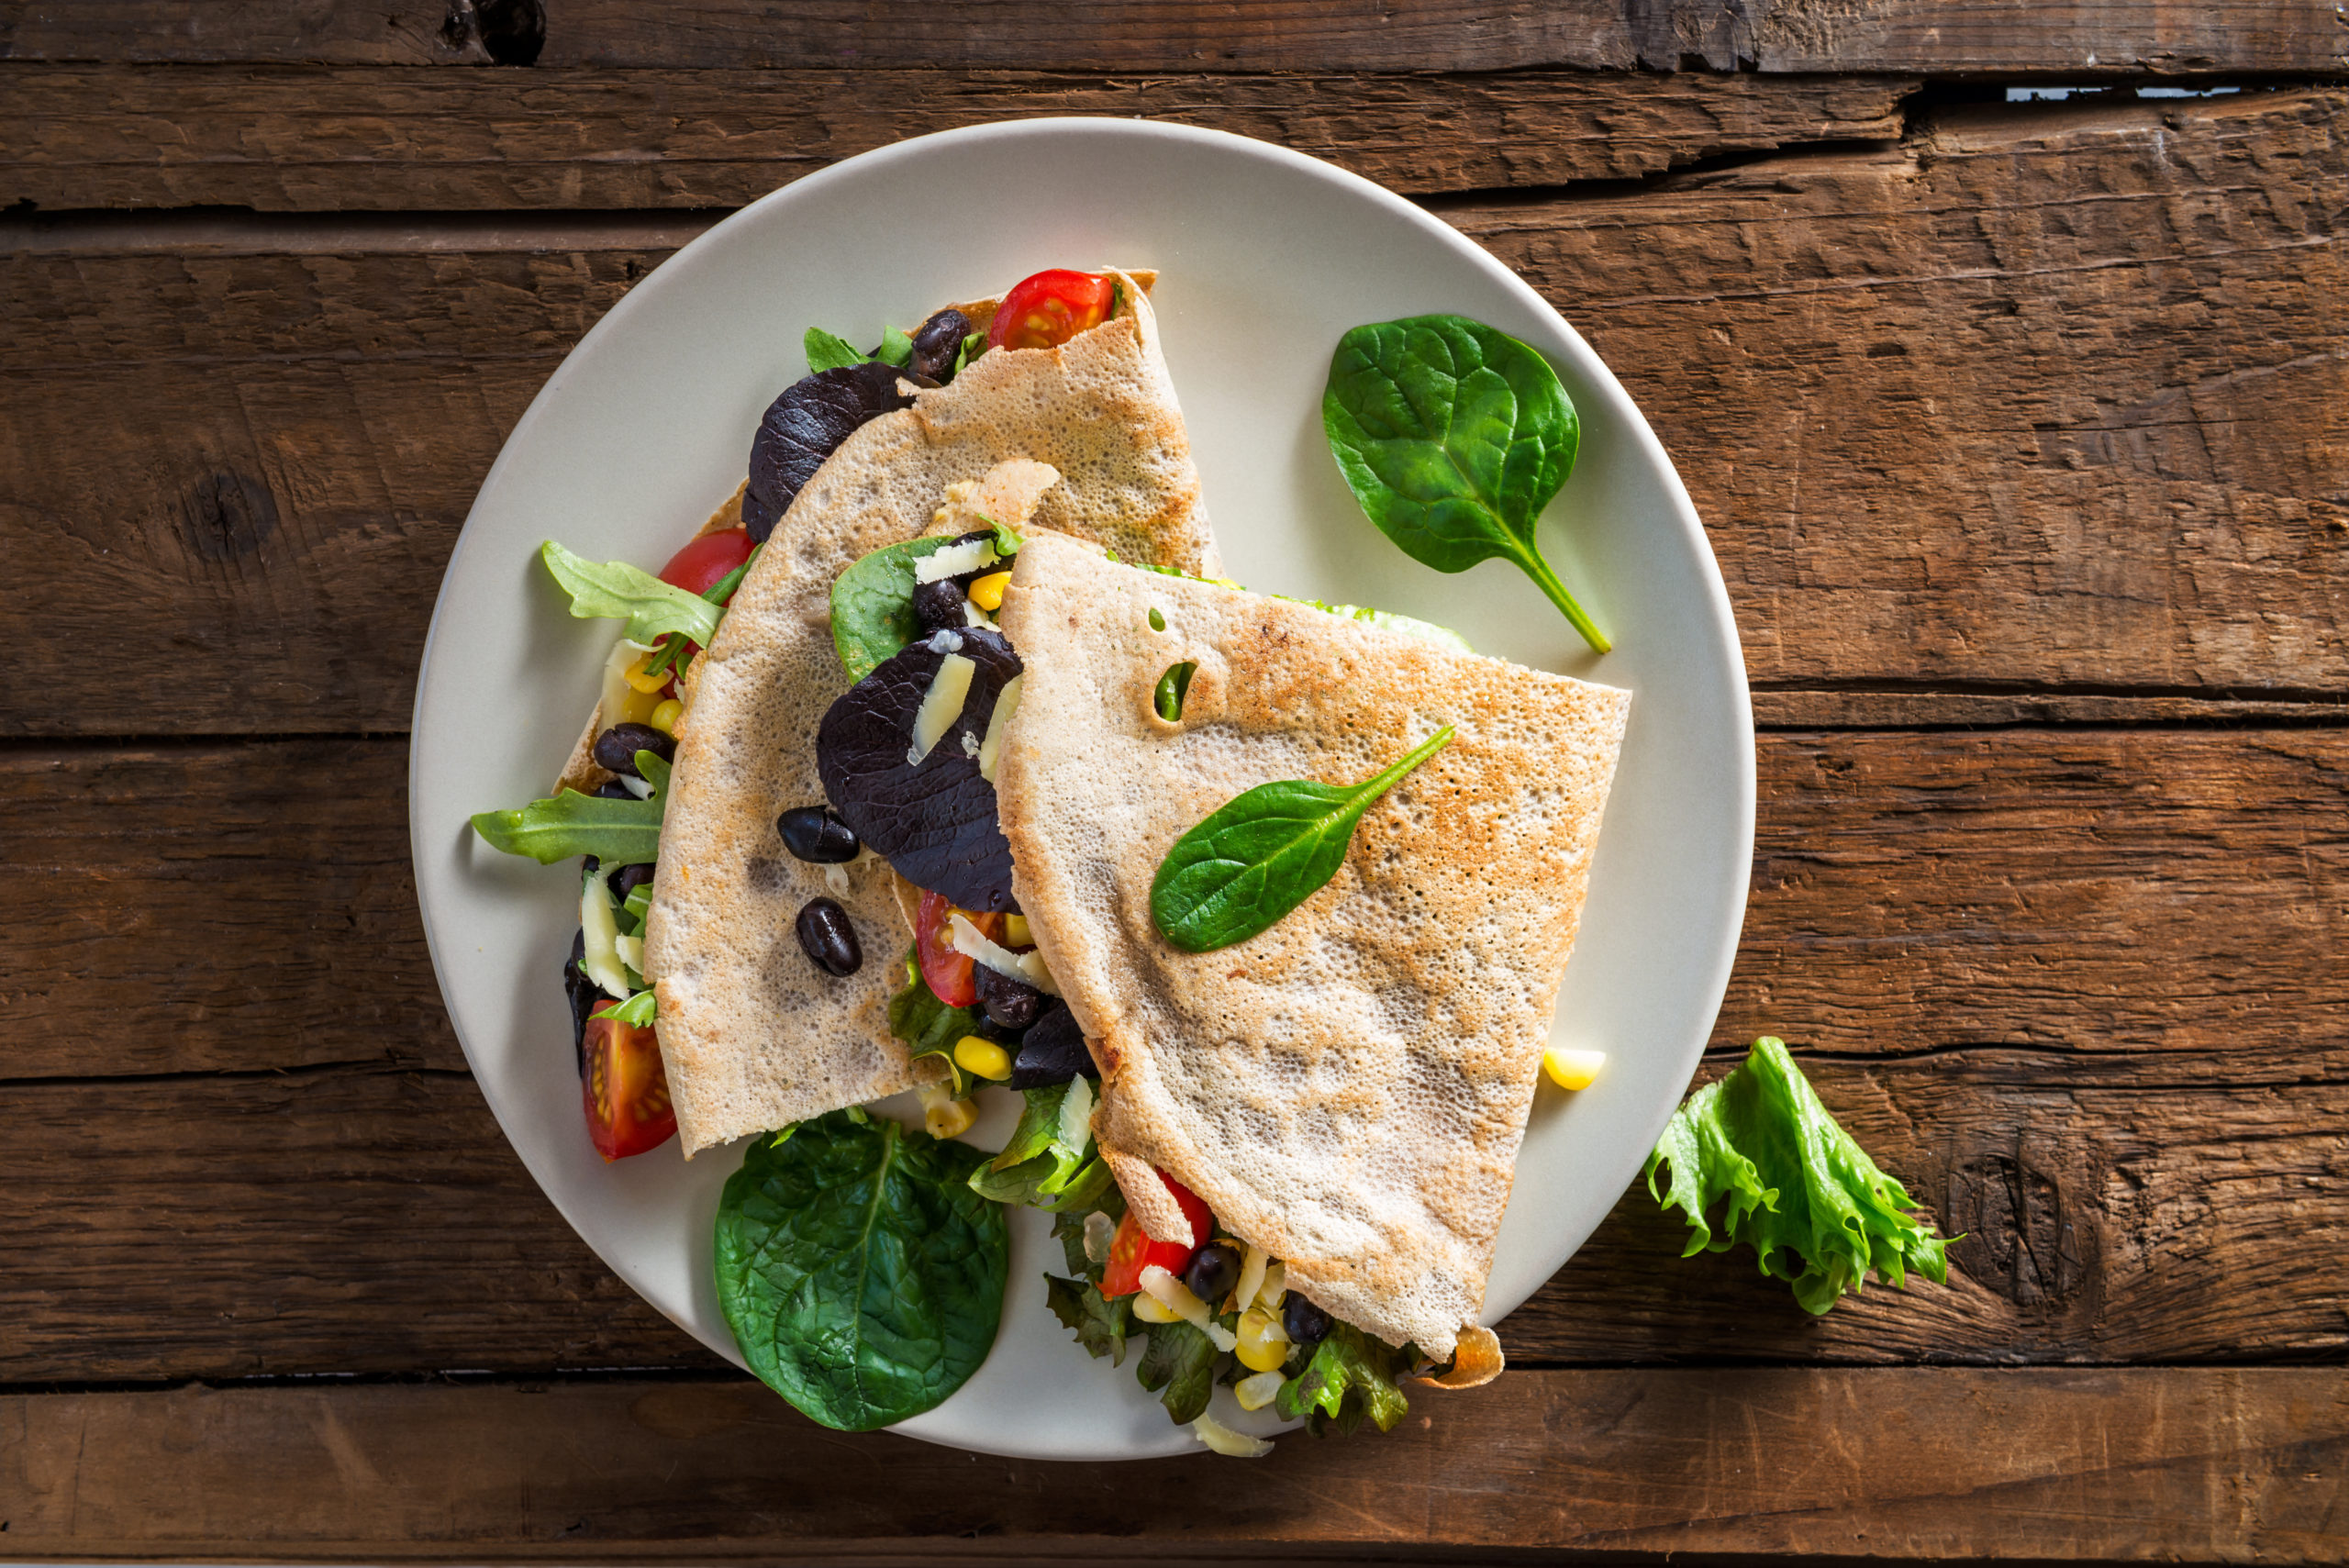
Cook and Workout, Veggie Quesadilla Recipe

Do you have a hard time fitting fitness into your schedule?

What if I told you that you can get a mini workout in while you cook? I love multi-tasking and being efficient with my time.  While waiting impatiently for water to boil,  cheese to melt, and sauces to simmer, I came up with the cook and workout series. 

When you cook,  there is a lot of passive time. This time can be put to better use by getting your body moving! I love cooking as I find it therapeutic. However, I hate the waiting periods and find myself getting impatient. As a fitness lover, I naturally started incorporating squats and other exercises to pass the boredom in the kitchen.

Over time, I refined the exercises into mini cook and workout routines. It’s versatile and easy to fit into your schedule. Now, I’m not a fitness trainer, but I am an avid fitness buff. This workout was created by a civilian for a civilian. 

at home workout, cook and workout

But do short workouts even work? 

It is so important to move your body. About 28% of Americans, approximately 80 million people are inactive. Inactivity can lead to health problems such as cardiovascular disease and premature death. 

While longer workouts are usually more beneficial, shorter workouts can still help you with your fitness goals.  Tabata workouts when done properly are only 4 minutes and popular HIIT (high-intensity interval training) workouts range from 10-20 minutes. 

Can you lose weight with short workouts? If you’re consistent with it, yes you will. Any activity is better than no activity. 

One study showed that shorter workouts are similar effects as continuous longer workouts in relation to losing weight.

Are you ready for a cook and workout? 

Let’s make a Veggie Quesadilla and get some fitness in!

Cook and Workout: 5 Minute Quesadilla Workout 

Disclaimers: You should consult your physician or other health care professional before starting this or any other fitness program to determine if it is right for your physical condition. If you feel uncomfortable at any time, stop. Do not continue if you hurt yourself. Always proceed with caution when introducing new workout elements into your routine. It is important to go at your own pace and increase intensity over time. Maintain proper form to avoid injuries and wear proper fitness attire. 

Perform exercises away from stove or heat sources and ensure you are safe at all times from injuries. 

Quesadilla Ingredients:

1 tortilla 

1/4 c shredded Mexican cheese

1/4 c diced veggies

1/4 c black beans

Olive oil Spray

Non-stick medium pan

Workout Supplies: 

Comfortable attire

Weights (optional)

This post contains affiliate links. If you use these links to buy something I may earn a commission. Thanks!

Step 1: 

Turn your stove to medium heat.  Spray pan with oil and place a tortilla on the pan.  Sprinkle cheese on top. Now since we’re working out, we probably should make this a healthy-ish quesadilla. So go ahead and add some veggies in. I love onions, bell peppers, green onions, corn, and zucchini. Spinach is also a good option too! Top with black beans.

Want to make it even more healthy? Use wheat or corn tortillas instead of flour. 

Step 2:

Standing Toe Touch (20)

Raise your left leg up straight in front of you.  As you do this,  touch your toe with the opposite hand while keeping your leg extended in front of you.  Switch leg and repeat for 20 total reps. 

Here is a great tutorial on how to execute the move properly.

Why this move works: This exercise raises your heart level (which is important for cardio health), gives you a full-body workout as multiple muscle groups are used, and works your stability/hand and eye coordination skills. 

Body Parts targeted: glutes, hip flexors, quads, hamstrings, calves, core, and arms

Step 3:

Check to see how the cheese is melting and under the tortilla to see how it’s browning. Lower heat if it browns too much. 

Step 4:

Jumping Jacks (50)

Yes, I said 50. It’s only a 5-minute workout so give me the best you can do.  Go ahead and bust out 50 jumping jacks. 

Check out the video below for a proper Jumping Jack tutorial. 

Why this works: Jumping Jacks are a great exercise for improving cardio health. With this total-body move, you can quickly improve your blood circulation and pressure. With higher reps, you build stamina and breath control. 

Body Parts targeted: This total body cardio workout engages biceps, triceps, glutes, adductors, hamstrings, calves, quads, chest muscles, core, and lats. 

Step 5:

Fold Quesadilla in half. Lower heat to low if you haven’t already. 

Step 6:

Squats (15)

With your arms in front of you,  widen your stance to about a foot apart. Keep your torso aligned and core in. Slowly lower your body into a squat, being sure to keep knees in line with toes.  Repeat 15 times.

Learn how to do a proper squat: 

Why this move works: Strengthens your core, easy to do anywhere, burns calories, builds lower body muscles which are important for everyday use. 

Body Part targeted: Glutes, quads, hamstrings, hip flexors, calves, core

Step 7: 

Turn off heat and place quesadilla on a plate. 

Step 8:

Double arm punches (20)

Yes, we still have time to fit in one quick exercise while your quesadilla cools. 

Punch each arm twice before switching sides. Repeat for a total of 20 times.  

Use this guide for proper technique. Instead of one punch, you will be doing 2 for each arm before alternating sides. 

Why this move works: Helps with speed, agility, strength and cardio

Body parts targeted: Upper body: shoulders, triceps, lats and core

And you’re done! A mini total body workout accomplished in the time it took to make a meal. Have a glass of water and enjoy your veggie quesadilla! Hope you enjoyed this cook and workout. 

Disclaimers: You should consult your physician or other health care professional before starting this or any other fitness program to determine if it is right for your physical condition. If you feel uncomfortable at any time, stop. Do not continue if you hurt yourself. Always proceed with caution when introducing new workout elements into your routine. It is important to go at your own pace and increase intensity over time. Maintain proper form to avoid injuries and wear proper fitness attire. 


Posted on 2 Comments

How to Make Confetti Hearts with Your Cricut

Red Hearts Confetti

Does it get any cuter than little hearts confetti for Valentine’s Day? 

Confetti has so many uses and it’s fun! Ever since I got my Cricut a couple of months ago,  I’ve gotten into making my own confetti. Making confetti hearts with your Cricut is easy,  fun and so useful. 

I sell the confetti I make on my Etsy store and use it professionally when I’m packaging orders.  It adds such a nice touch and my customers love it. It’s also super cheap! You can make over 150 pieces from 1 sheet of paper that costs about 10 cents.

Since Valentine’s day is coming up, making confetti at home would be a fun DIY project.  I’ll show you how easy it is to make confetti hearts with your Cricut and some nice cardstock.  

This Cricut tutorial is also beginner-friendly. You’ll be a confetti pro in no time!

This post contains affiliate links. If you use these links to buy something I may earn a commission. Thanks!

How to Make Confetti Hearts With Your Cricut 

Supplies:

❤ Heavyweight Cardstock (I used Recollection brand in Rose Gold Foil )

Cricut

Light grip Blue Mat

Scraper

Directions:

1.) Sign in to Cricut Design Space and create a new project. 

2.) Select the shapes icon from the left panel and click on the heart.  

how to make hearts confetti with cricut   

3.) Resize your heart to your liking.  For my project, I used a variation of .5 in as I wanted small hearts. 

4.) Once your heart is sized, duplicate however many times you like.

5.) Change the fill color to match your cardstock. I changed mine to a rose gold color. 

6.) Select make it in the upper right corner and proceed to the next screen.  

7.) Set the dial on the Cricut to cardstock.

8.) On your screen, change the paper size to 8.5 x 11 and proceed to the next screen after clicking continue. 

10.) Align cardstock on your mat and load it into Cricut.  Make sure edges are properly aligned. I used the Recollections brand from Michael’s in Rose Gold Foil. This cardstock is 65 lbs and has a lovely sheen that changes colors depending on how the light hits it. It does have a brown back. You can get it on Amazon here

Feel free to use any color you like!

11.) Hit the flashing button on your Cricut. Once the Cricut has loaded the mat, hit the C. 

12.) After the machine cuts your project, lift cardstock up.  Your confetti will be on the mat. Use a scraper to lift from the mat. My scraper is the Cricut brand and it works really well in getting the confetti off!

And, now the fun part!

How to use your homemade Confetti hearts: 

❤ Send in the mail to friends and family

❤ Wedding table decor

❤ Jazz up bachelorette party or bridal showers party favors

❤ Use it for birthday parties

❤ Romantic Valentine’s Day Dinner decor

There are so many options. Now you know how to make hearts confetti with your Cricut, have fun using it!

Posted on 1 Comment

Top 10 Self-Care Ideas for a Happier Life

Top 10 Selfcare ideas for a happier life
This post contains affiliate links. If you use these links to buy something we may earn a commission. Thanks!

Many people neglect their self-care and it is one of the most important things you can do for yourself. We often find it selfish to take time for ourselves when we have busy work schedules, families to take care of, and fitting in the social life on top of that. I’m here to tell you that it is anything but selfish. It is so important that you make yourself a priority and having a list of self-care ideas will arm you with the tools you need to lead a happy life. 

“You cannot pour from an empty cup.”

Similar to how we recharge our phones when they drain, we need to recharge our bodies. Self-care does not need to be complicated, and it will improve your mental health. If you are happier and aligned, you will be more focused and organized to deal with the crazy that life throws our way. 

Here are 10 Self-Care Ideas for a Happier Life: 

1.) Wake up 10 minutes before your alarm and take the time to journal. 

Journaling Self Care Idea

Journaling is a powerful tool to organize your thoughts. Journaling in the morning allows you to dump anything that may be bothering you. When you do this first thing in the morning, you can move through your day more refreshed. Set a timer and write freely. By the time you’re done, you can read it back or let it sit and simmer. 

This practice will not only make you lighter, but it will also start your day off on the right foot. 

2.) Take a bath before bed. 

Self Care Idea Take a bath

From morning to night we are constantly on the go and if you’re anything like me, you might have trouble falling asleep or have bouts of insomnia. A relaxing bath before bed is a great remedy. 

First, get rid of any distractions. Put your phone in a different room, have your spouse take care of the kids for this time, and allot the time you need to relax. Even if it is 10-15 minutes, it will help. 

Set the mood for relaxation. I like to use Epsom salts and essential oils in my bath. Epsom salts are great for tired muscles and essential oils such as Lavender and Chamomile have relaxing properties. 

3.) Take a walk. 

Walking for self care

Walking is one of the best forms of exercise. It’s low impact, can be done pretty much anywhere and it gets you out into the world. You also get the ability to choose how long you walk for. This self-care idea fits in really well with busy schedules. 

Take 30 minutes during your lunch hour to get out and walk.  30 minutes is also all you need to reap the cardiovascular benefits of walking. 

However, you choose to walk, make sure to stay present and enjoy your surroundings. 

4.) Incorporate a weekly beauty routine. 

 Beauty Self Care Ideas 

There’s a reason why we long for spa and pampering days. We feel so zen after a massage or a facial. While we can’t always take the time to get weekly massages (I wish!), a weekly at-home spa day is completely doable. 

Pick a time where you won’t be disturbed. Get in comfy PJs, slap on your favorite face mask, and put on your favorite Netflix show. Add in a glass of wine for an ultimate pampering time. My favorite mask is the Aztec healing clay combined with a drop of tea tree oil or lemon essential oil. It’s so invigorating and will leave you with clear, smooth skin!

5.) Take 30 minutes for a hobby you love. 

Hobbies for Self Care

Hobbies are a great way to unwind. You have fun while doing the thing you’re passionate about. I love arts and crafts for my self care time because I find it to be relaxing and meditative. Crocheting is my go to.

There is no rule to what works, just what works for you. Maybe you like to draw or you like to bake. Reward yourself with something you love to do.  Research shows that people who have hobbies suffer less from low mood and depression. Hobby away!

6.) Eat your favorite food guilt-free. 

Guilt free foods for self care

Self-care time does not have to be healthy time! If you want that piece of chocolate you’ve been eying, do it! Life is short to deprive yourself of things that make you happy. Moderation is the key. 

I’m not ashamed to admit I love eating nachos during my me time. There is nothing like a bowl of comfort food, right? 

7.) Read a book. 

Read a book for self care

Reading is one of the ultimate ways to block out the world and escape into another one. While many of us listen to books on audio or read on our electronic devices, try reading a book you can hold. There is just something about turning a page. 

It’s also better for your eyes and gives you a break from the digital world. 

8.) Meditate for 15 minutes. 

Meditate for Self Care

Meditation is a great way to center yourself and find inner peace. This is especially helpful if you’re like me and get easily distracted and/or have insomnia. Some people think meditation is a difficult practice, but it’s actually pretty simple. 

You don’t have to shut your mind off. Instead take 15 minutes to sit or walk in silence. Focus on what thoughts you have and decide if you want to pursue the line of thinking or discard the thoughts. This will help you be more present with your thoughts and guide the flow of your thinking.

Meditating helps reduce negative thinking, increases creativity and gives you perspective on things that may be bothering you. 

9.) Write kind notes to yourself. 

Self Care Idea, Write Kind Notes to Yourself

We are often our harshest critics and the things we think to ourselves we would never dare say to another person. So why not write kind notes to yourself? Self-love is one of the best self-care ideas. 

Write 5 things that you think is awesome about you. You can be as detailed or brief as you want. Hang these notes up where you’ll see them for motivation. Writing and visually self kindness will make it easier for you to believe in yourself. It might seem weird at first, but give it a try and see what happens. 

10.) Treat yourself. 

Treating yourself for Self Care

Sometimes we just need a splurge. You work hard, raise a family and are busy taking care of everyone else to think about what you need. Treating yourself can be as simple as a dessert from your favorite restaurant, or a extravagant shopping trip. Whatever makes you happy and won’t break the bank, do it! It might be momentary happiness, but it just might make your day. 

You don’t have to do all of these at once to reap the benefits. Start with one self-care idea a week and go from there!


Posted on Leave a comment

Using Non Toxic Remedies for Cold Sores

Today, I felt that dreaded tingle,  the tingle that precedes a cold sore.  Within minutes,  it was a full blown creature and had taken over the bottom half of my lip. I was mortified!

I’ve dealt with cold sores on and off throughout my 20s. Thankfully they aren’t that common for me.  My last one was three years ago.  This also meant that I didn’t have cold sore medicine on hand. 

Abreva was my choice in the past. It never was a miracle cure,  but it did always feel like it was helping. My cold sores always last 1 week,  no matter what medicine I use.  Now that I’m focusing on a non-toxic life,  I want to see if I can move this buster along with non toxic remedies,  at home.  

Day 1 of Healing a Cold Sore the Natural Way At Home

I started my journey as many do,  a quick online search to see what essential oils would do the trick.  I am a big oil lover and like when I get to use my growing stash. 

Why Try Essential Oils For Cold Sores?

Essential oils are plant based and potent. This makes them a great ingredient for non toxic remedies. 

My search led me to this article which has a great breakdown of which oils are good and some recipes.  Ultimately, I used the resources I came across to experiment on my own. 

The first thing I tried was peppermint and thyme undiluted. I always dilute, but I was curious to see if this would speed it along. It burned right away.  I definitely would NOT recommend this route! 

I decided to make a roller bottle blend that I could use a cotton swab with.  It’s very important to avoid cross contamination when dealing with cold sores.  Here is the blend I made:

• 5 ml roller bottle

• 5 drops Peppermint 

• 2 drops Clove

• 3 drops Thyme

• Fractionated Coconut Oil

This blend was way more soothing and didn’t burn at all.  

As Day 1 nears its end,  I have come up with a plan for to combat this sucker. I will:

• Drink lots of water (at least 8 glasses)

• Use the roller blend 3-5 times a day

• have Emergen-C once a day along with elderberry gummies*

Healing is both topical and internal. I need to provide my body with the nutrients it needs to fight off this infection.  In the meantime,  I will destress and hopefully this sucker will be gone soon!

Stay tuned for more updates on how these non toxic remedies for cold sores fare. 

Posted on 2 Comments

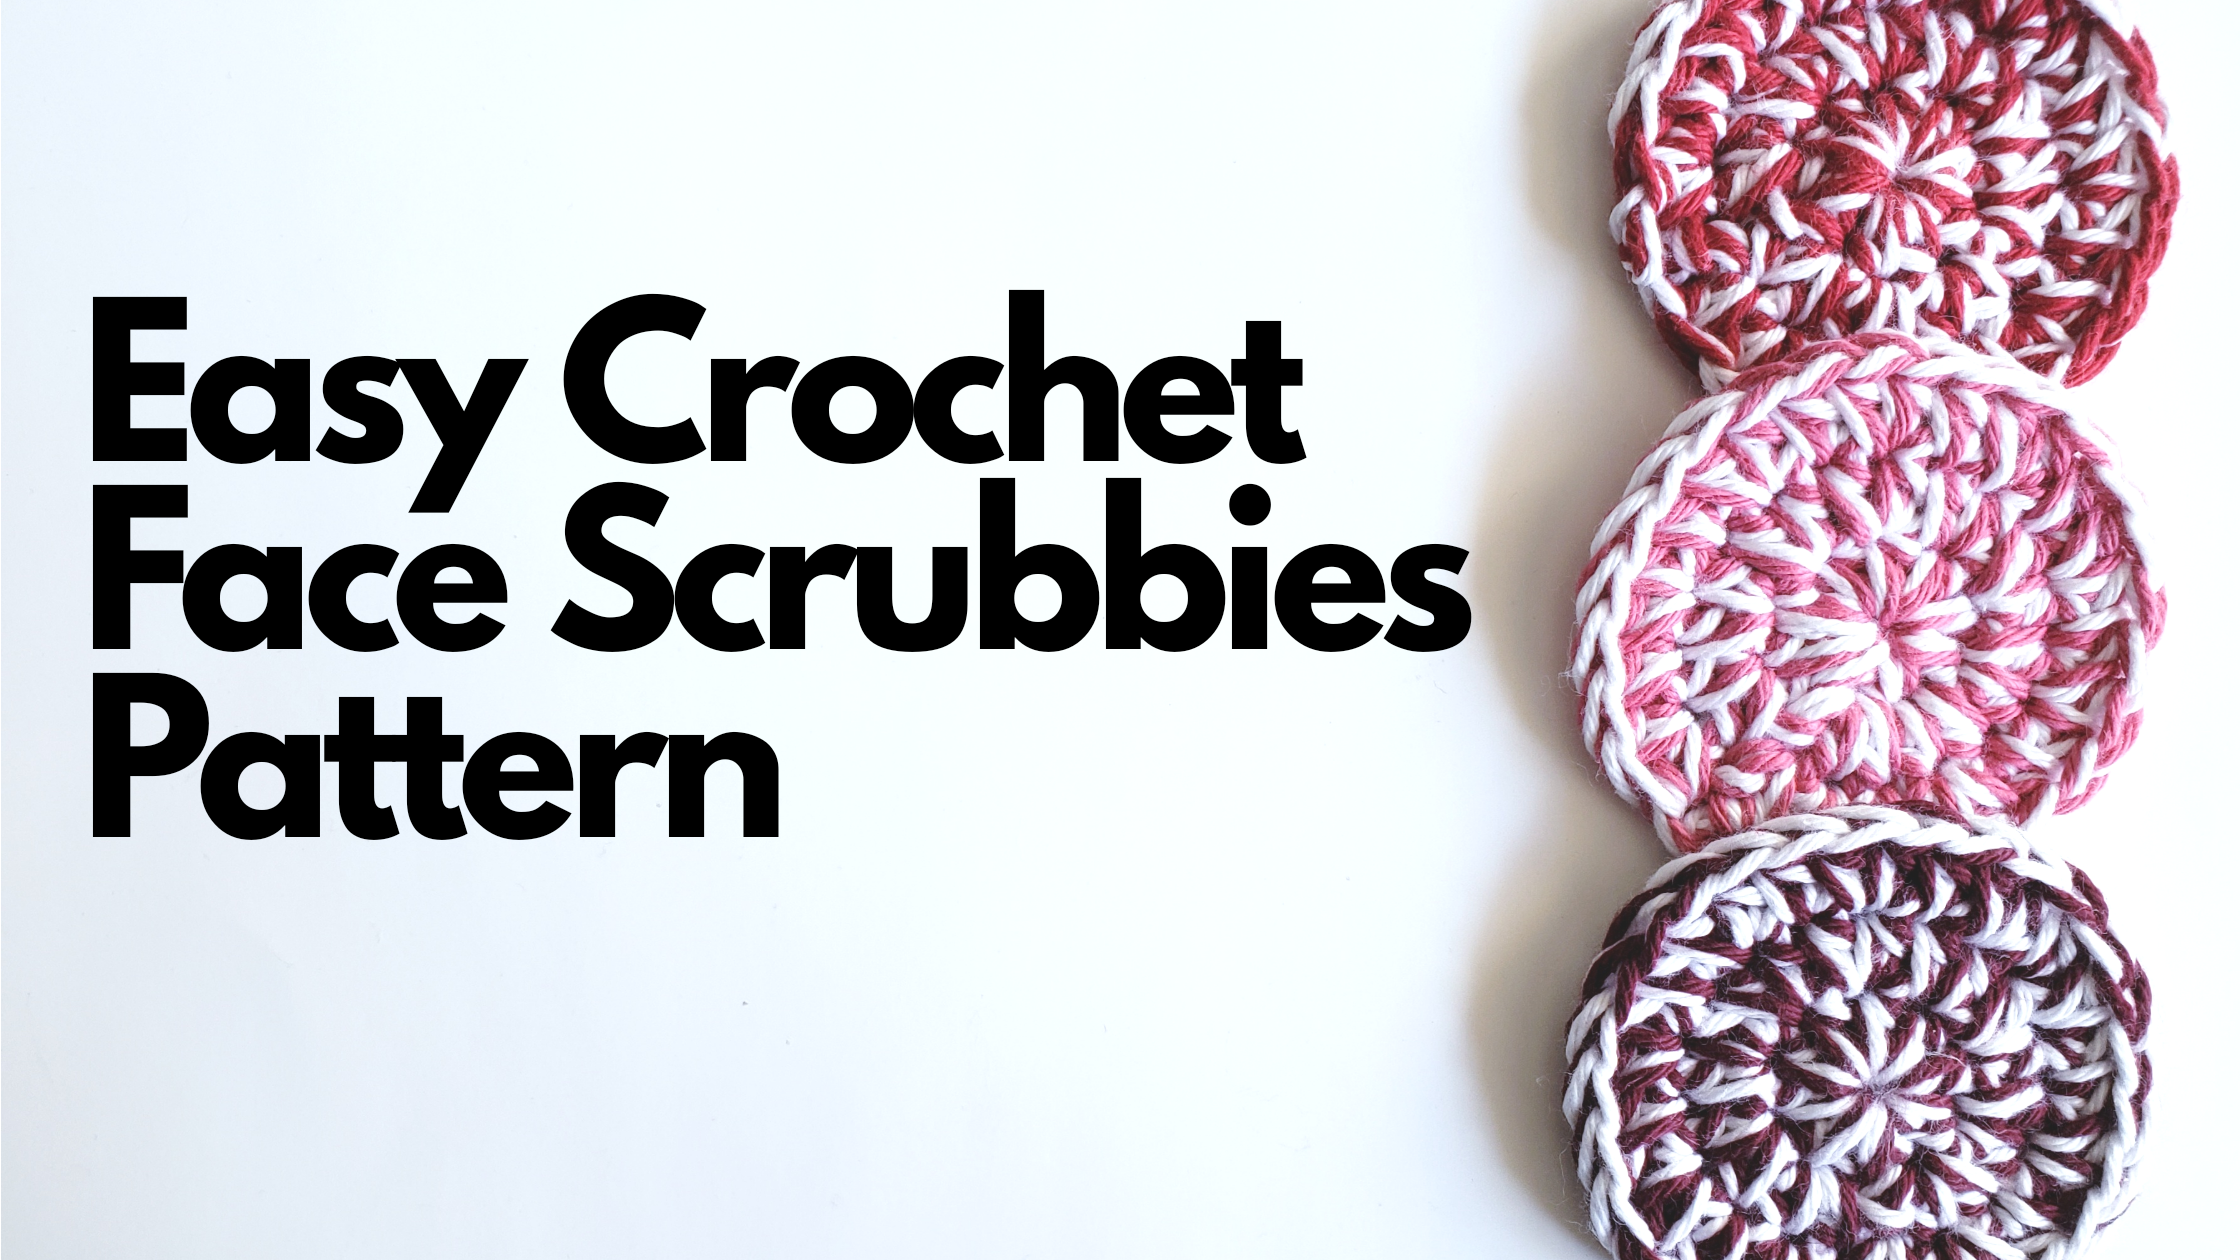
How to Make Reusable Crochet Face Scrubbies in 10 Minutes

How to Make Reusable Crochet Face Scrubbies in 10 minutes (Beginner Friendly Crochet Pattern)

Reusable face scrubbies are a big trend these days. It makes sense to ditch disposable face wipes and cotton rounds that plug up our landfills and switch to the more economical eco-friendly makeup remover. Just look on Etsy, and you’ll see tons of options for homemade scrubbies. They’re much cheaper, last longer, and are easy to maintain with laundry or handwash. 

Over the past couple of years, I started to ditch commercial one-use products for more economical reusable ones. They’re better for the environment and your body. Recently, my obsession is face scrubbies. I love these things and have made loads of them. They exfoliate my skin so well and leaves it super soft. I noticed with patterns I came across that the scrubby tends to get too “holey” when it’s dampened in water. This makes it a little hard to wash your face when the stitches don’t hold up against face wash and water. Due to this, I experimented with making a pattern with two yarn strands and was pleasantly surprised by how sturdy and still soft they were!

If you’re like me and love DIY projects, you’ll enjoy these crochet face scrubbies. They work up very fast. I can have one done in less than 10 minutes. And, they’re super cheap, costing around 50 cents for one. These scrubbies are also sturdier due to the two yarn design, plus it gives the scrubbies a cool two-tone look! This crochet pattern is beginner-friendly. The only stitch you’ll need to know is half double-crochet.

If you’re super brand new to crocheting, I would recommend a crochet kit. The one I have comes with a good range of hook sizes, stitch markers, and weaving needles. And, it comes in a handy bag so you won’t lose anything!

You are welcome to sell any creations you make using this project. I would appreciate credit if you do so. Since these work up fast, they’d be great for craft fairs, bath spa gifts, and to sell online. You are not allowed to sell this crochet pattern as your own. 

Let’s get started!

Reusable Crochet Face Scrubbies Pattern

Materials: 

  • 2 skeins medium weight (4) 100% cotton yarn (I used I Love This Cotton yarn in White and Rosey)*
  • I-9 hook
  • Stitch marker
  • Needle to weave ends

*Feel free to experiment with different colors. You can also make the pattern in one color; just use 2 skeins of the same color. 

Size: 

The approximate finished diameter will be 3 inches. 

Stitches: 

  • Half Double Crochet (HDC): Yarn over, insert hook into stitch, yarn over, and pull through loop. Yarn over and pull through all loops. 
  • Slip Stich (sl st): Insert hook into next stitch, yarn over, and pull through a loop. 

Notes: 

  • Chain 1 at the start of rows does not count as a stitch. 
  • Always slip stitch into the first stitch of the row, not chain 1. 
  • Working with two strands of yarn can be a little difficult if it is your first time doing so. Make sure to keep your tension loose so you can easily insert hook into stitches. Keep skeins separate to keep yarn from getting tangled as you work. Always make sure you have both colors on your hook. 

Directions: 

Foundation Row: Chain 3 and sl st into chain one. This will create a circle. 

Row 1: Chain 1 (does not count as stitch).  9 HDC into the circle. Sl st. (9 stitches)

Row 2: Chain 1. **2 HDC in same stitch**. Repeat from * to * in the next 8 stitches. Sl st. (18 stitches)

Row 3: Chain 1. **1 HDC in the same stitch. 2 HDC in next stitch**. Repeat from ** to ** 5 more times. Sl st (27 stitches)

Finish off and weave in ends. 

And that’s all there is to it! If you make this pattern, be sure to comment below and tag @Paintingsbybindi in photos! I would love to see what you create. 

– ByBindi